
PC part design
Utilizing the new design freedom given to me by my 3D printer, I try to look for inspiration outside of the confines of the over-saturated cramped pc parts market. In doing so I can balance form and function, integrating concepts from other designers to augment my own creations.
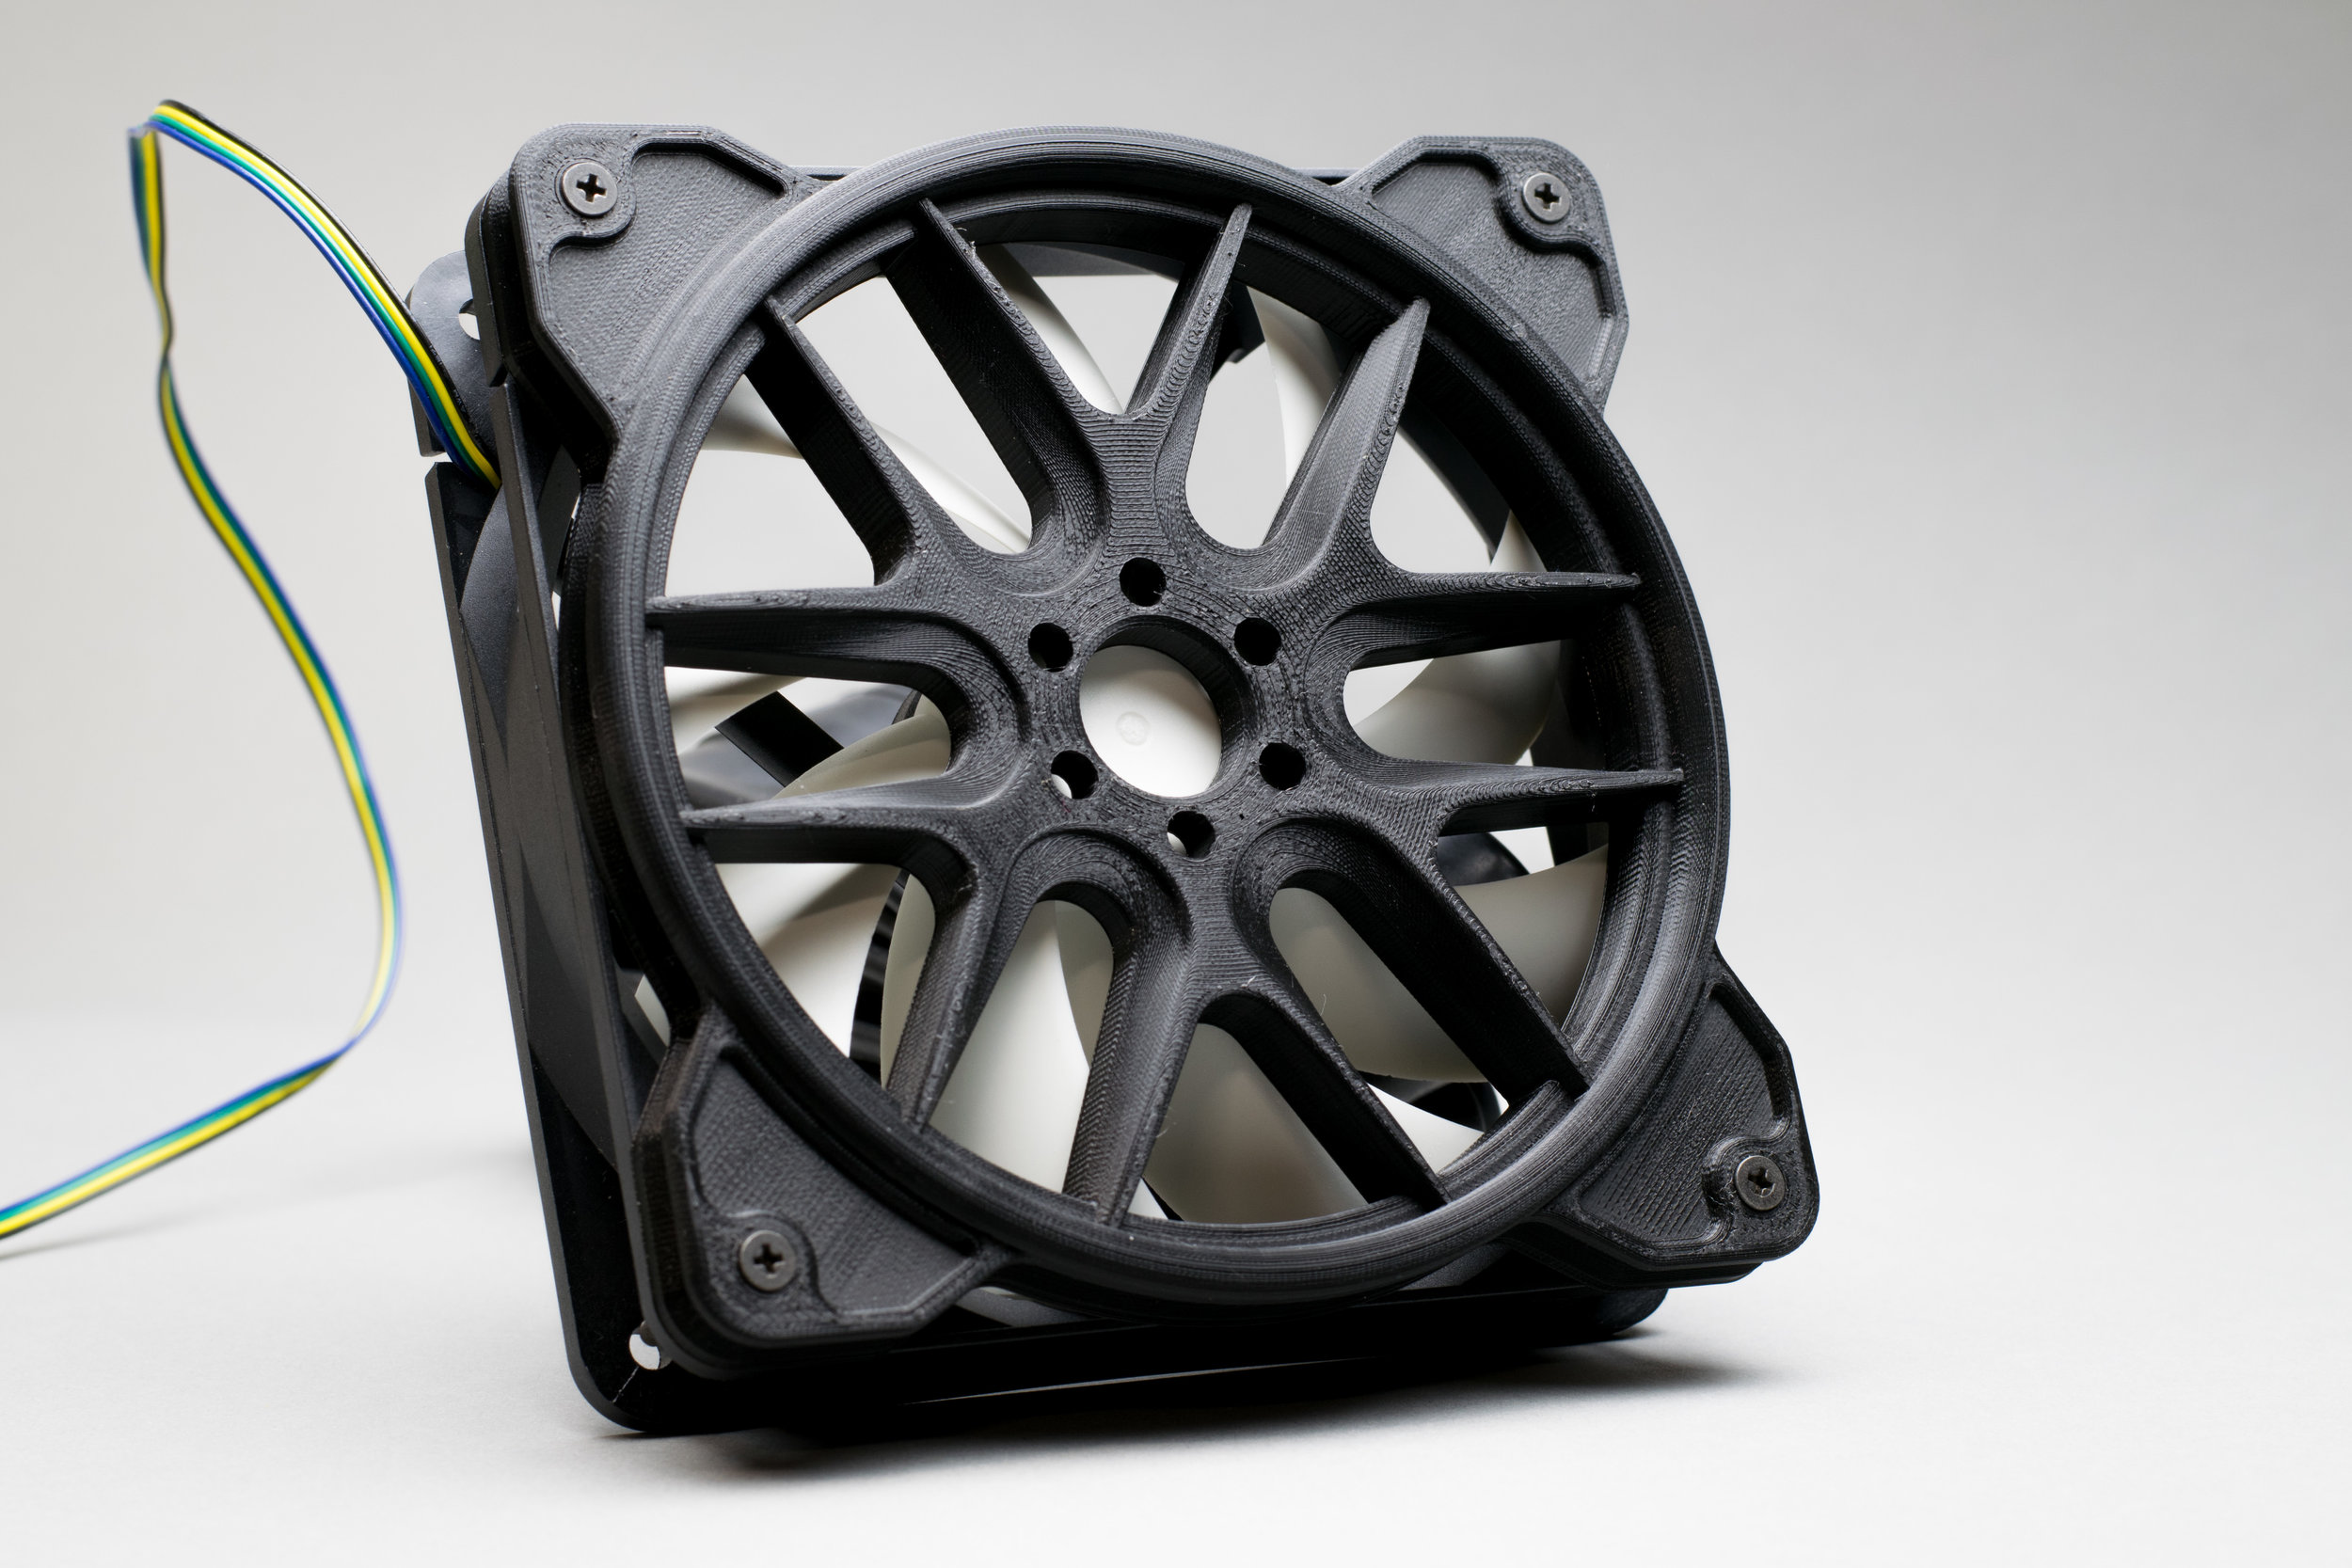

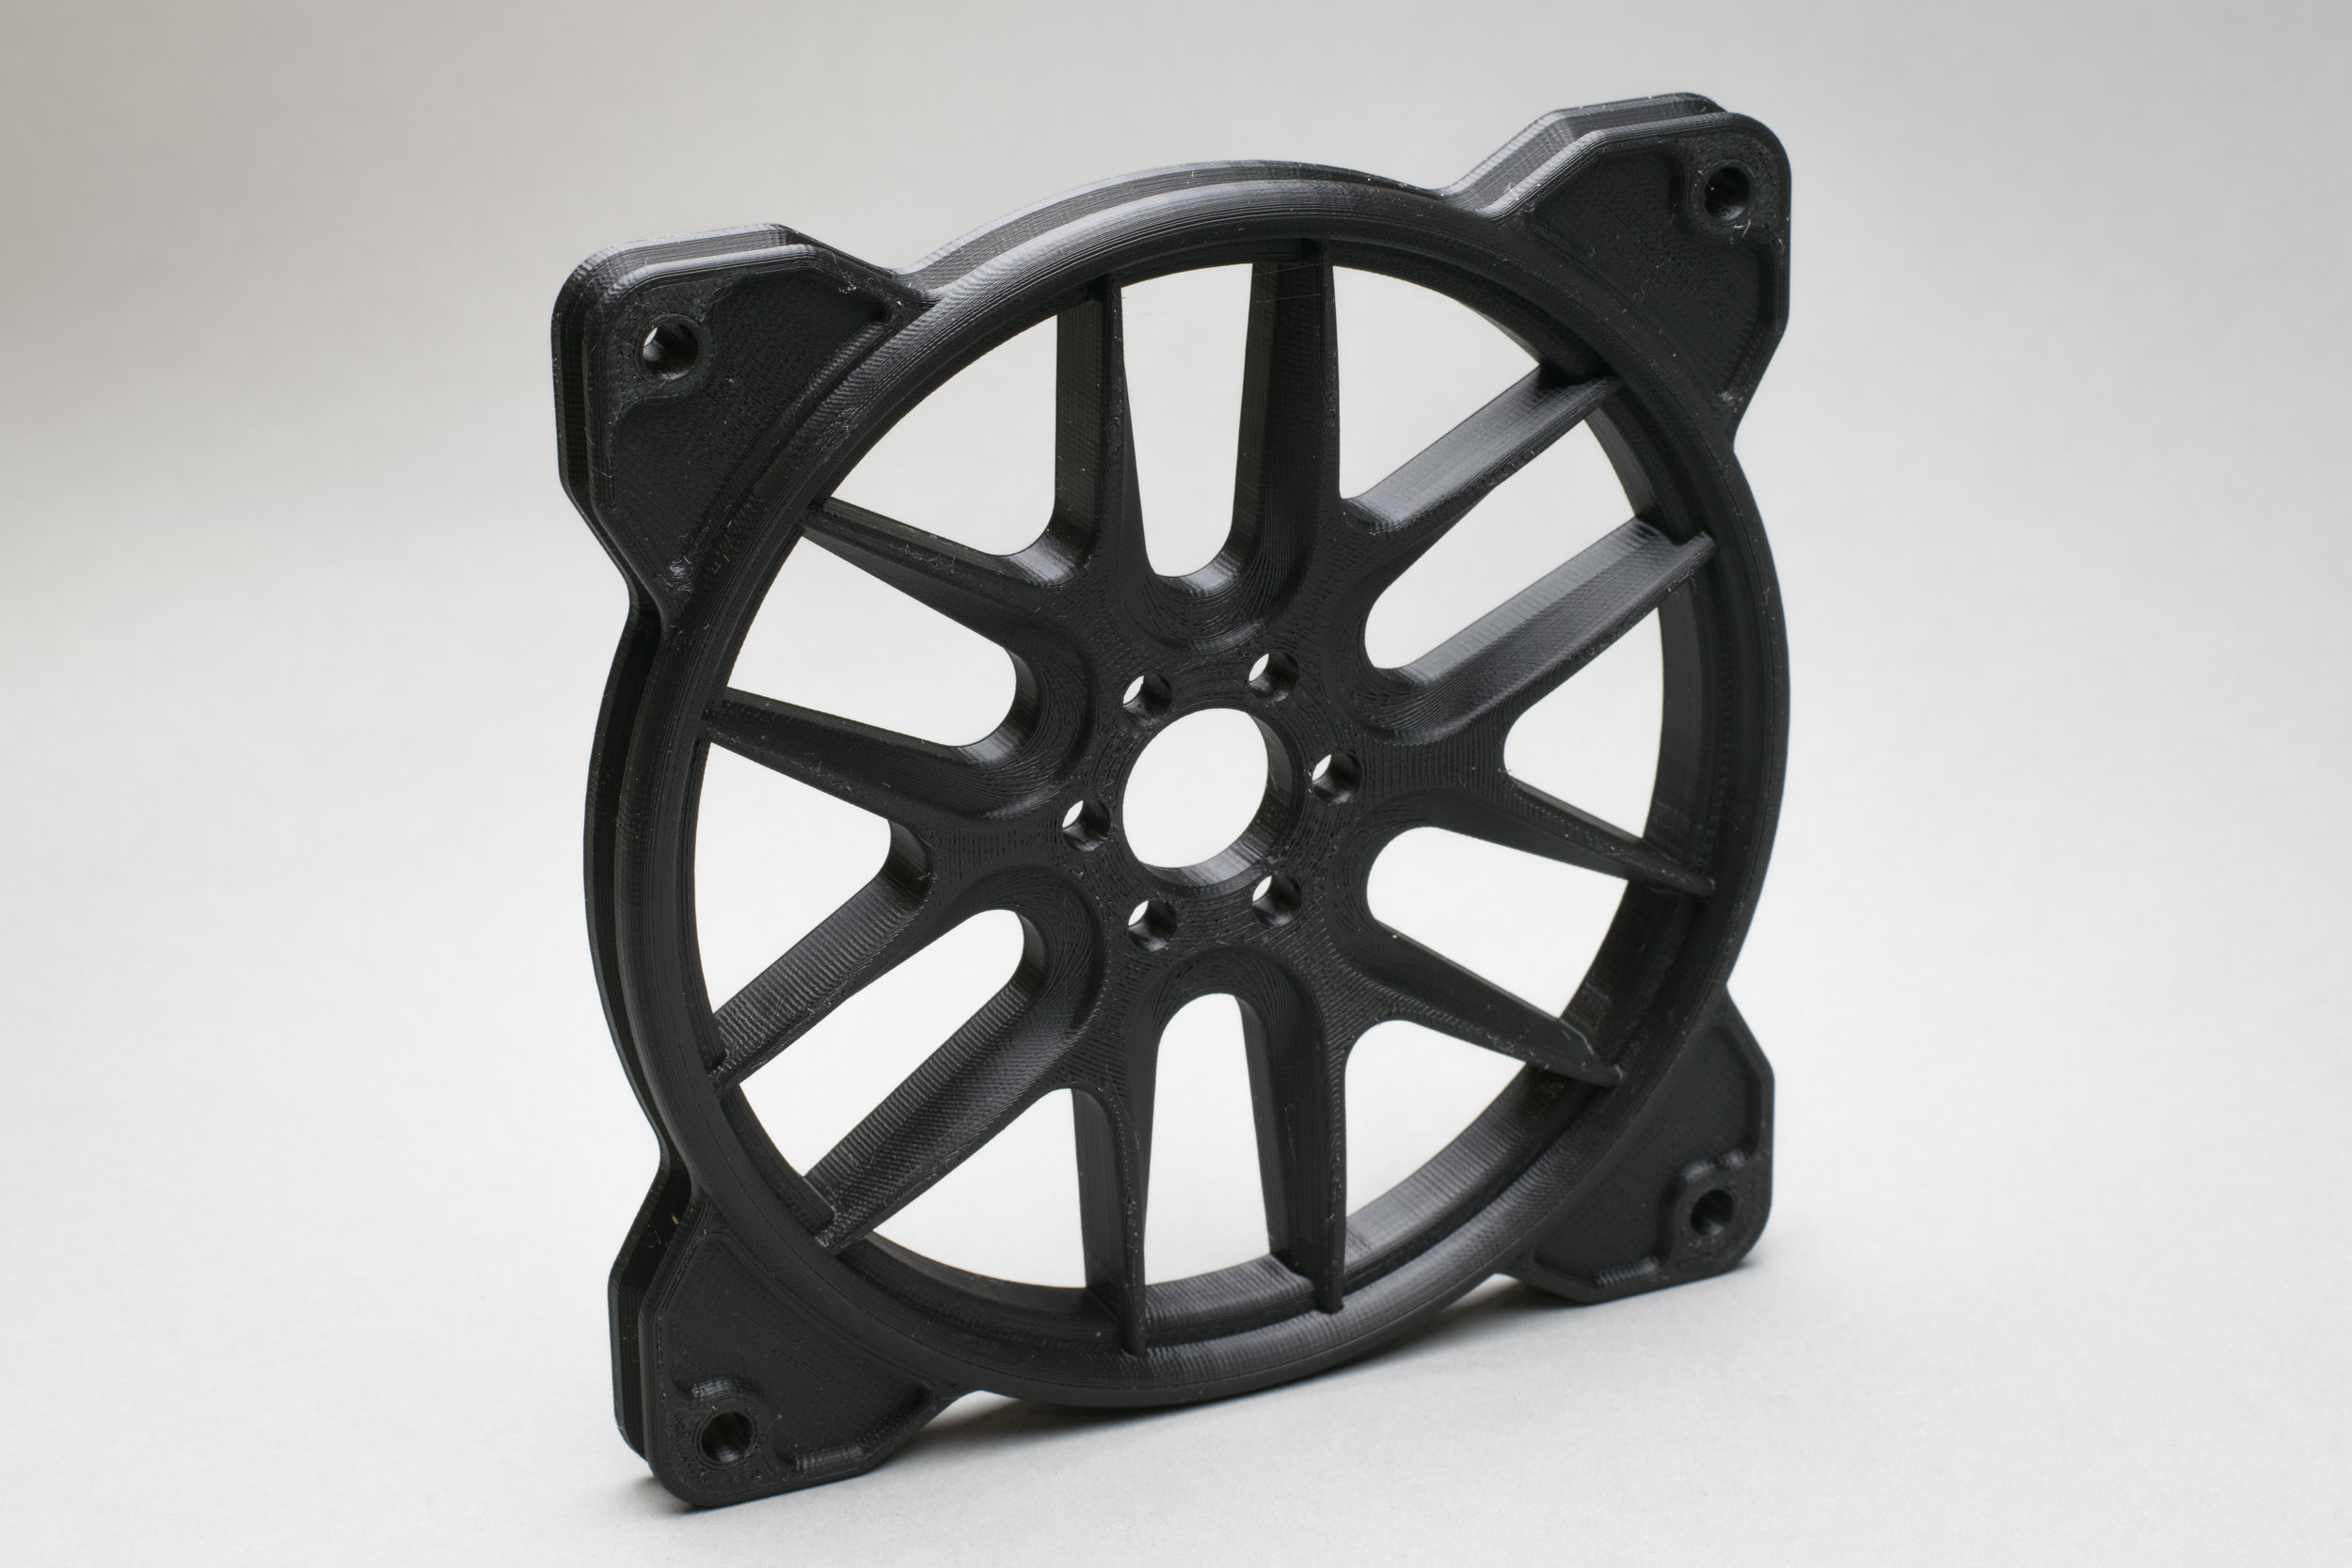
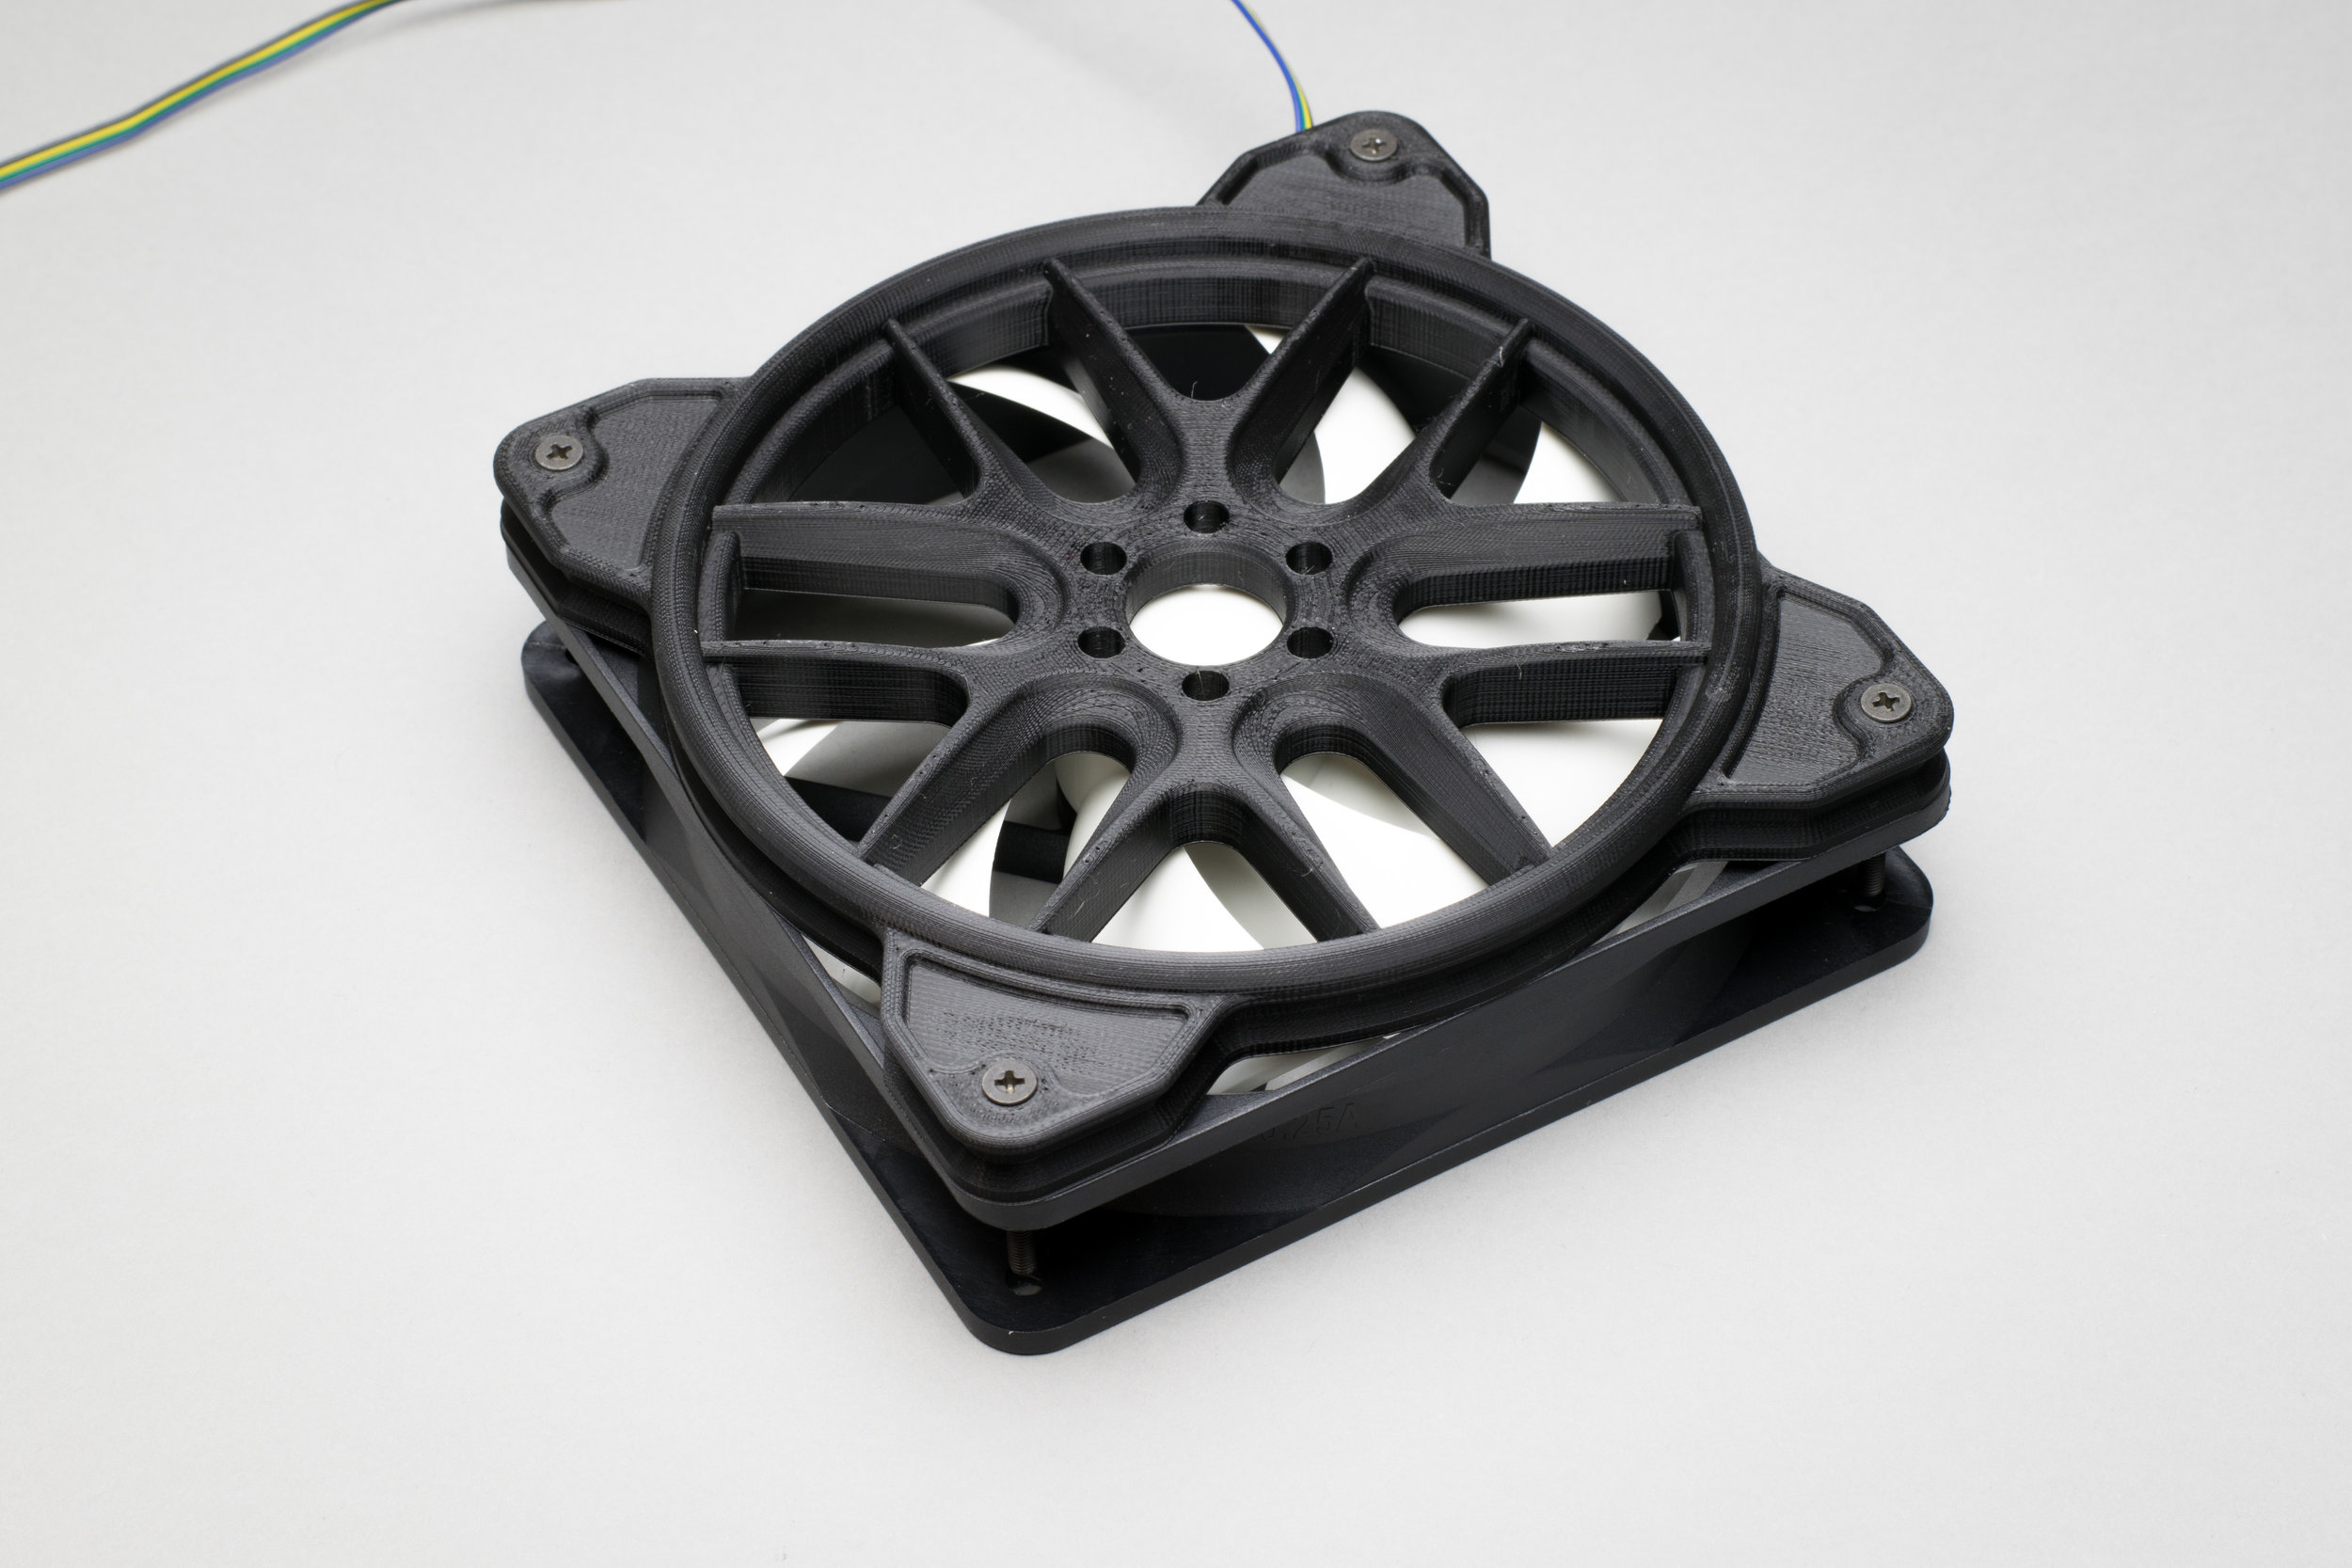
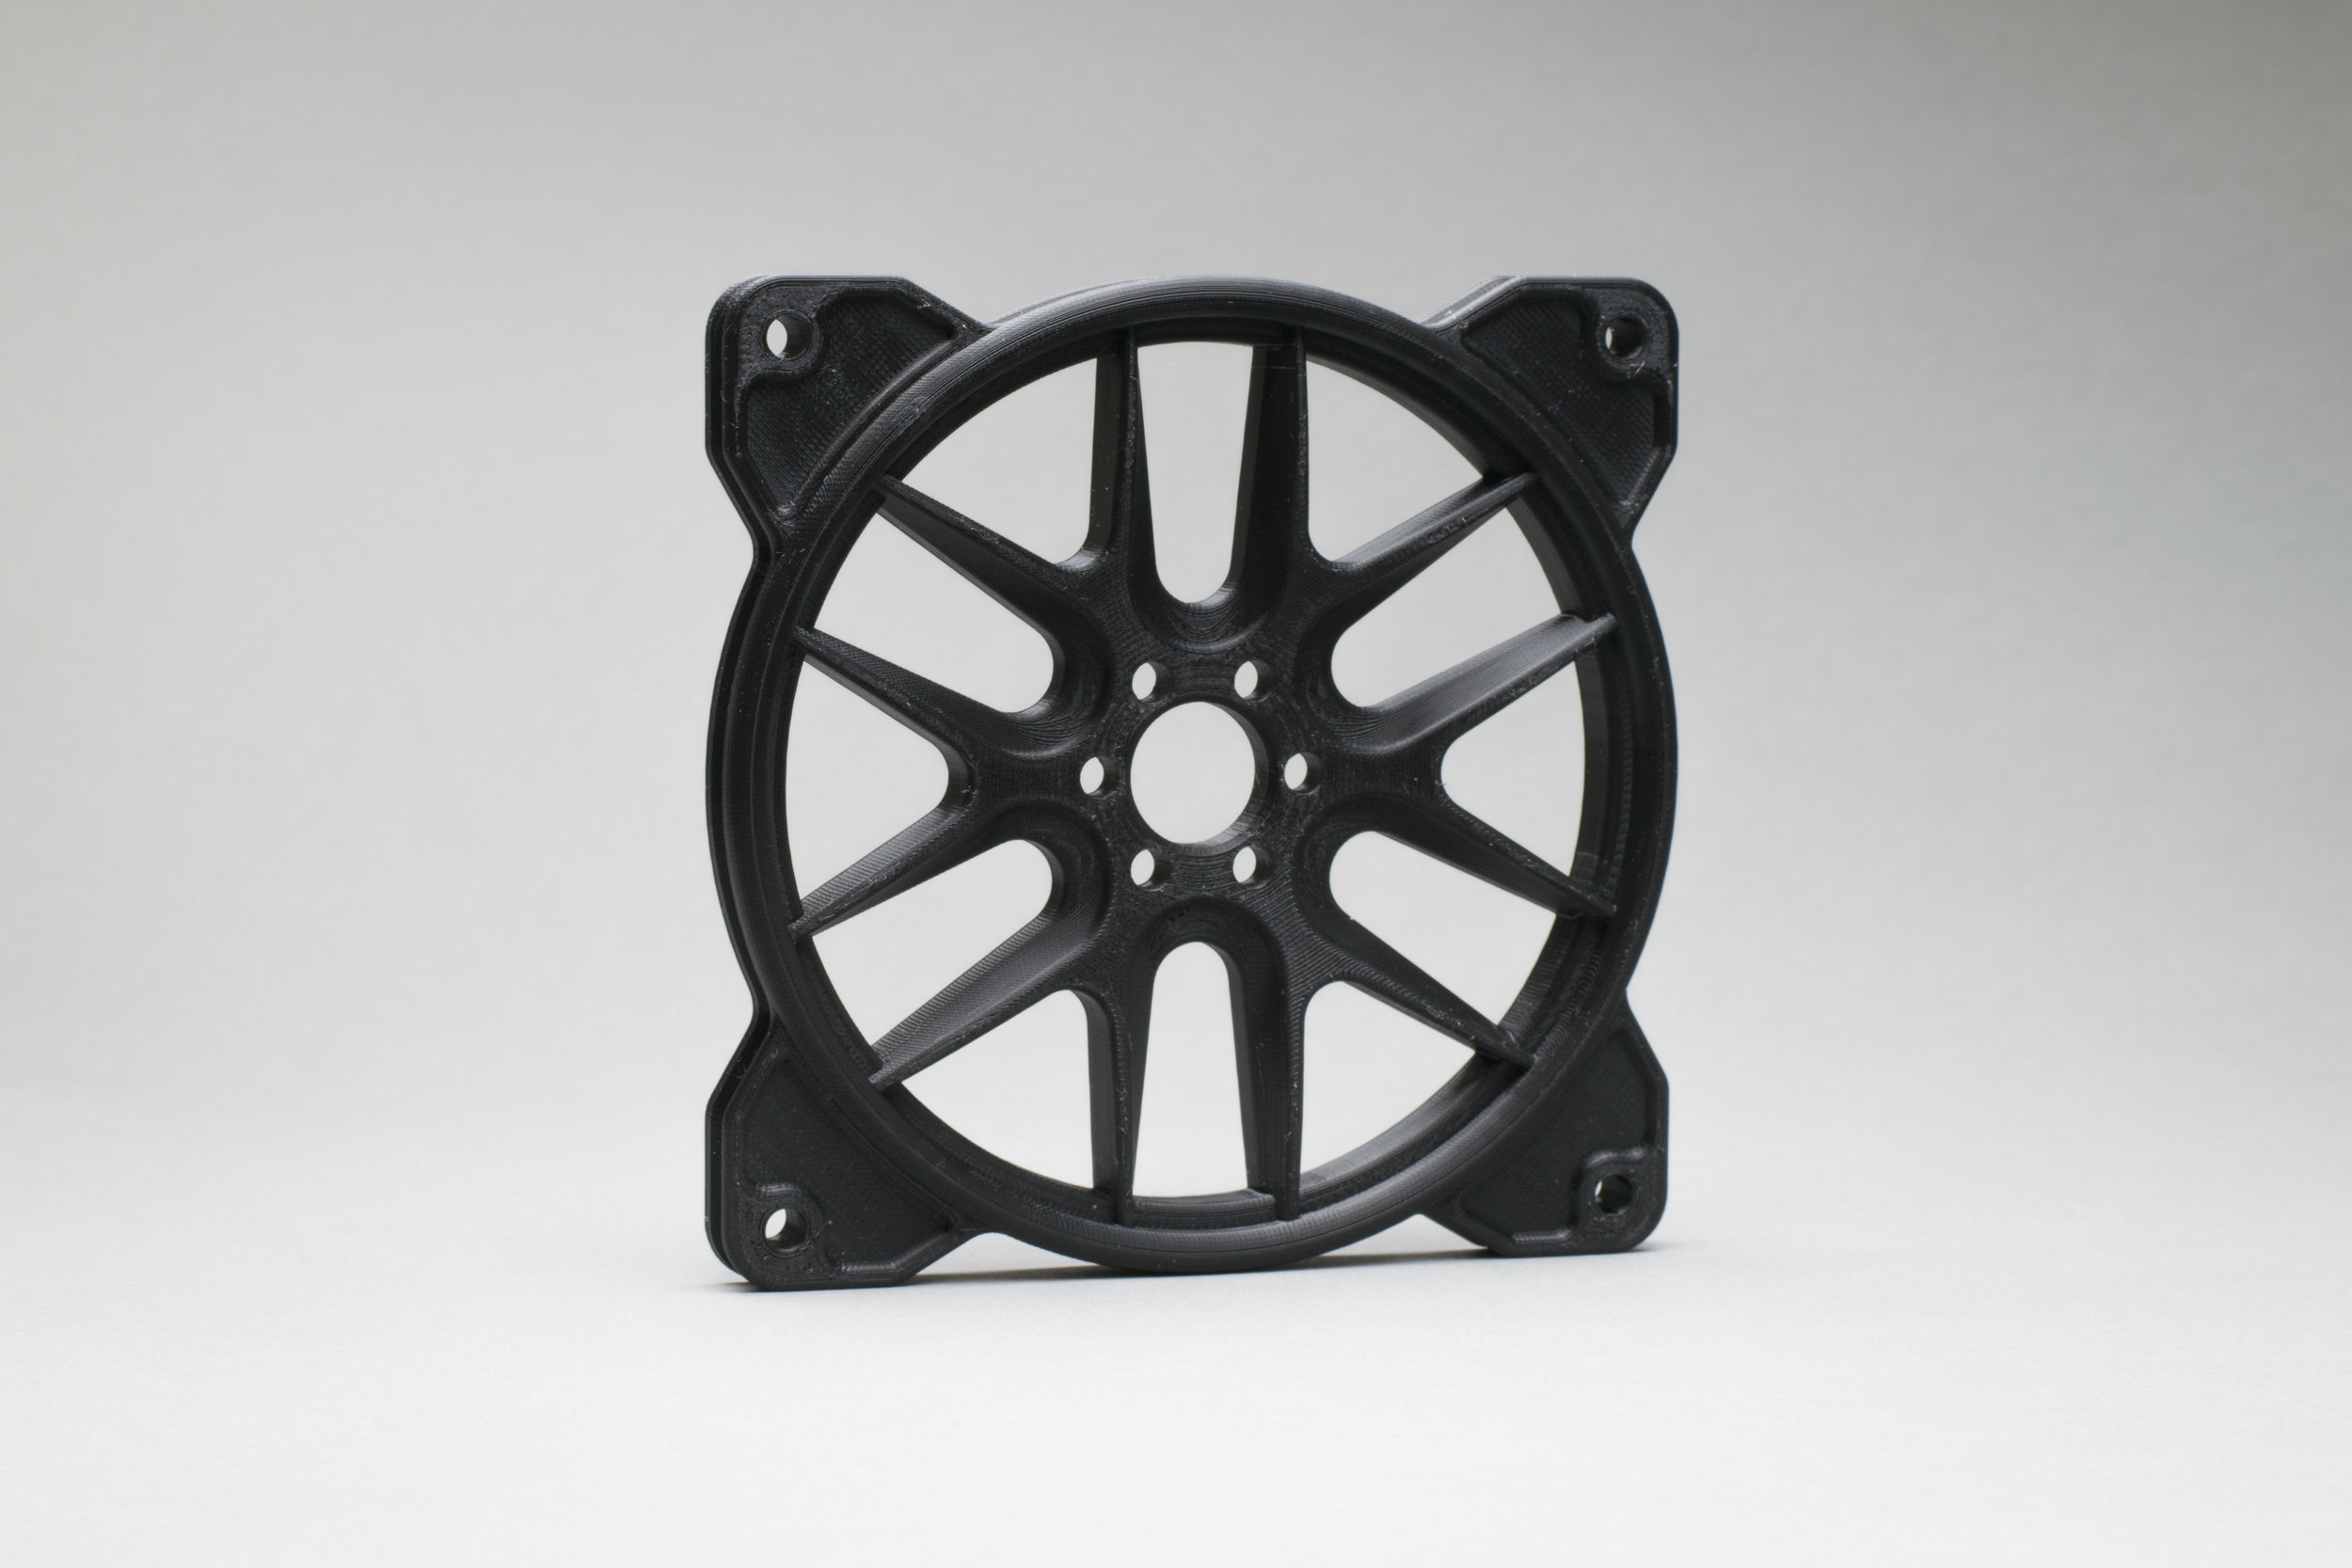
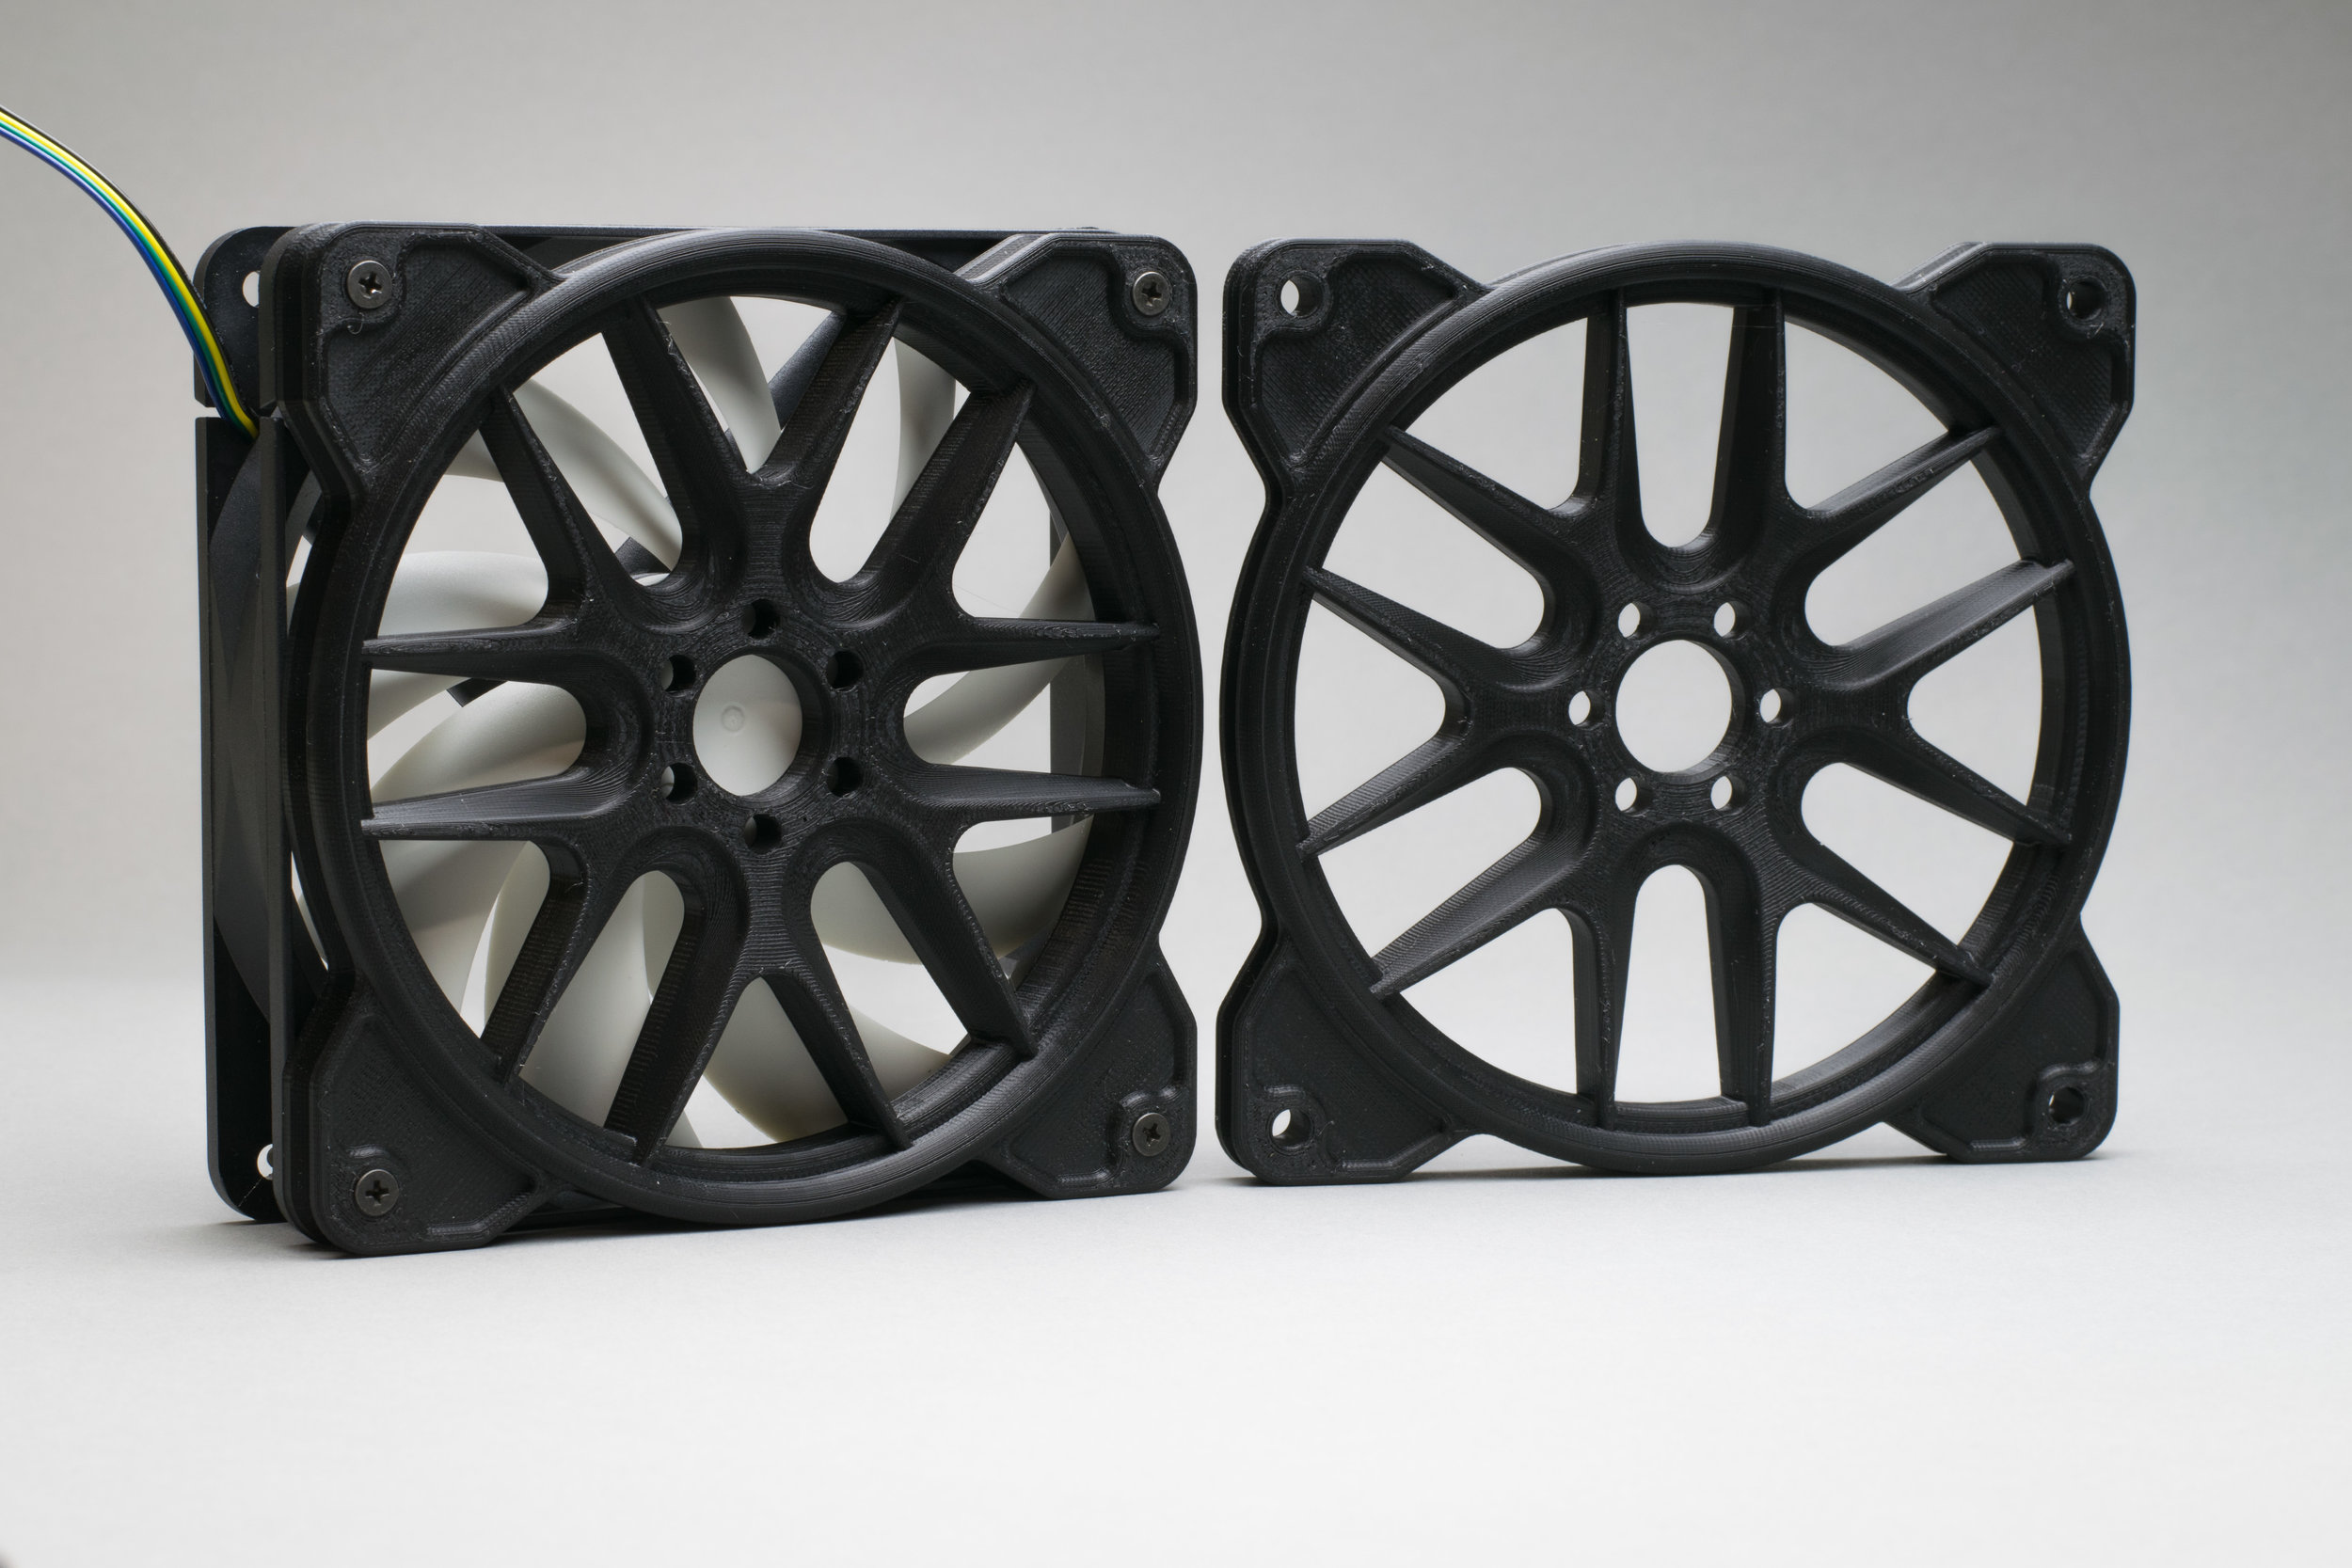
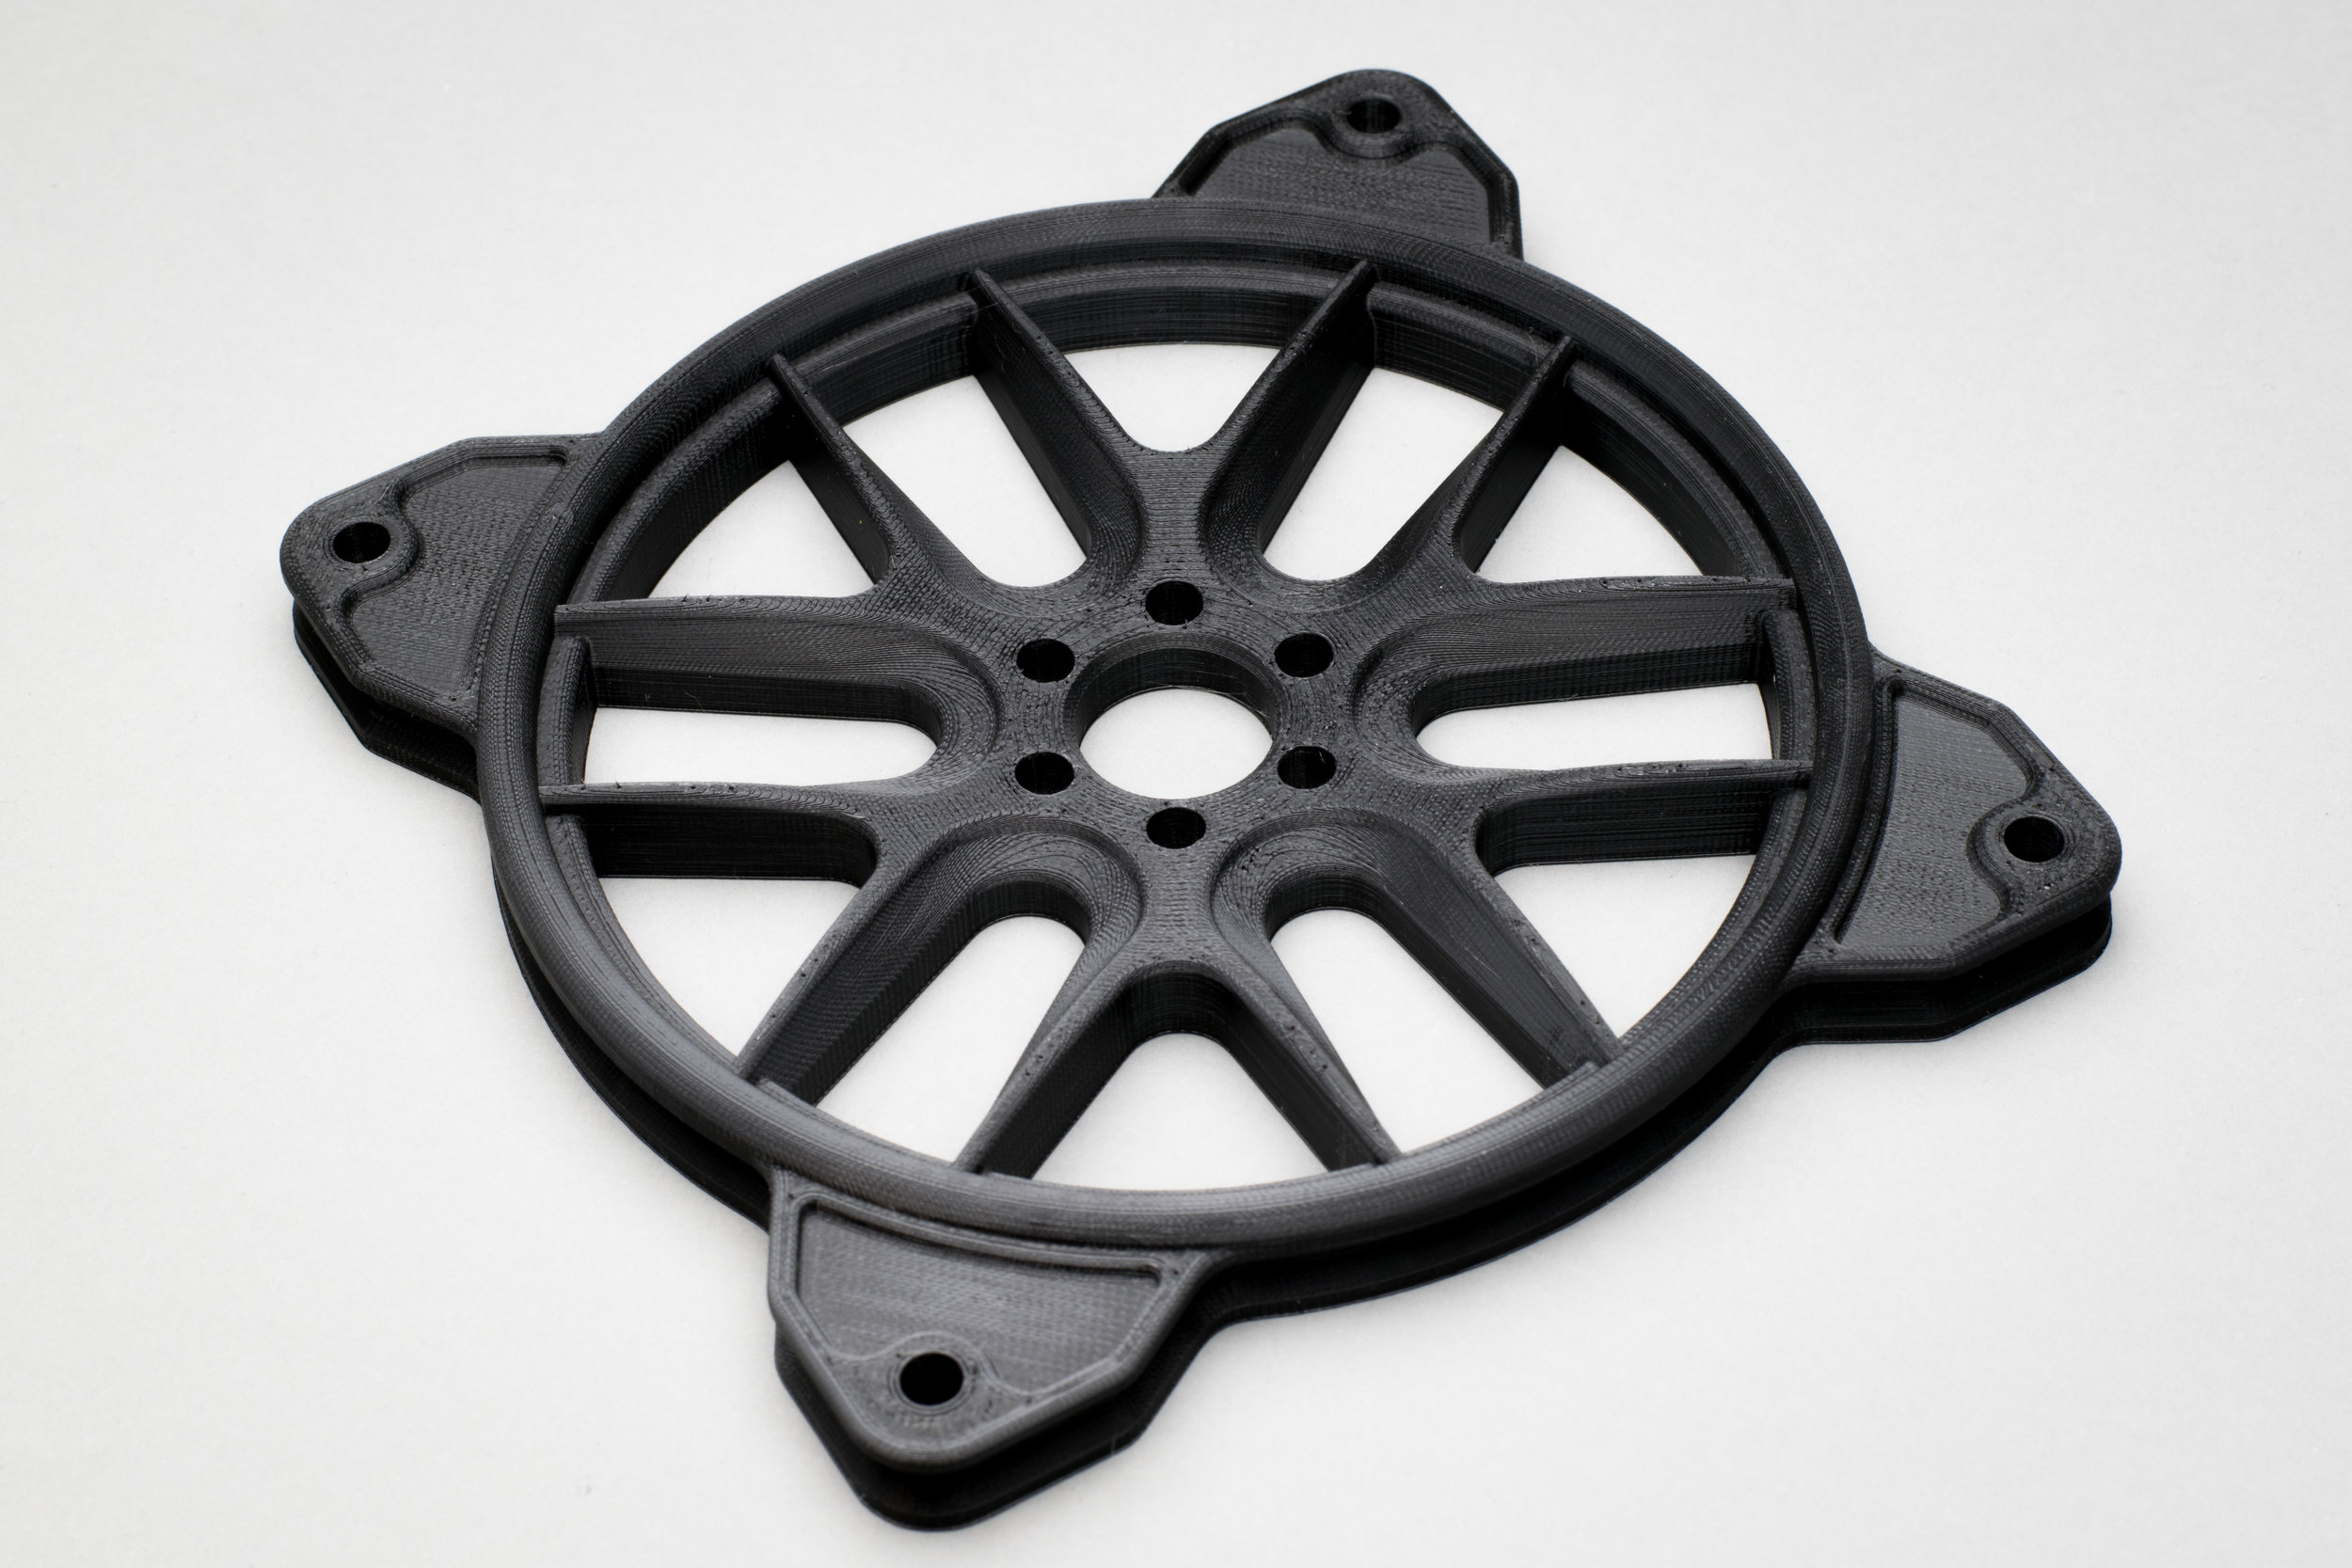
"Car-Rim" Fan Grill
Inspiration: For inspiration of the grill I looked to the car world. Car rims have spawned their own massive industry, where large companies continually innovate by blending artistic elements and strength. I translated this relationship to a fan grill while preserving airflow, something I had not seen implemented before.
Use: The fan grill screws over a 120mm computer case fan, both protecting the blades and adding an aesthetic touch to a user's system. It contributes visually to the cohesive theme of a computer system, something that enthusiasts value greatly.
Cost: 3D printing allows me to rapidly prototype different designs, reducing excess waste and high minimum-order-quantity costs. Each grill costs about $1.50 in plastic to make.
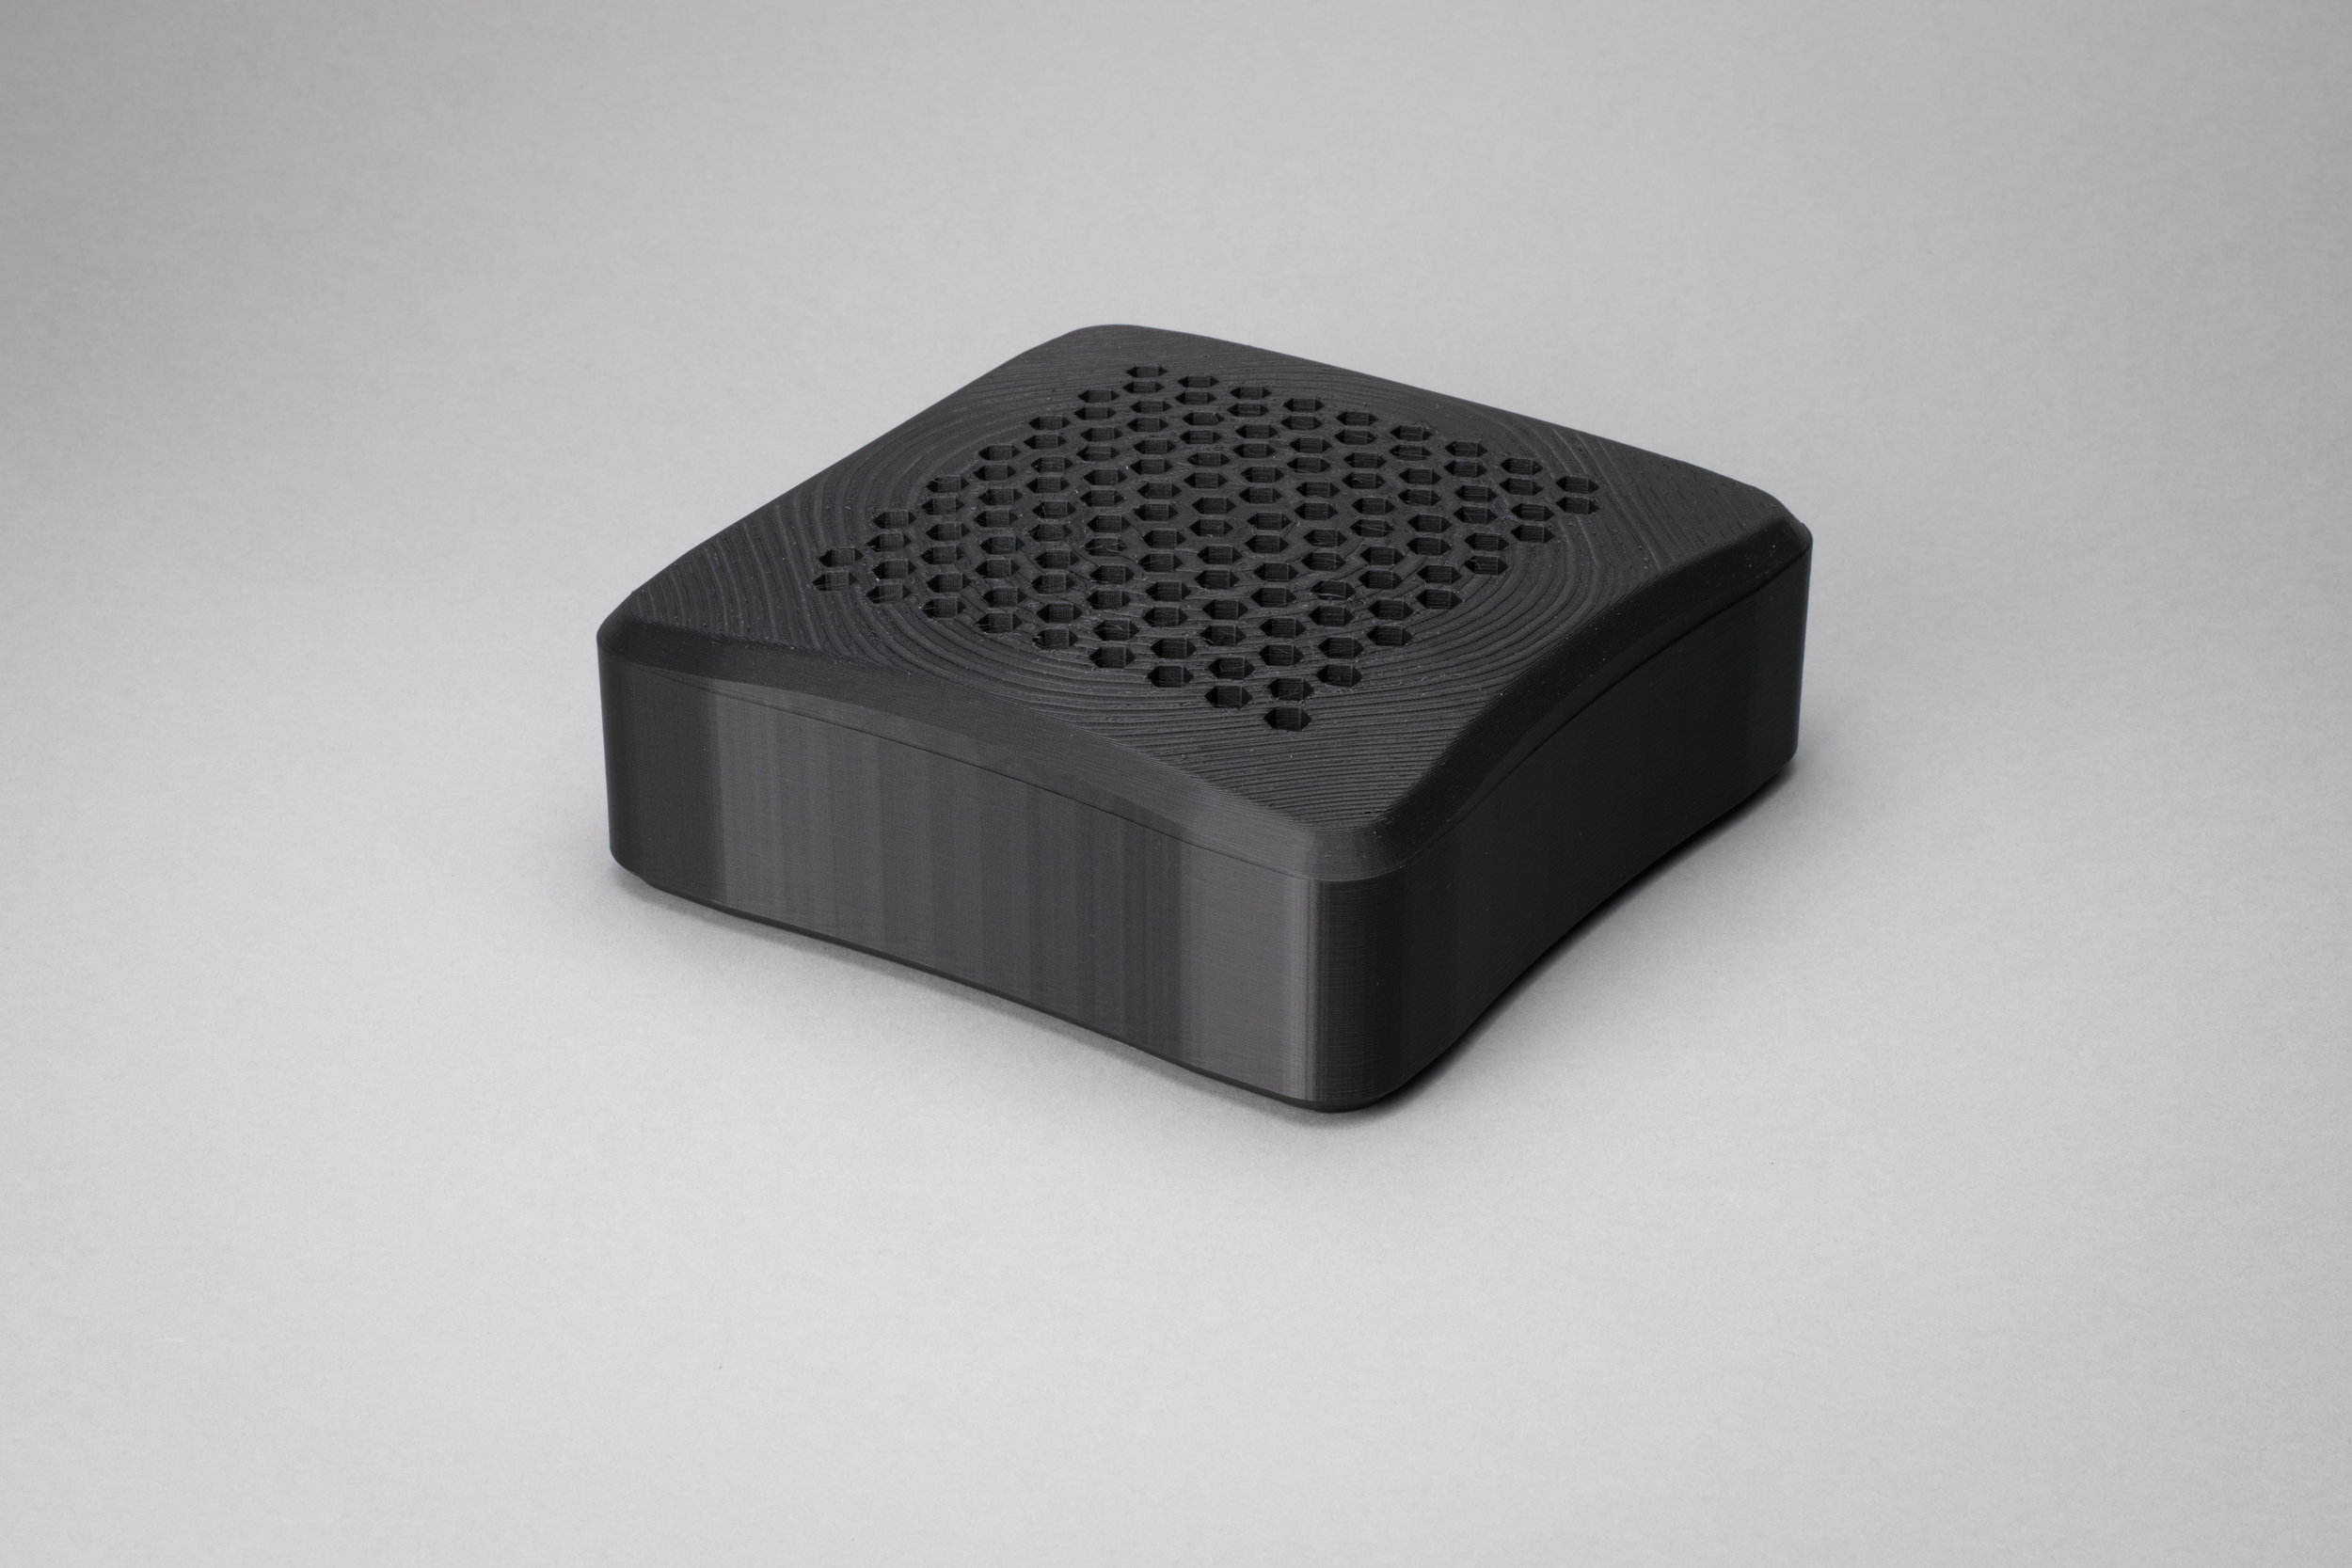
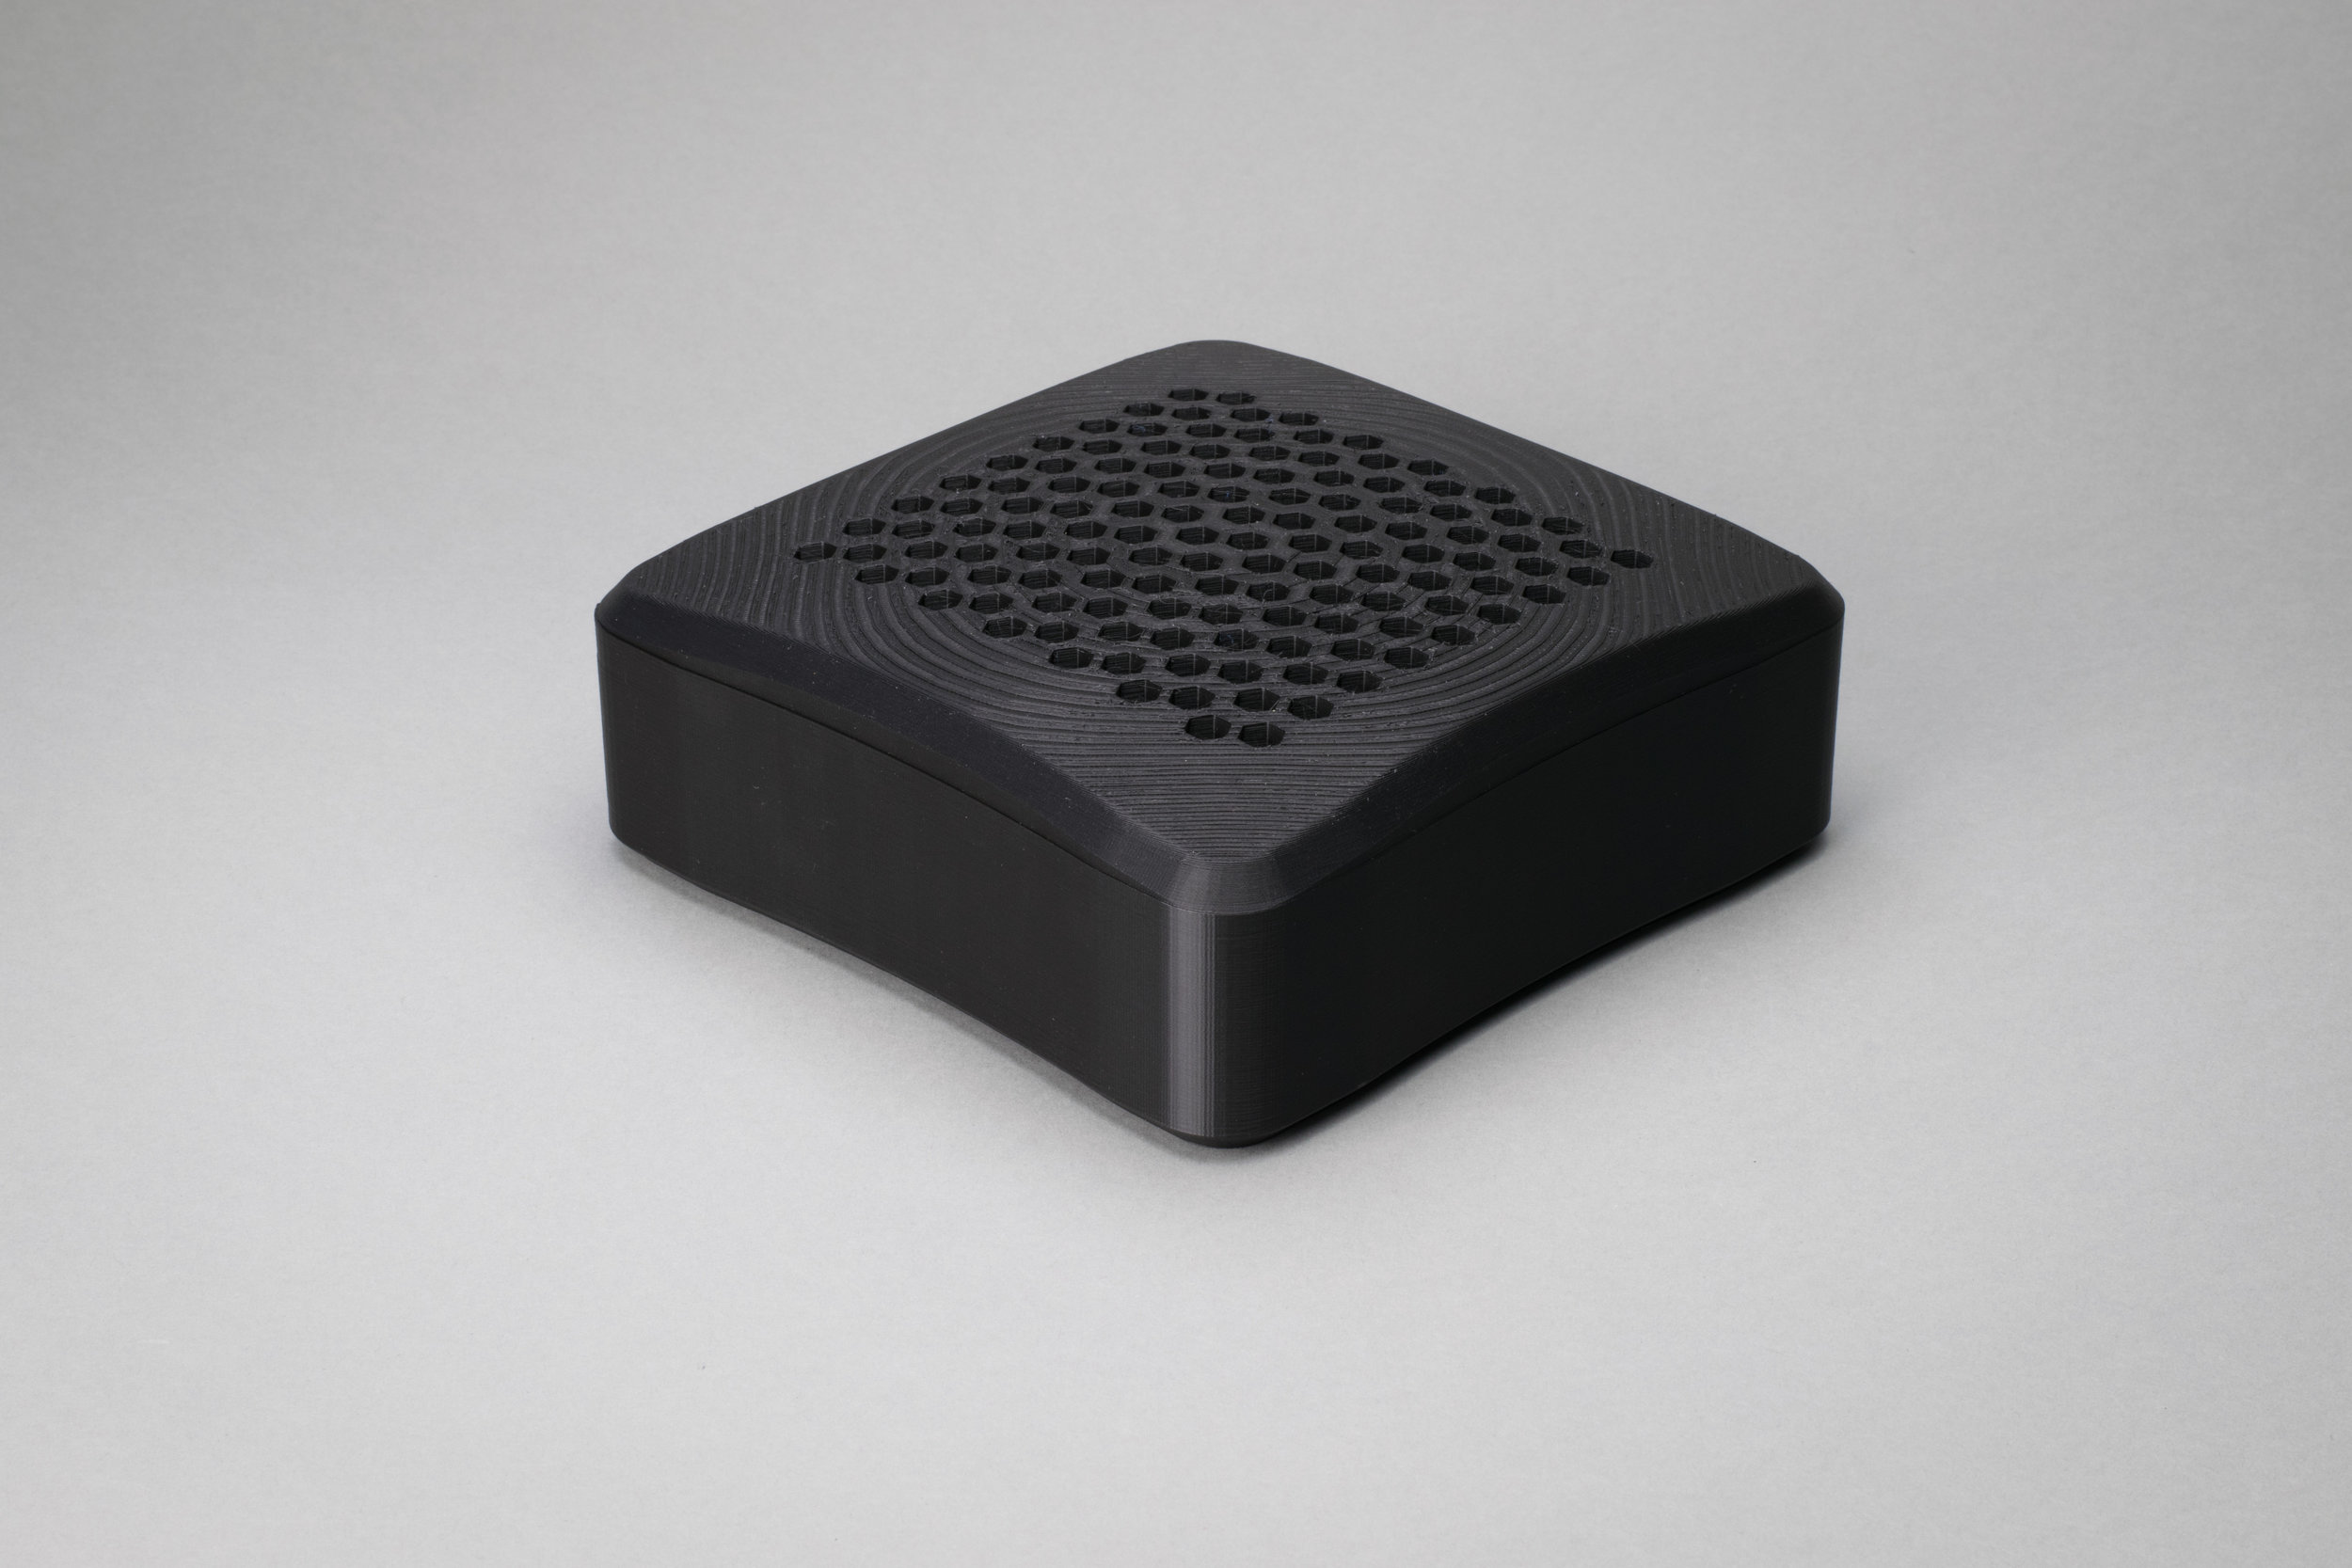
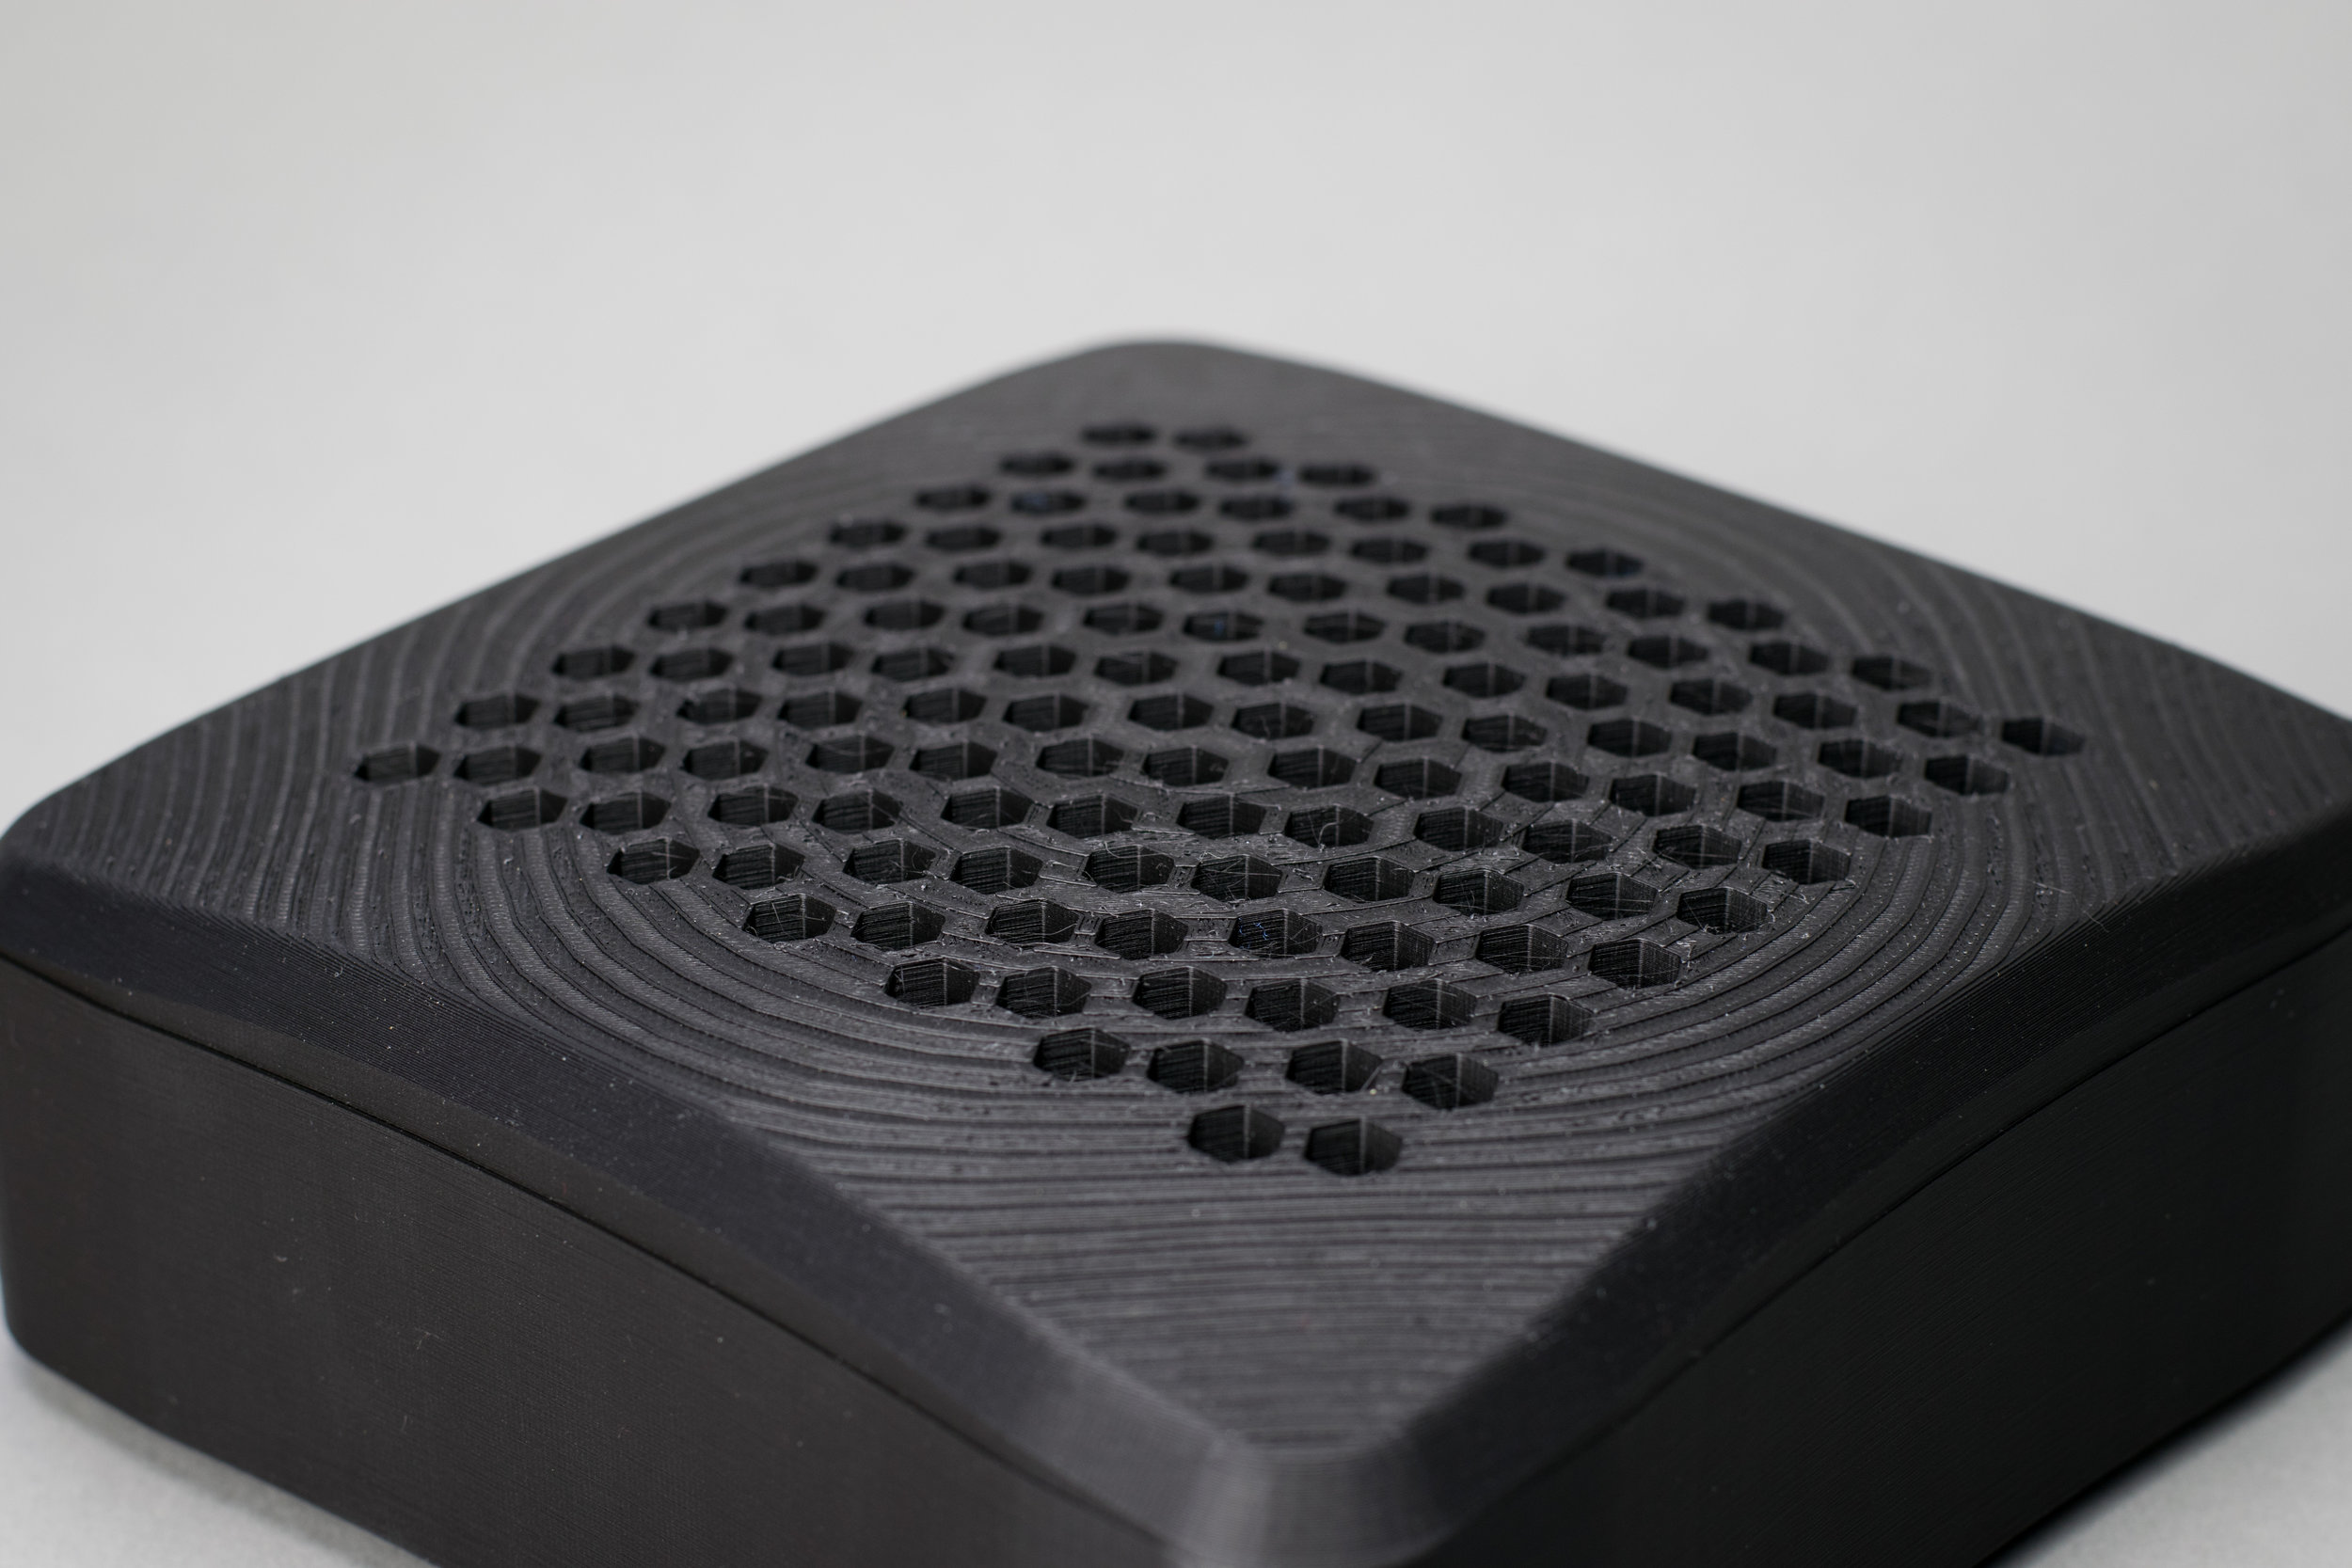
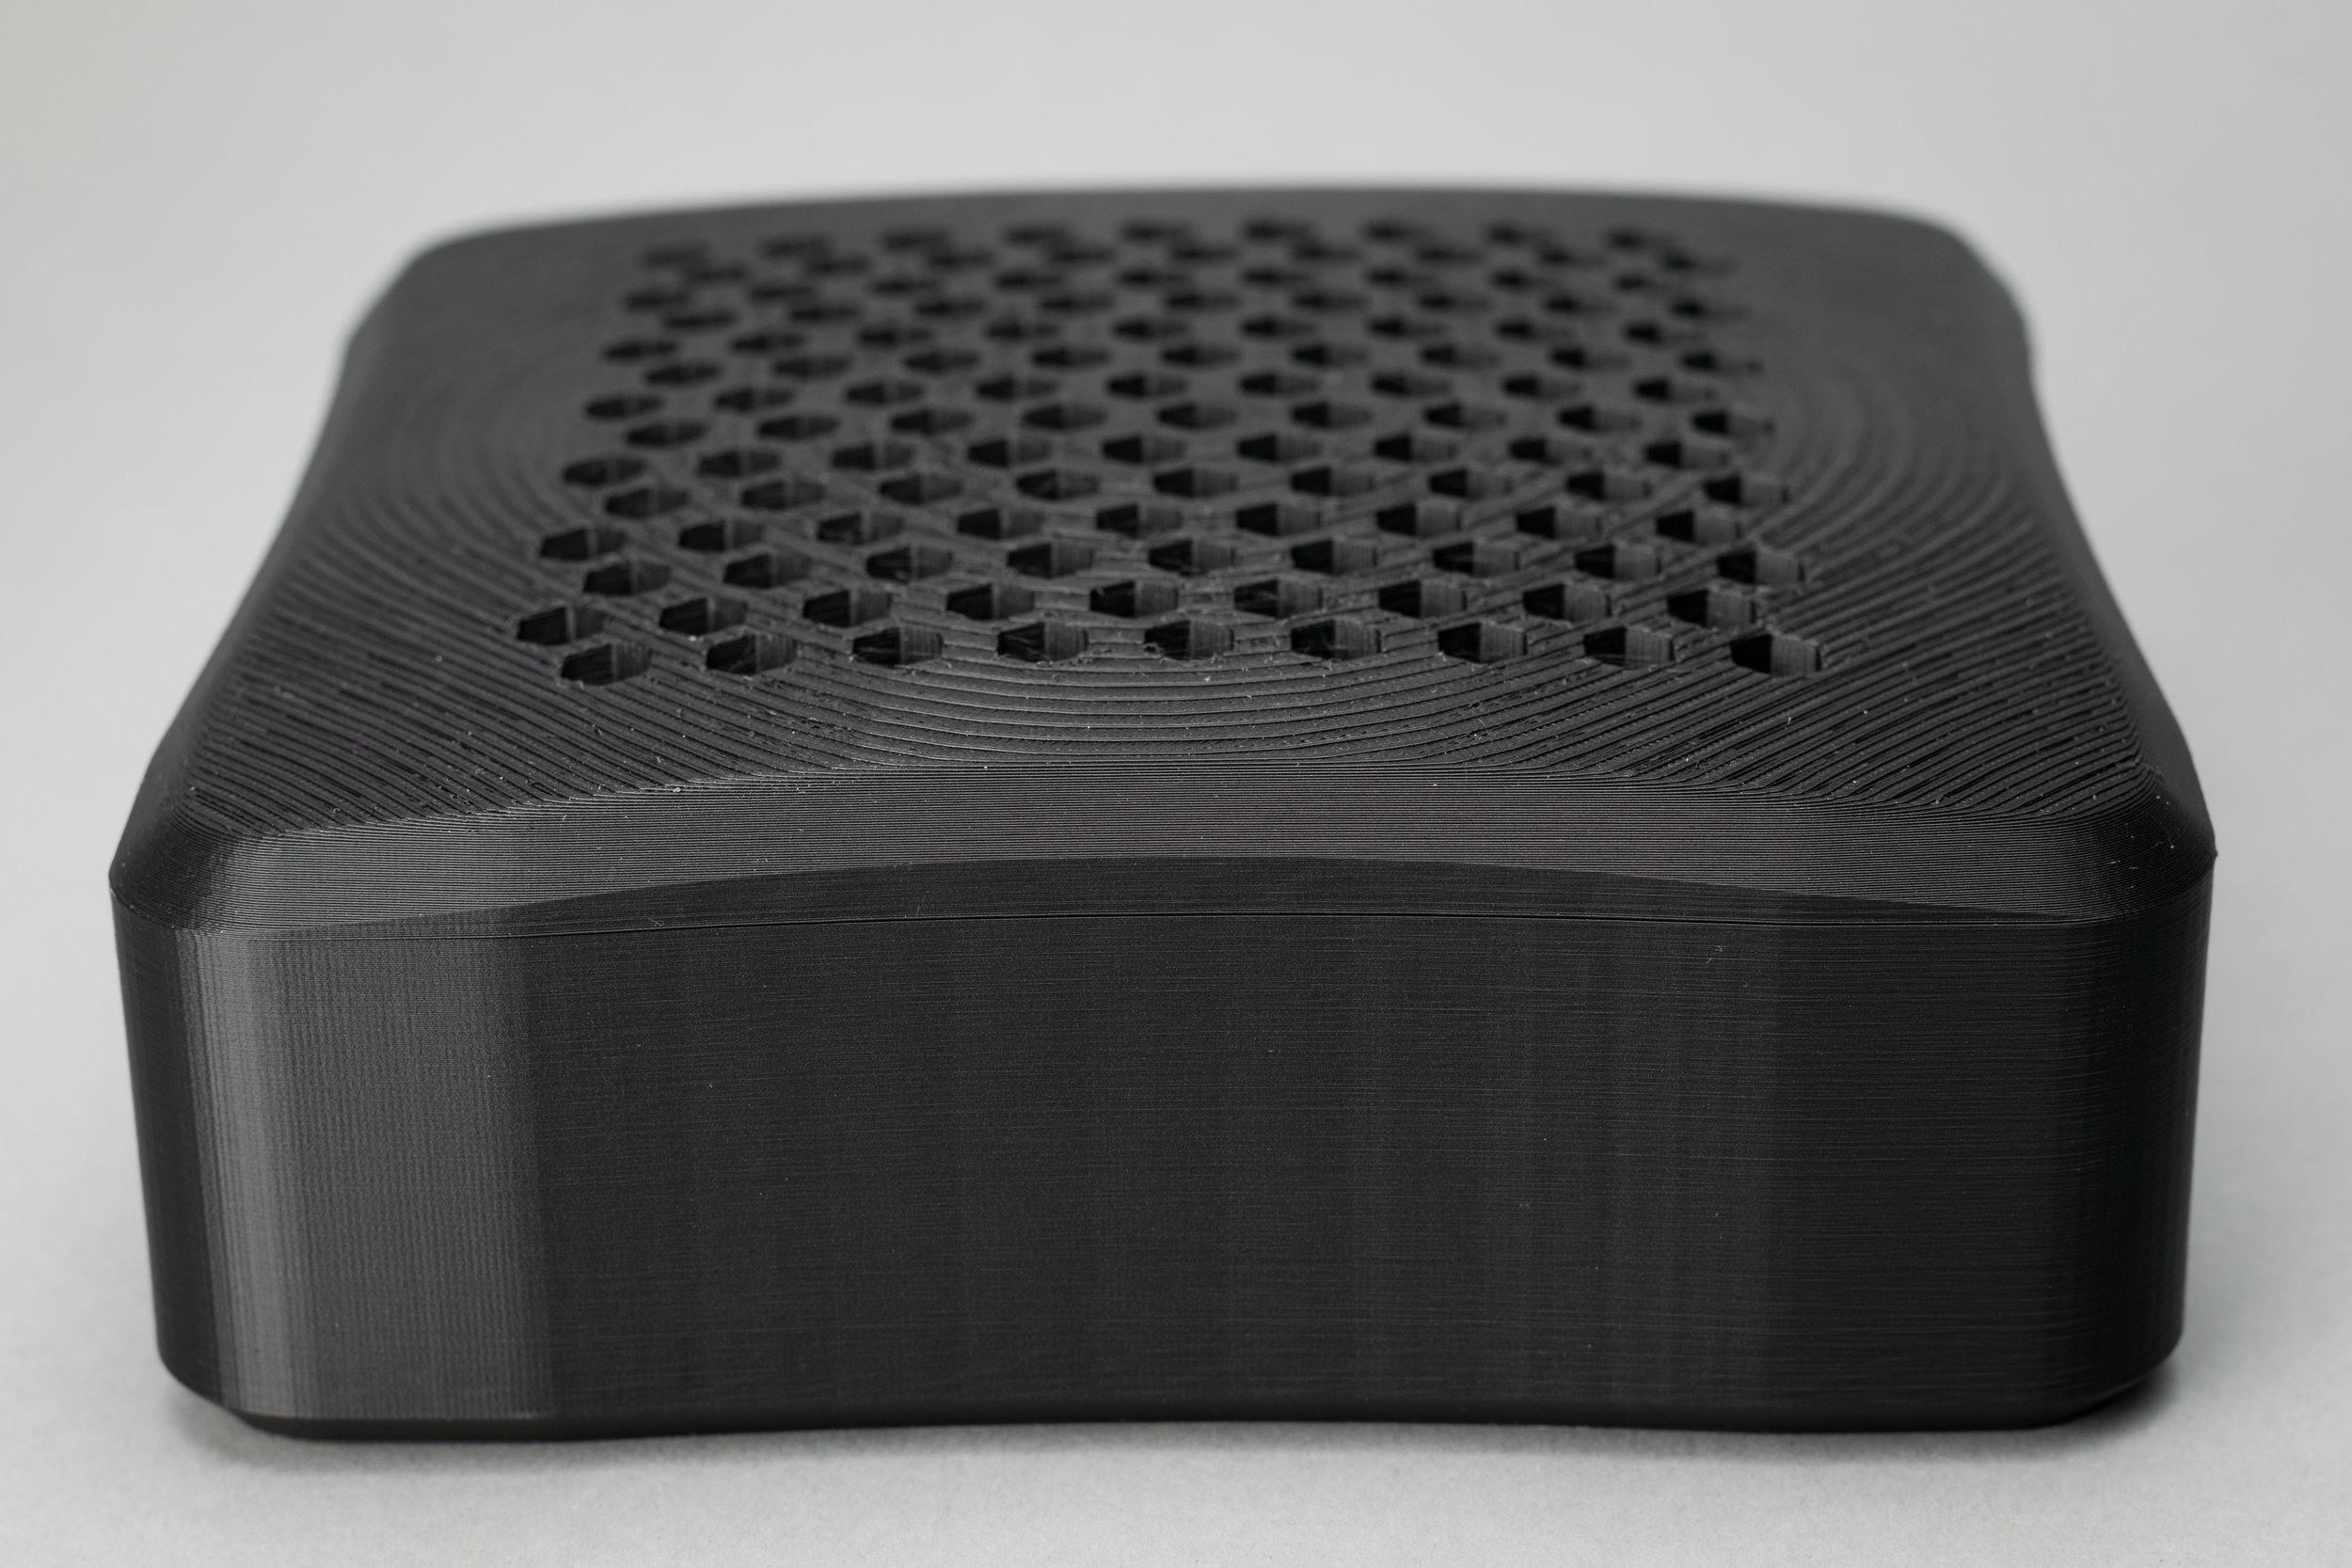
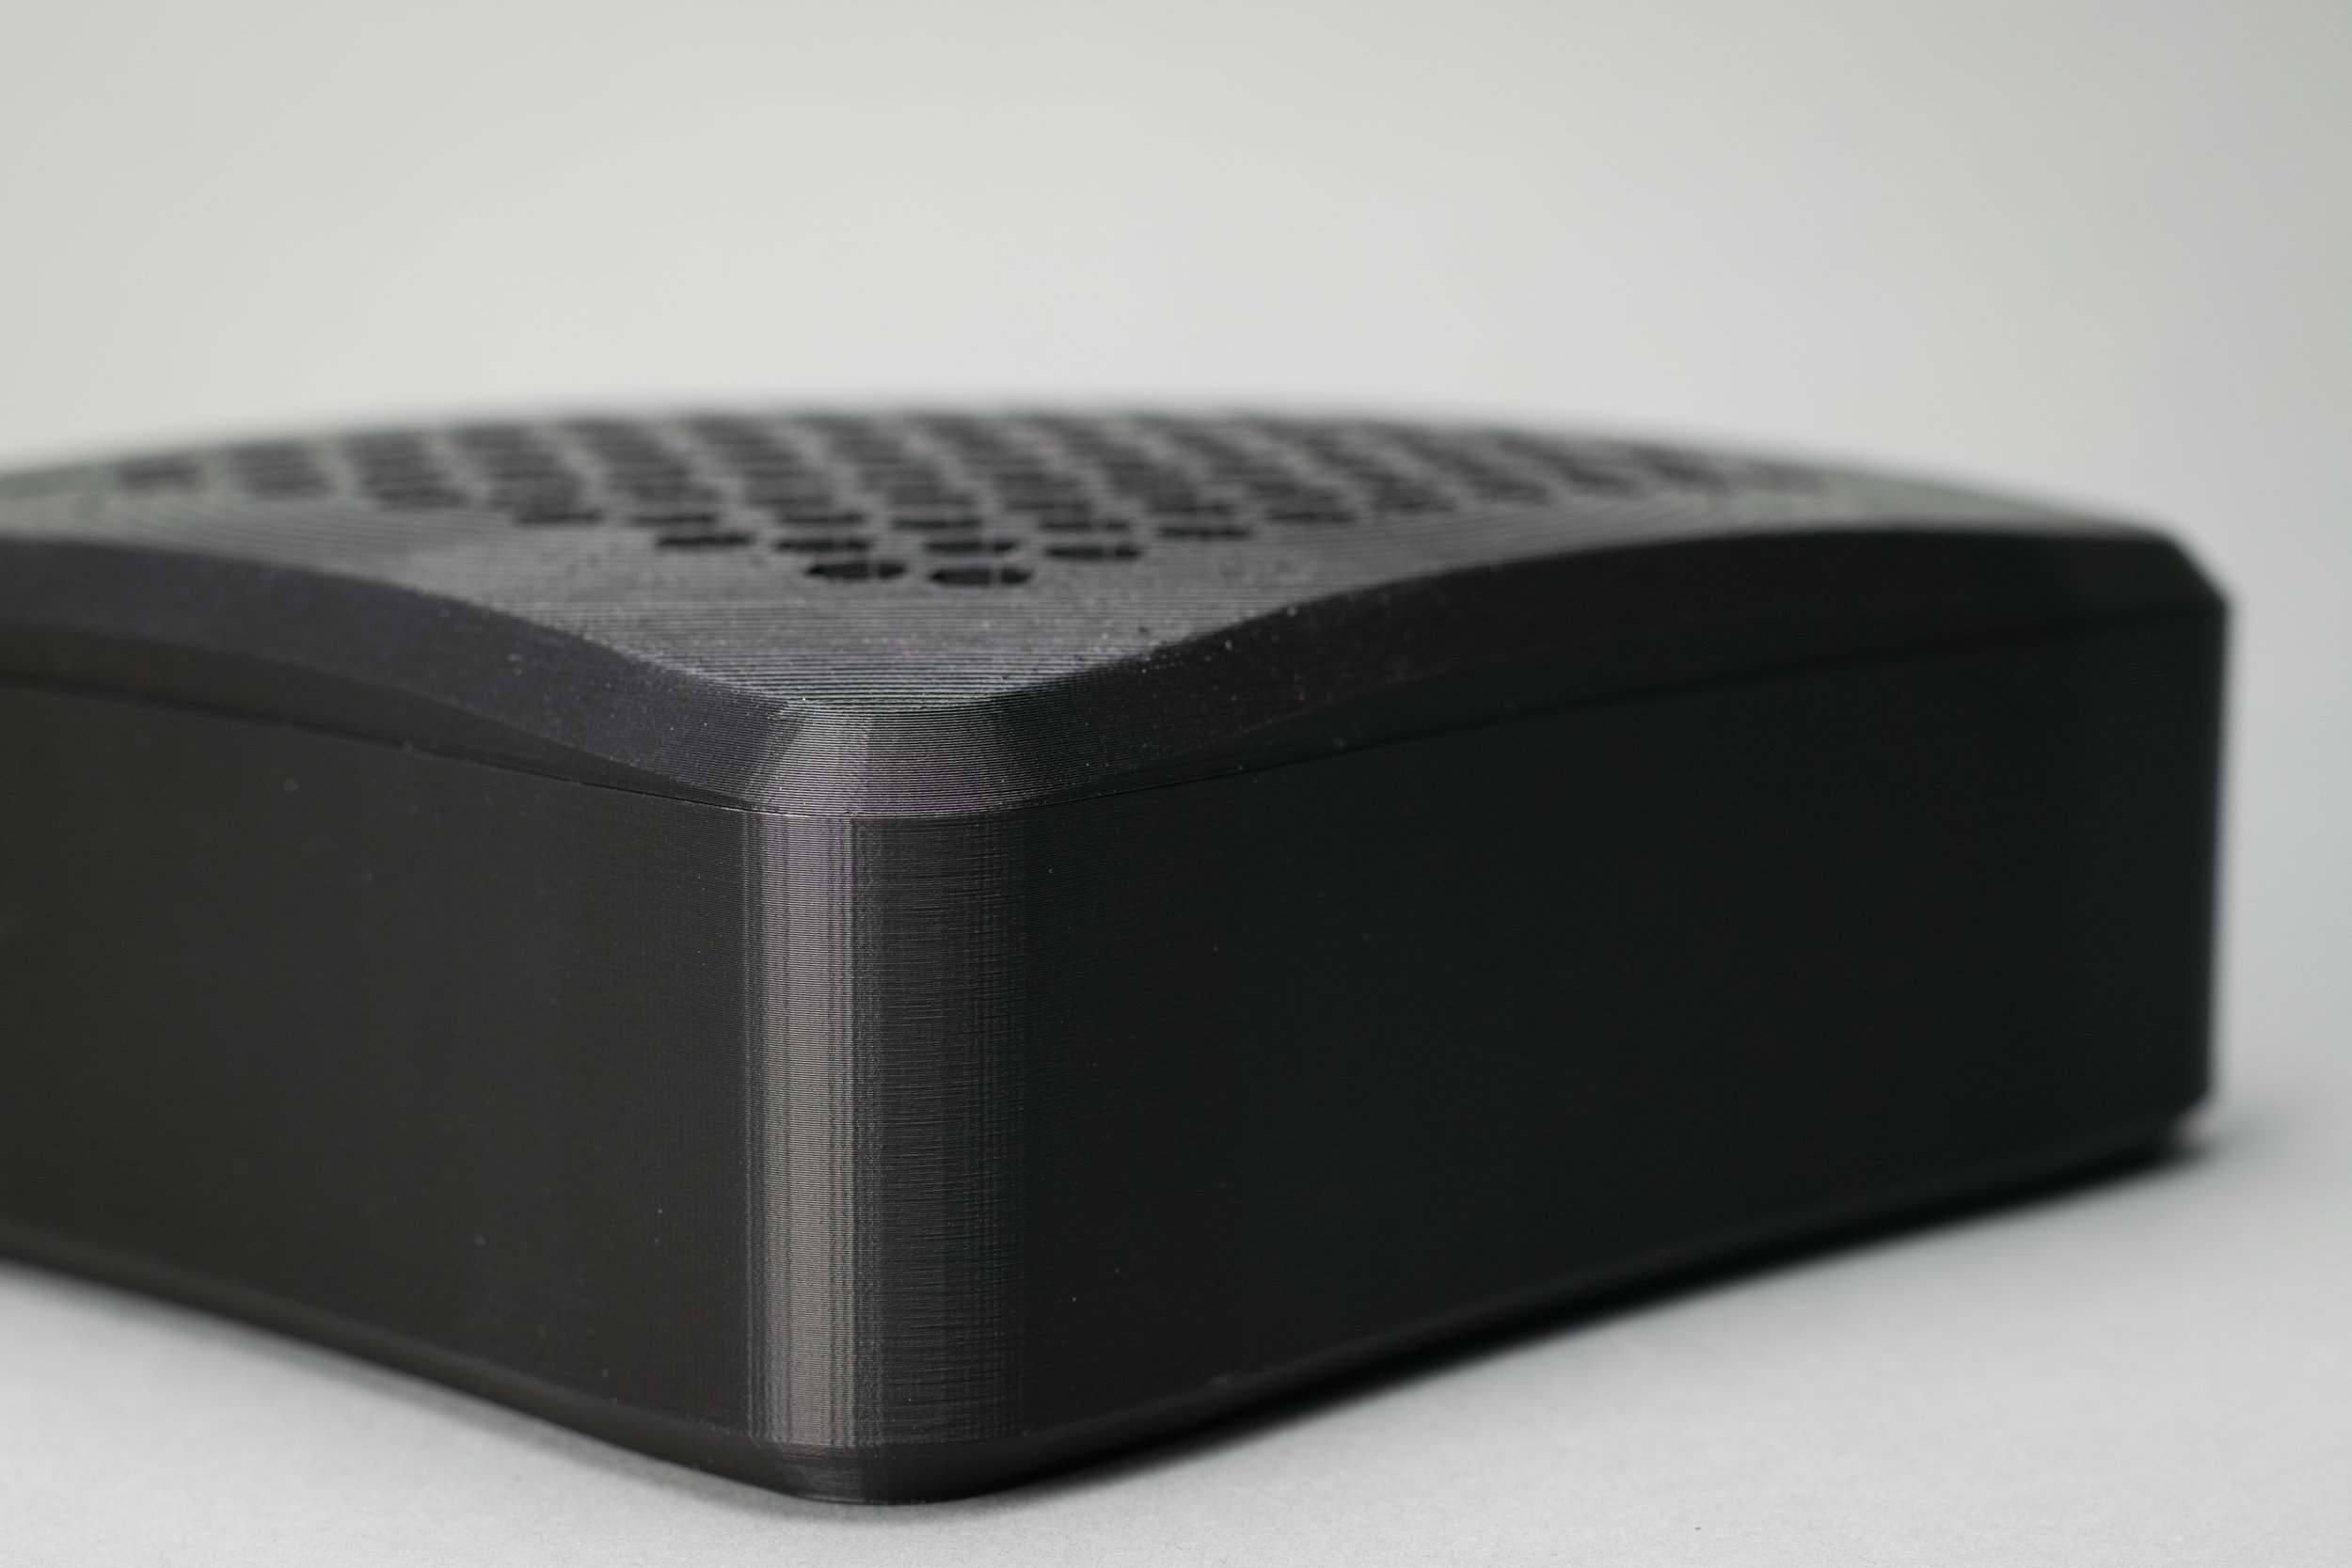
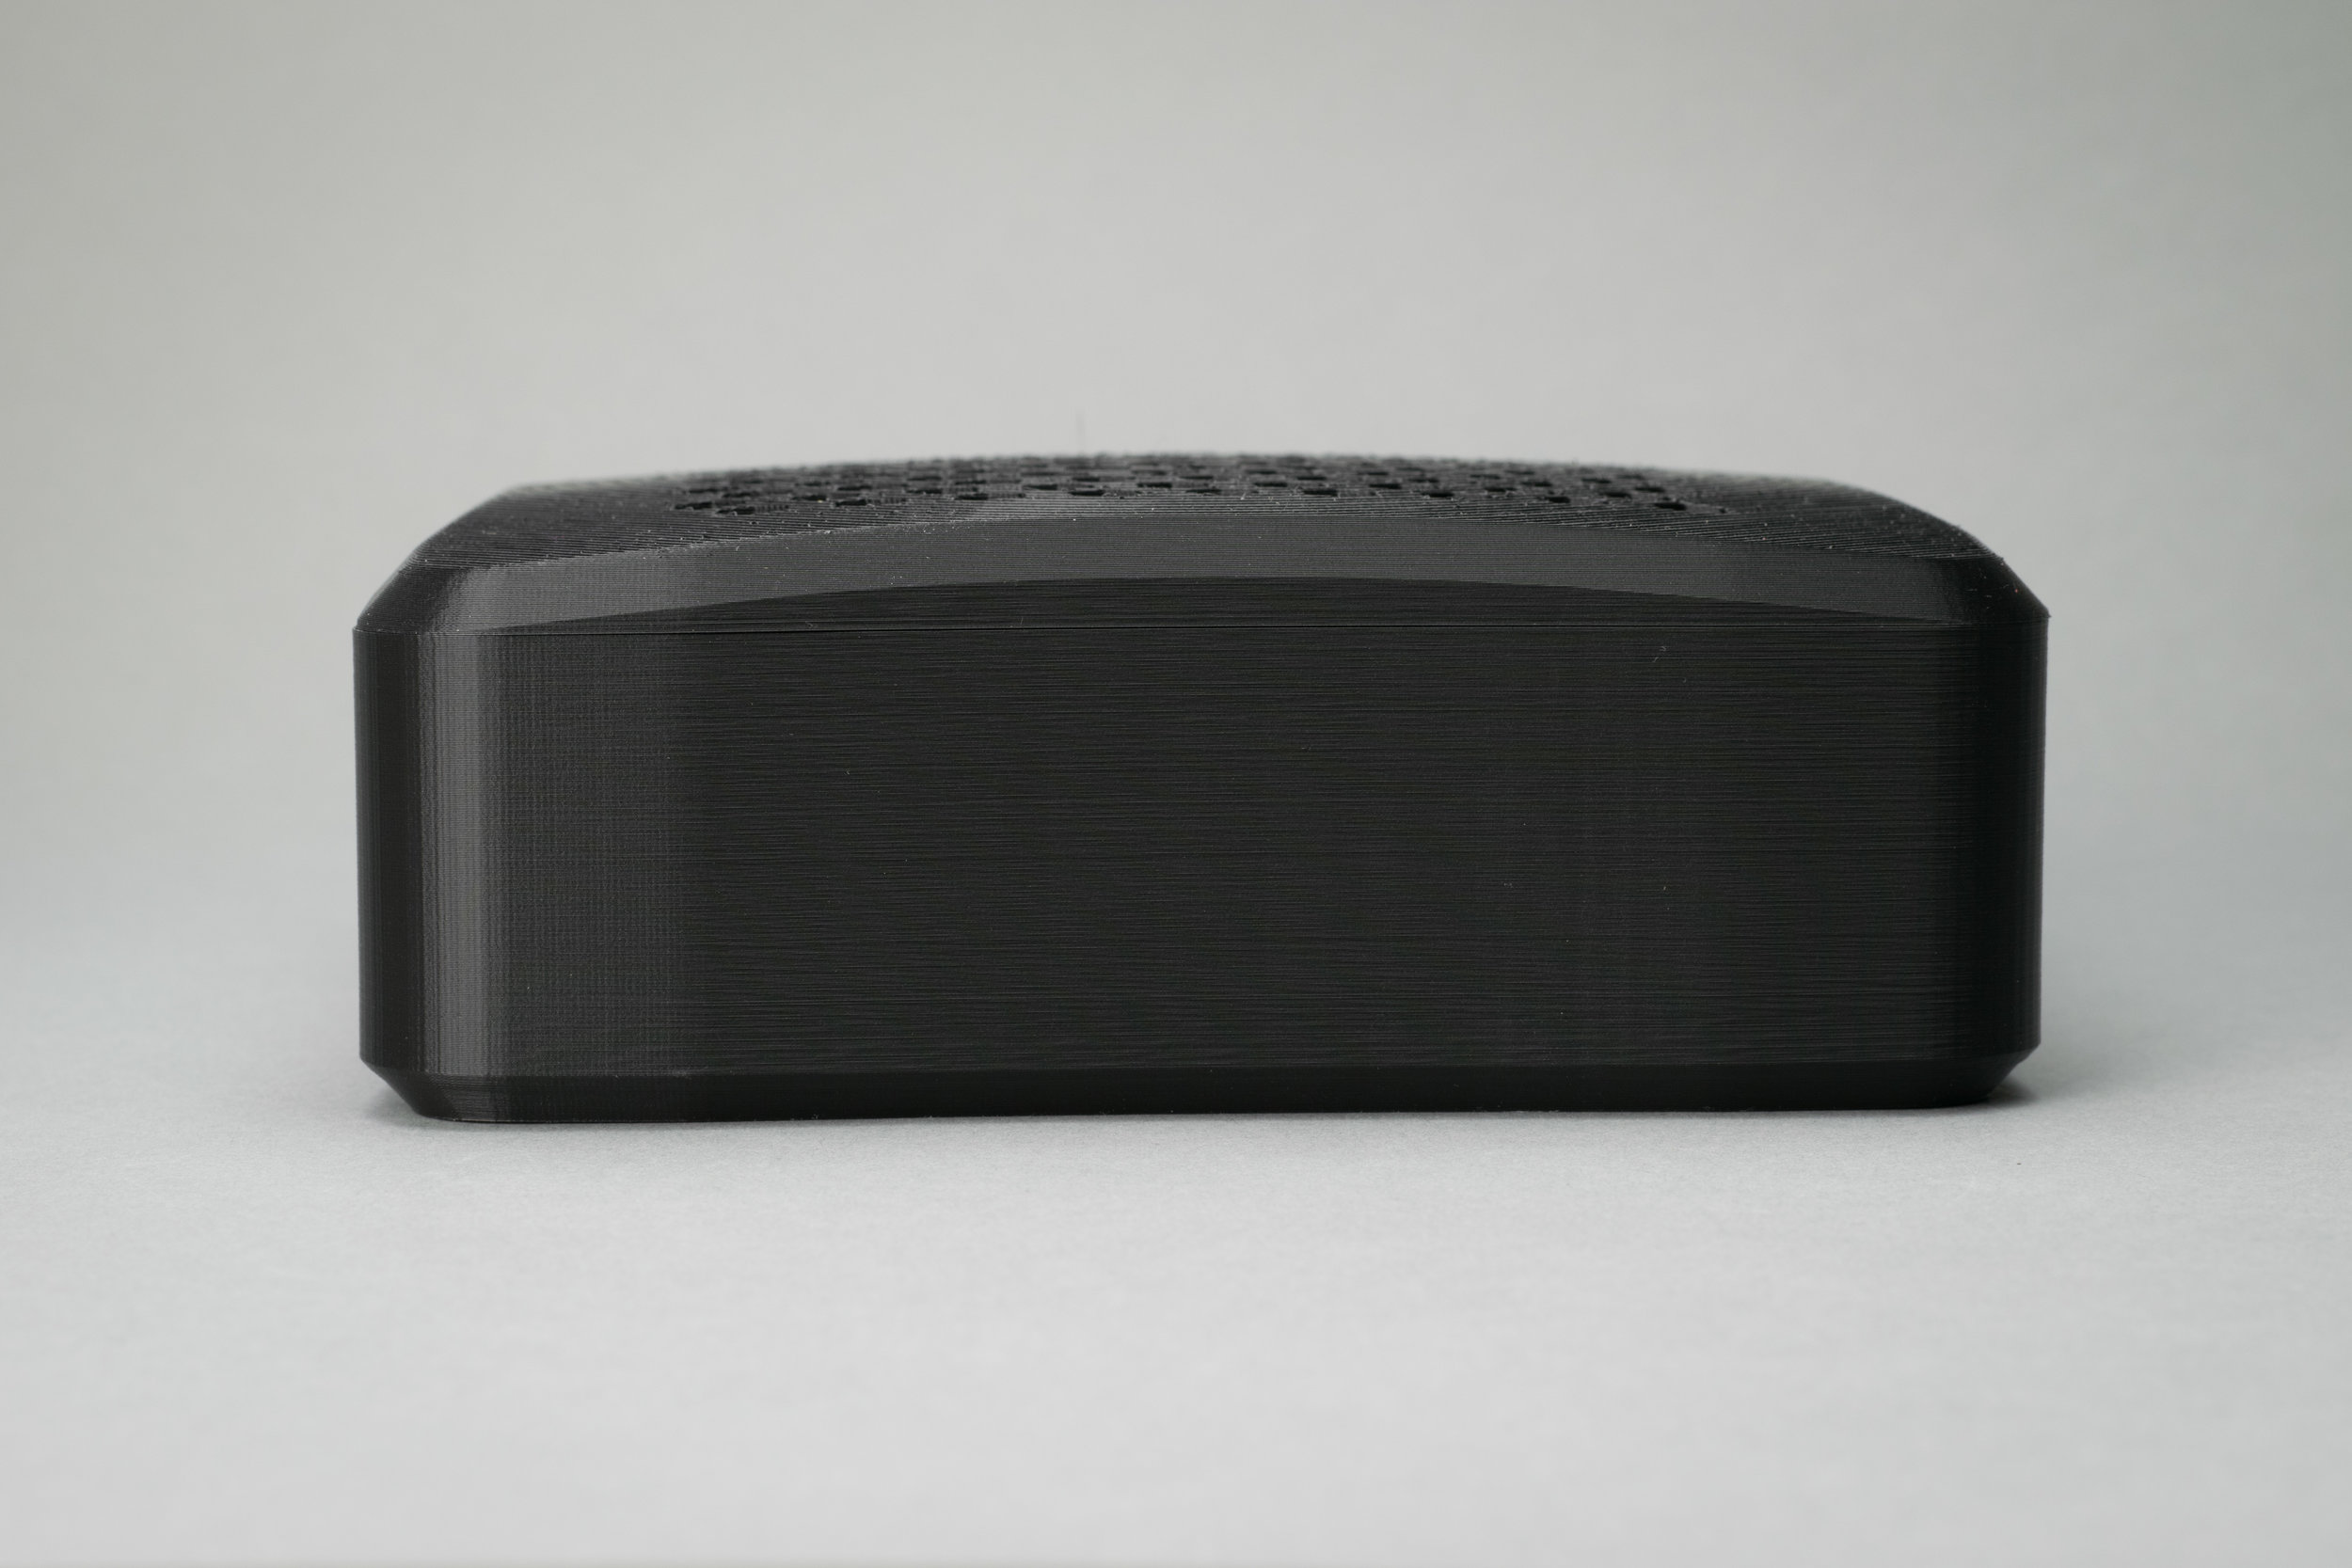
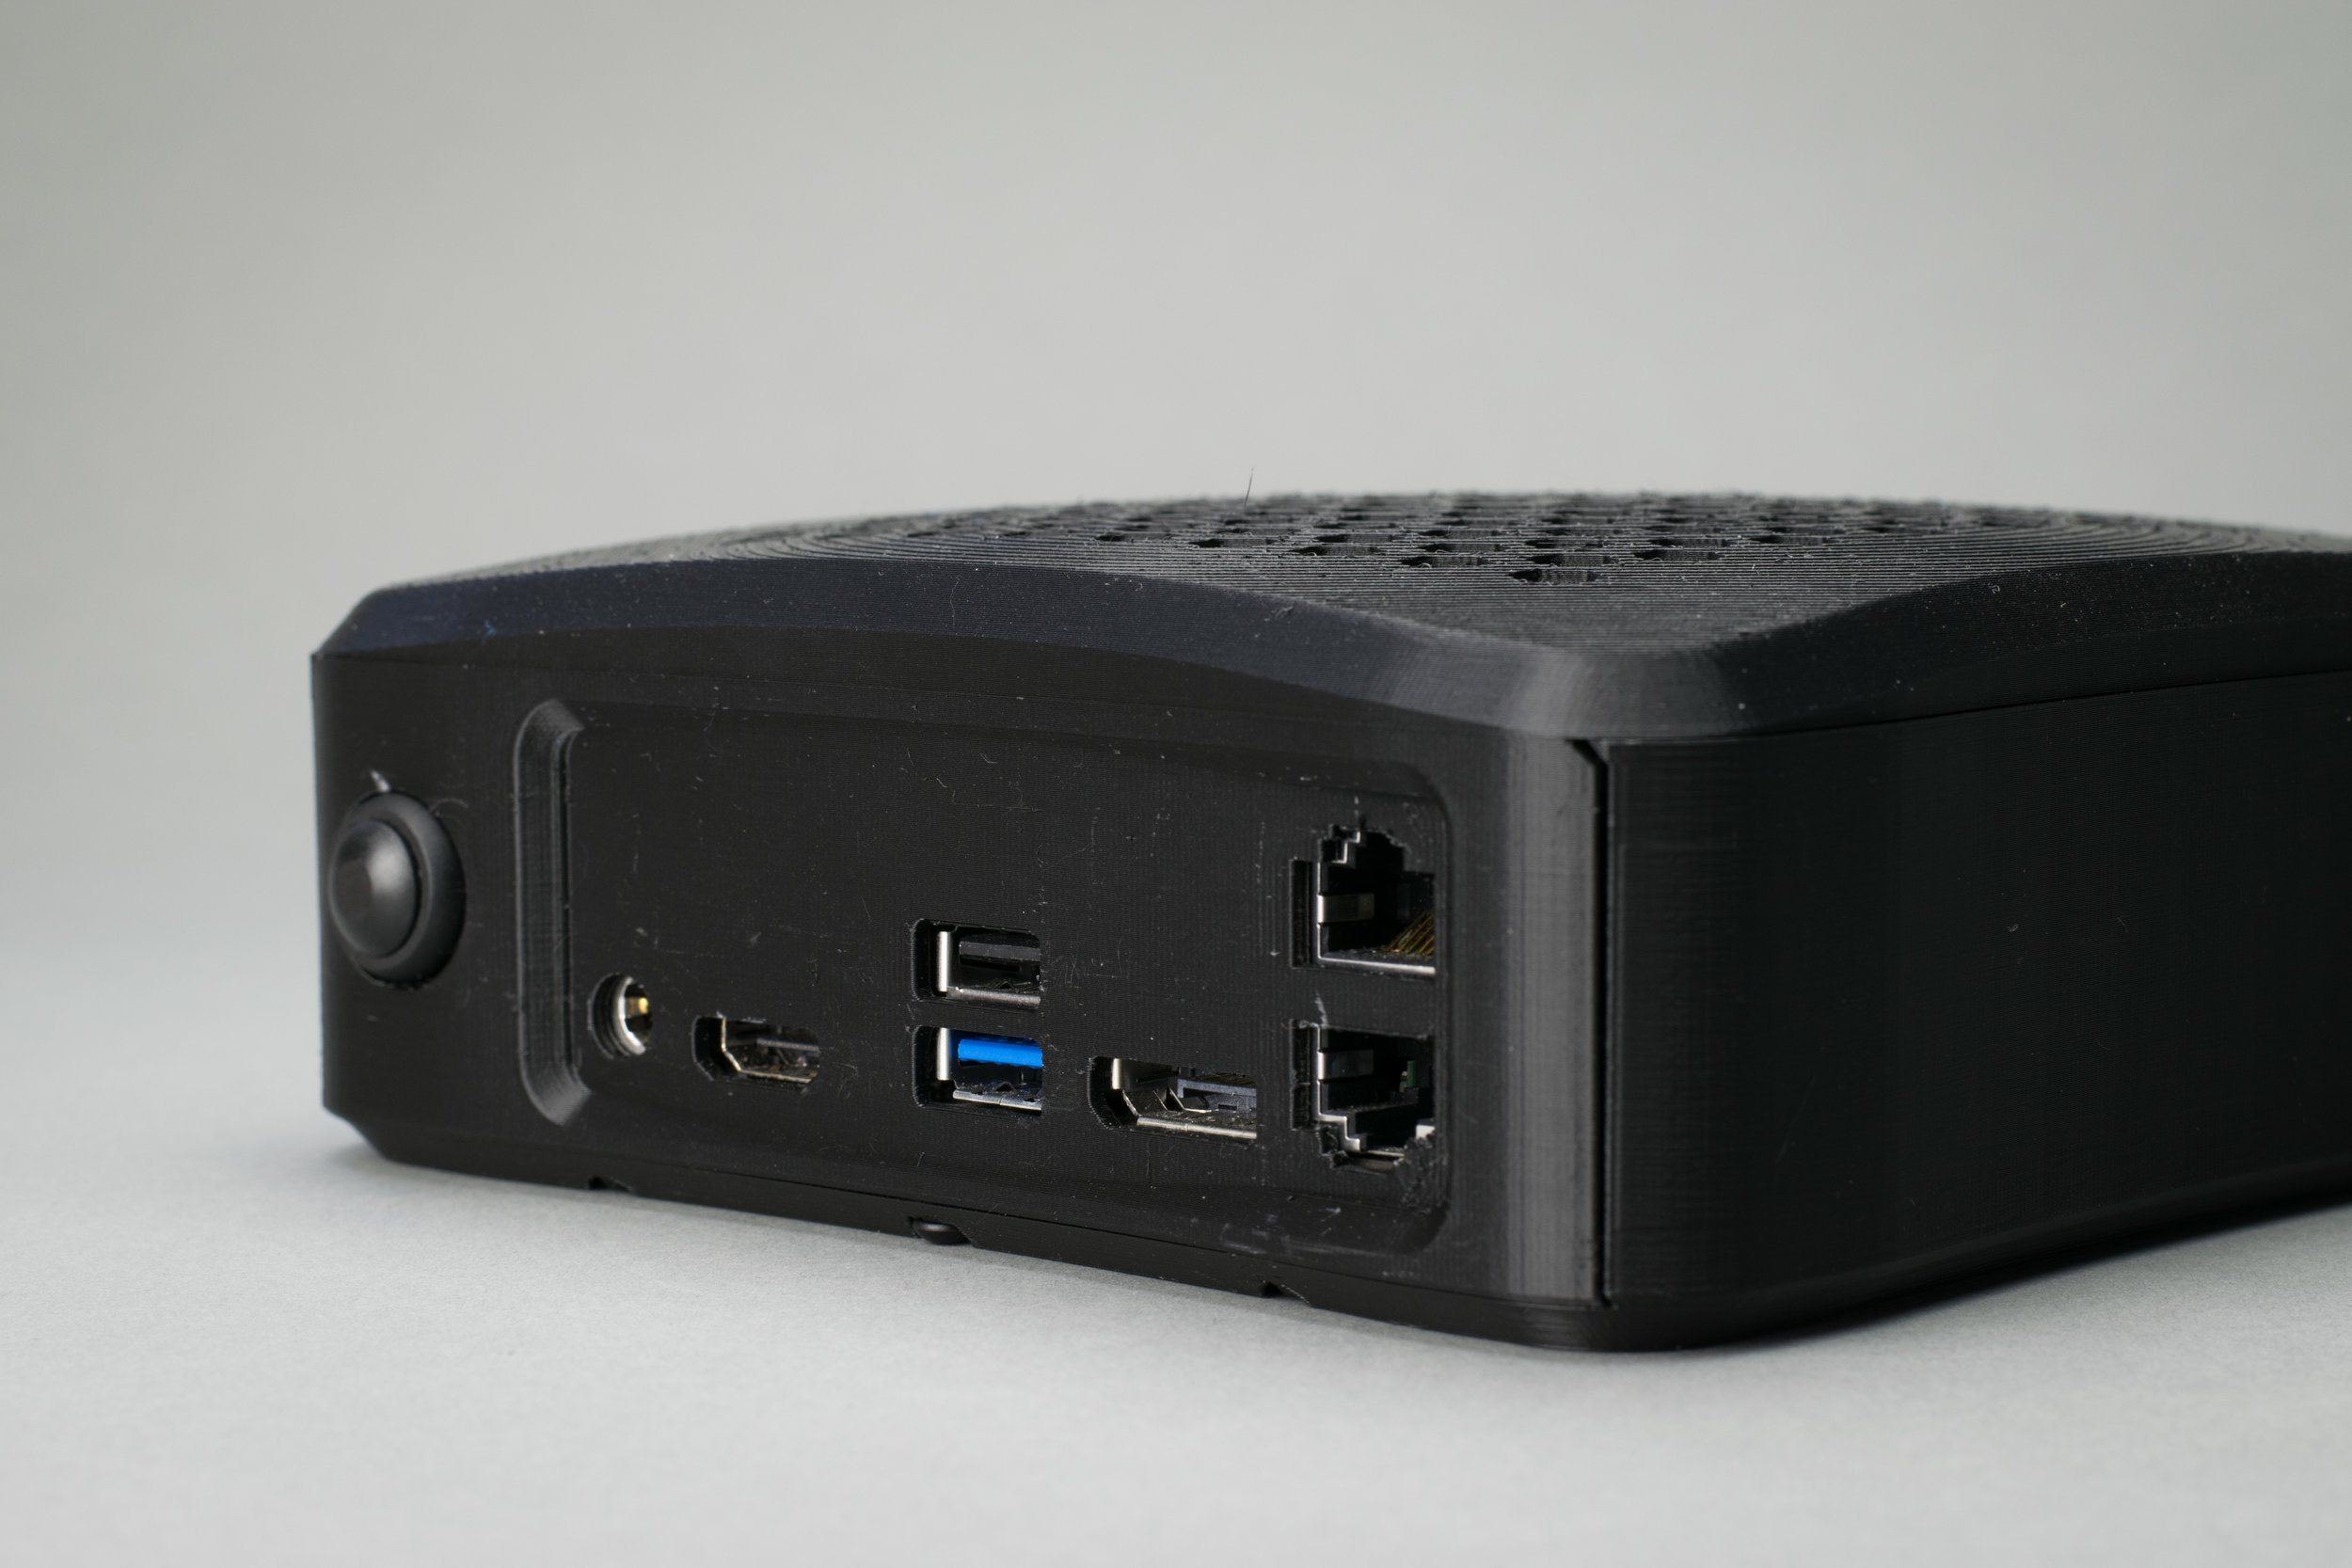
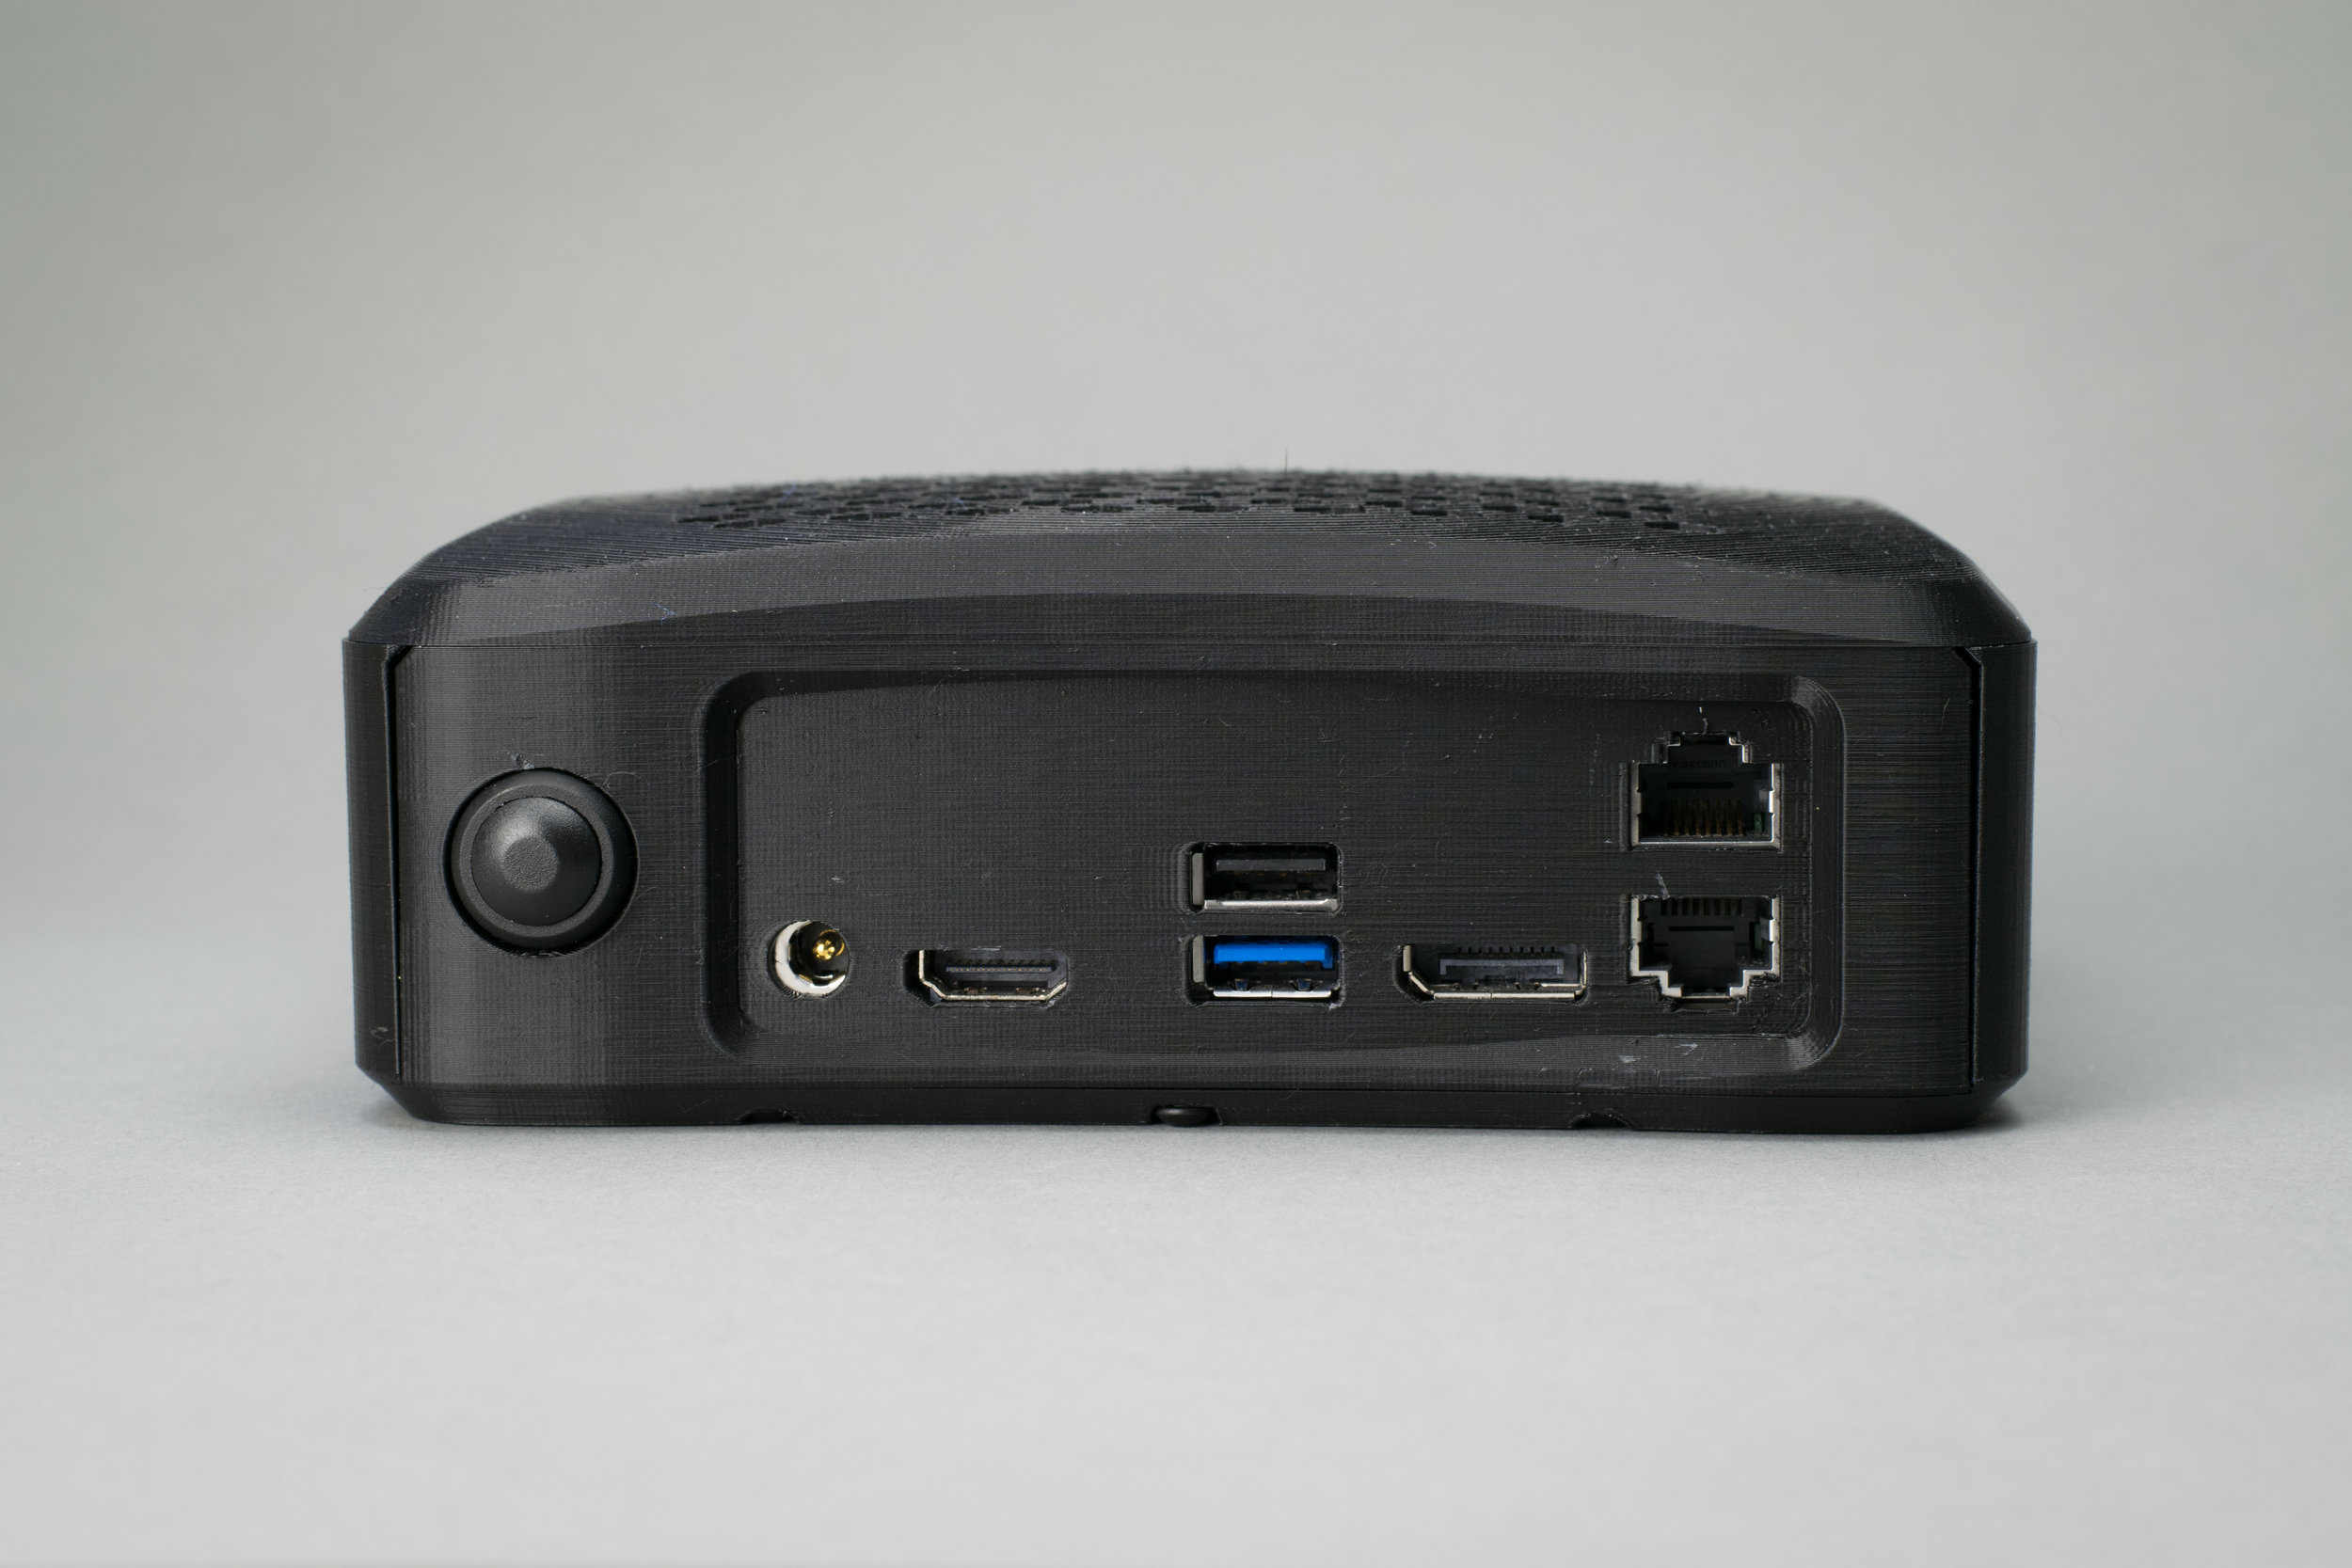
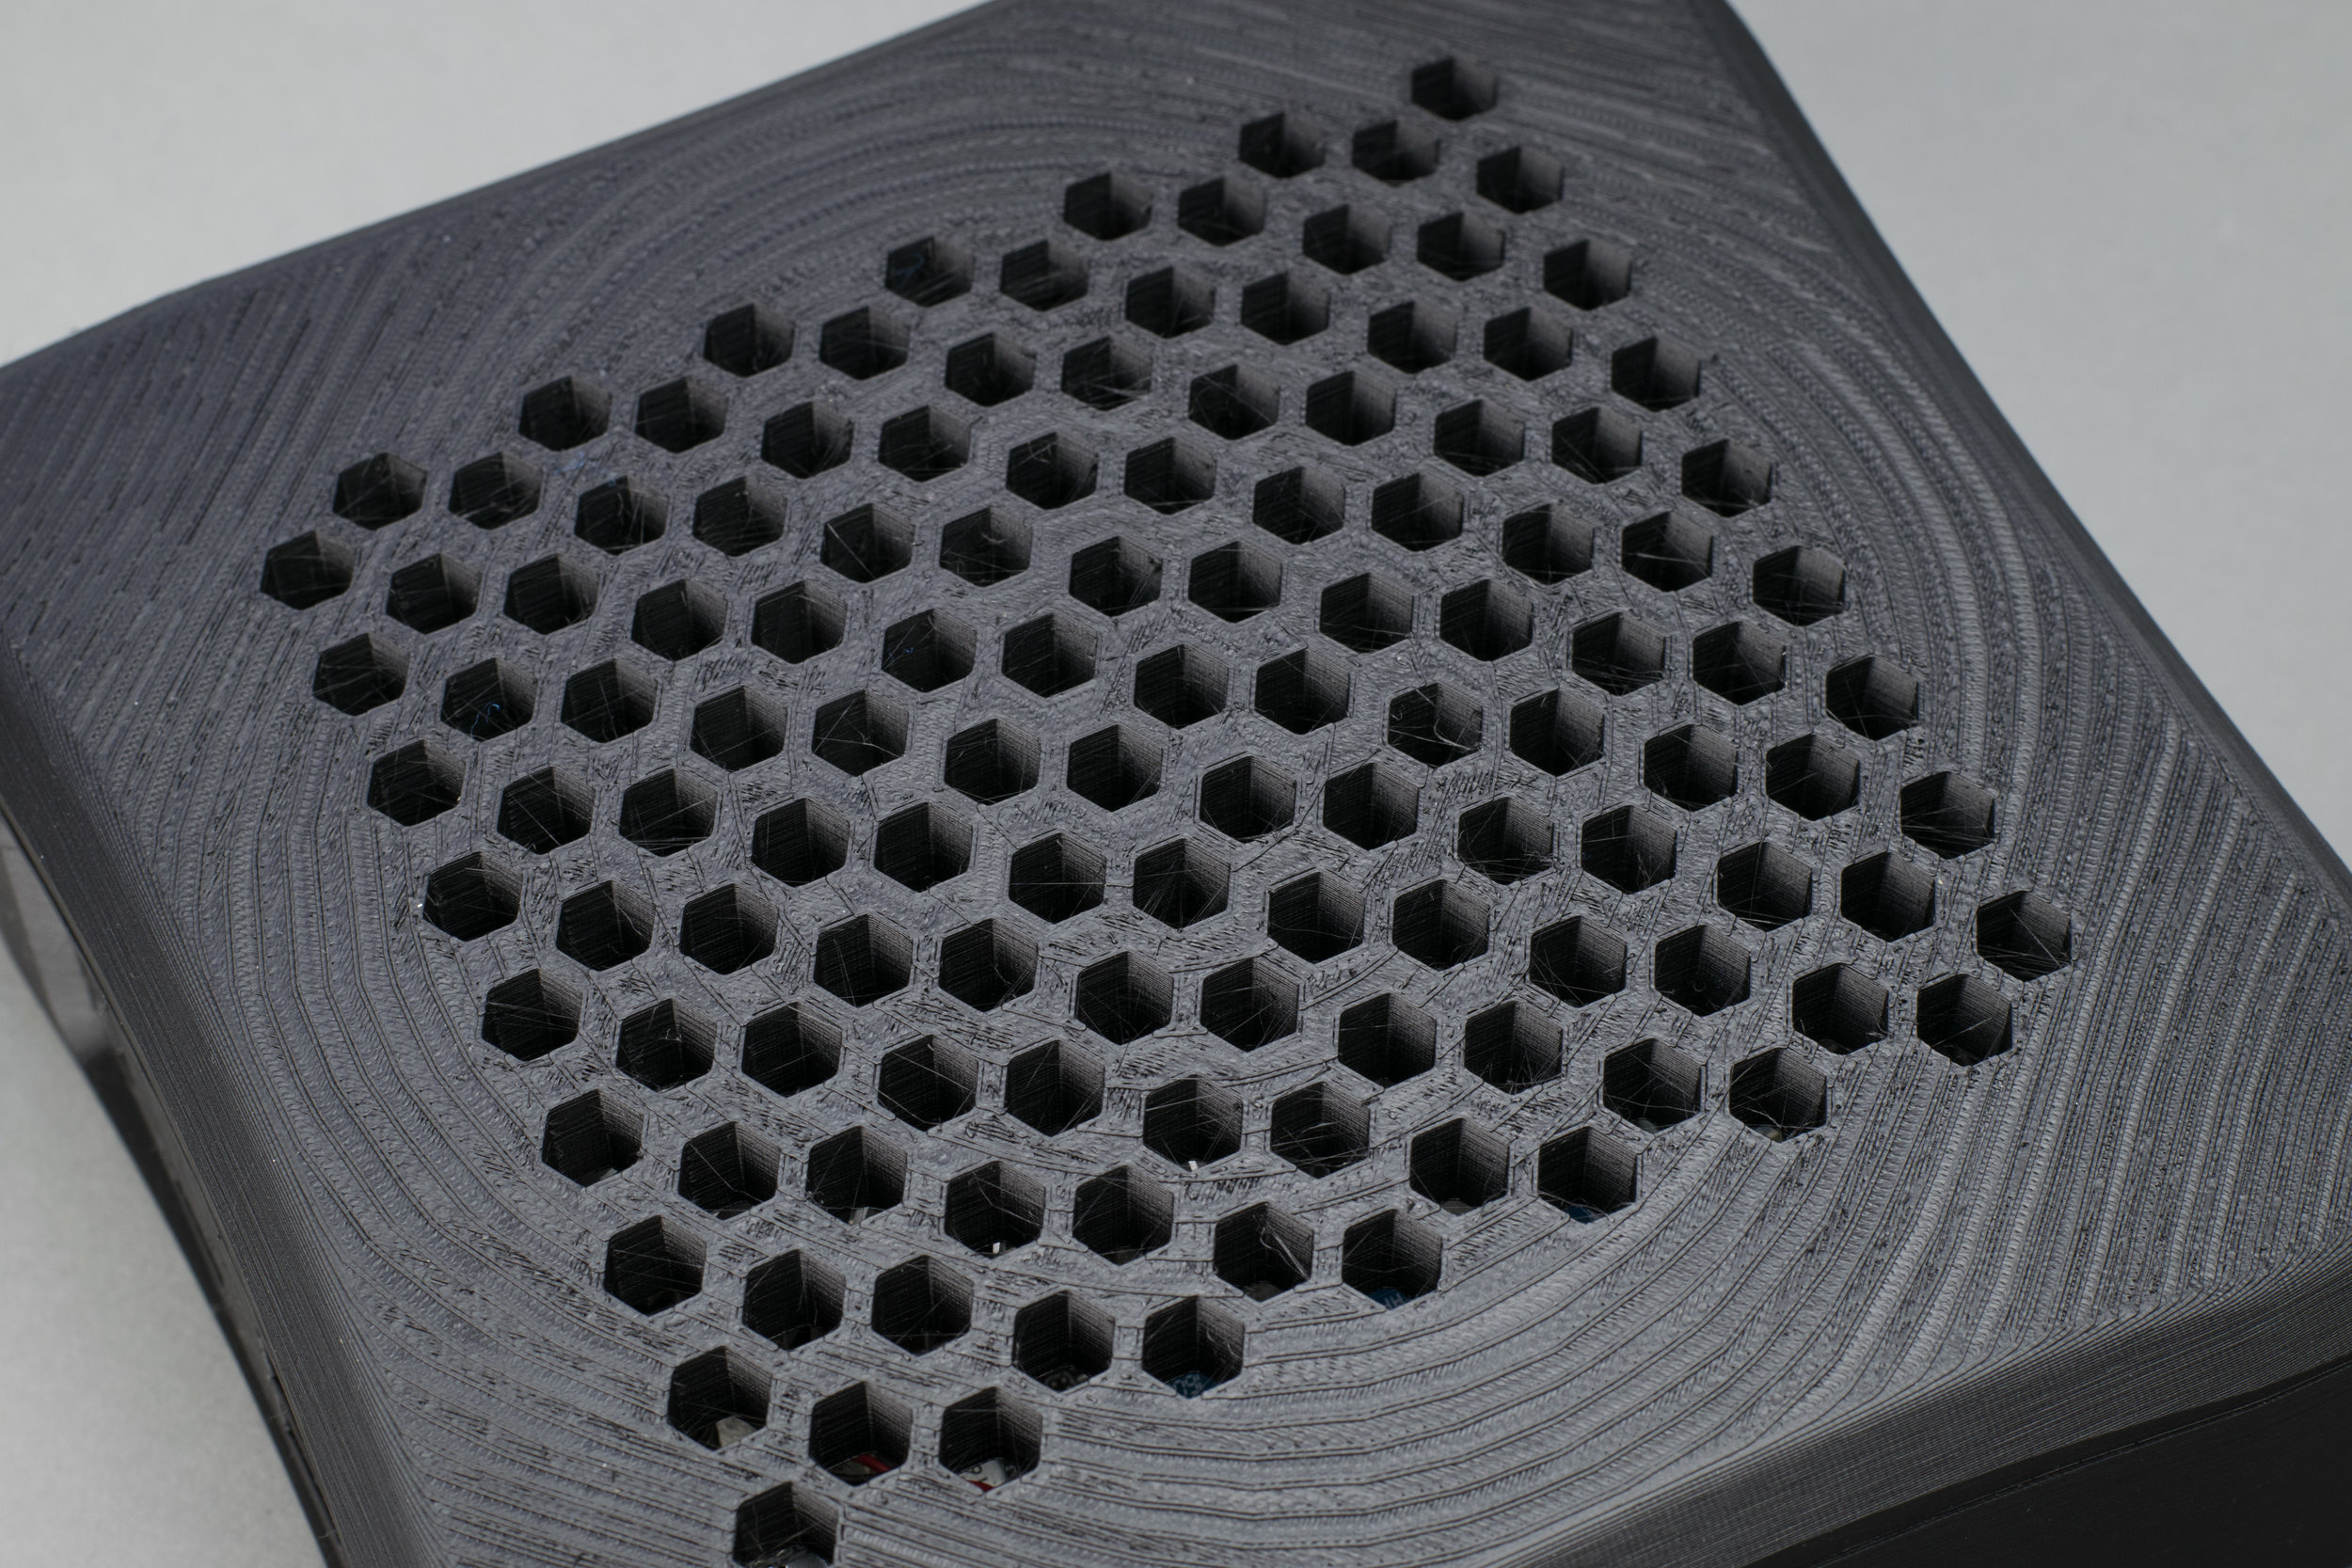
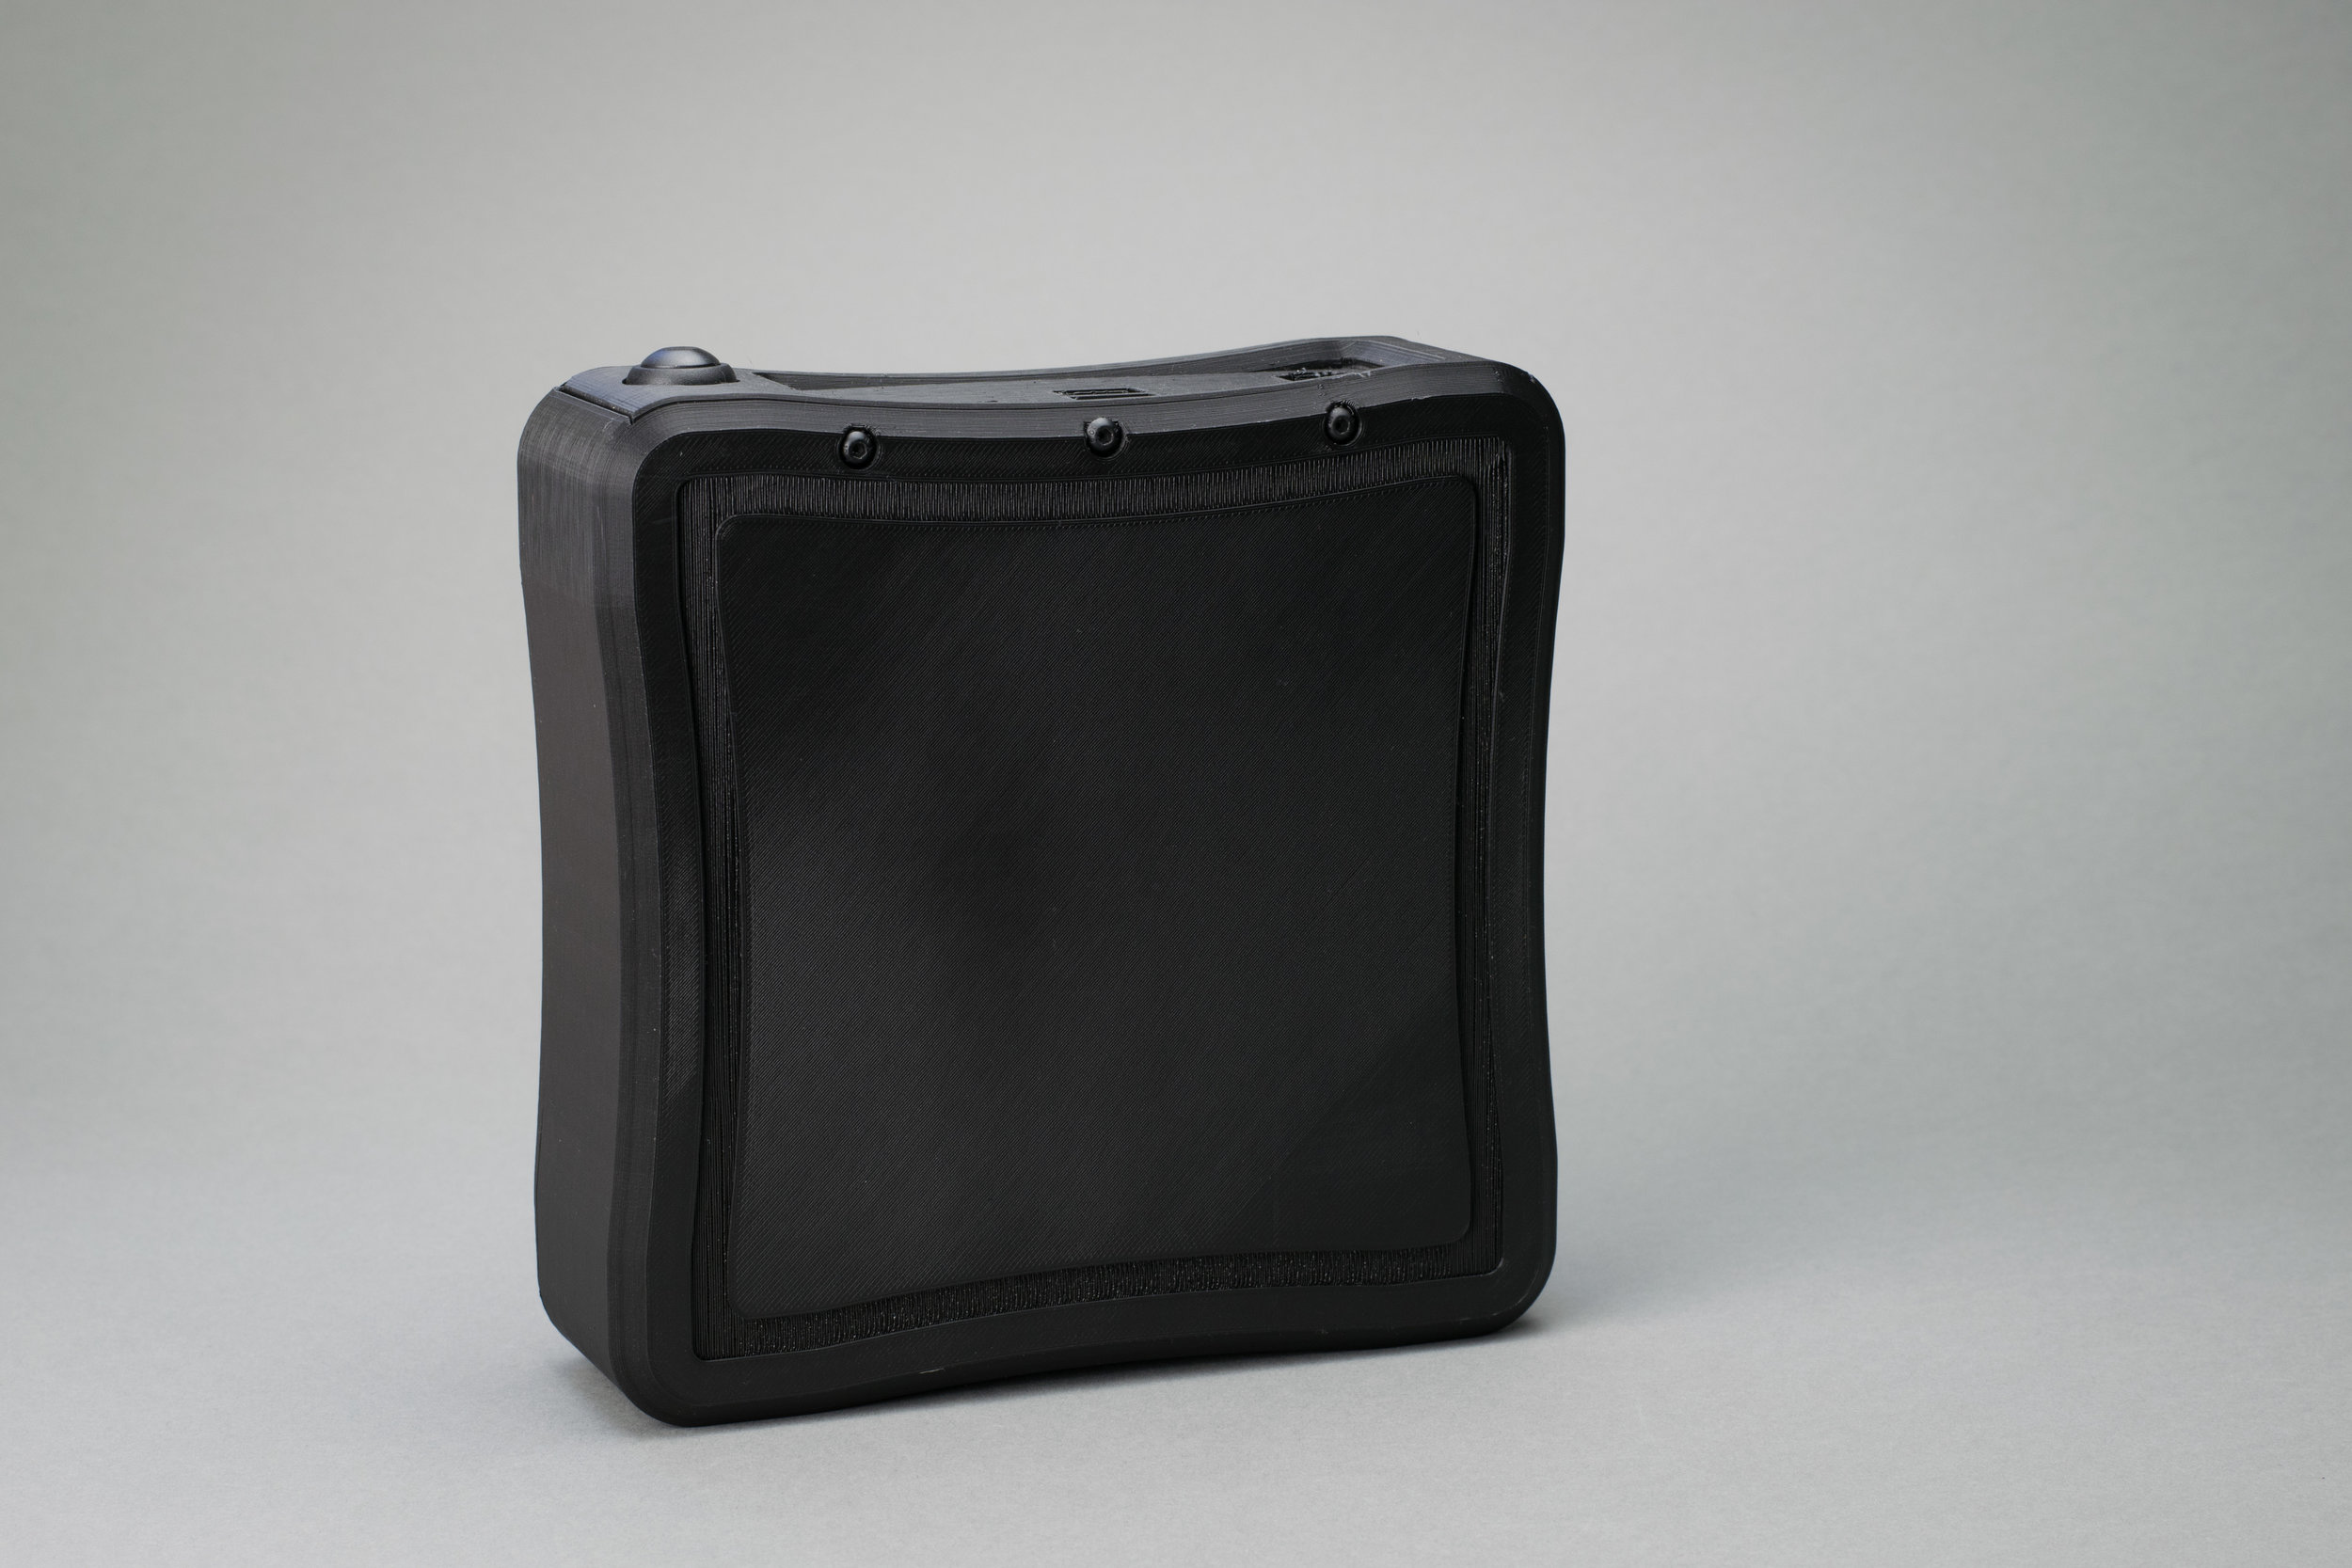
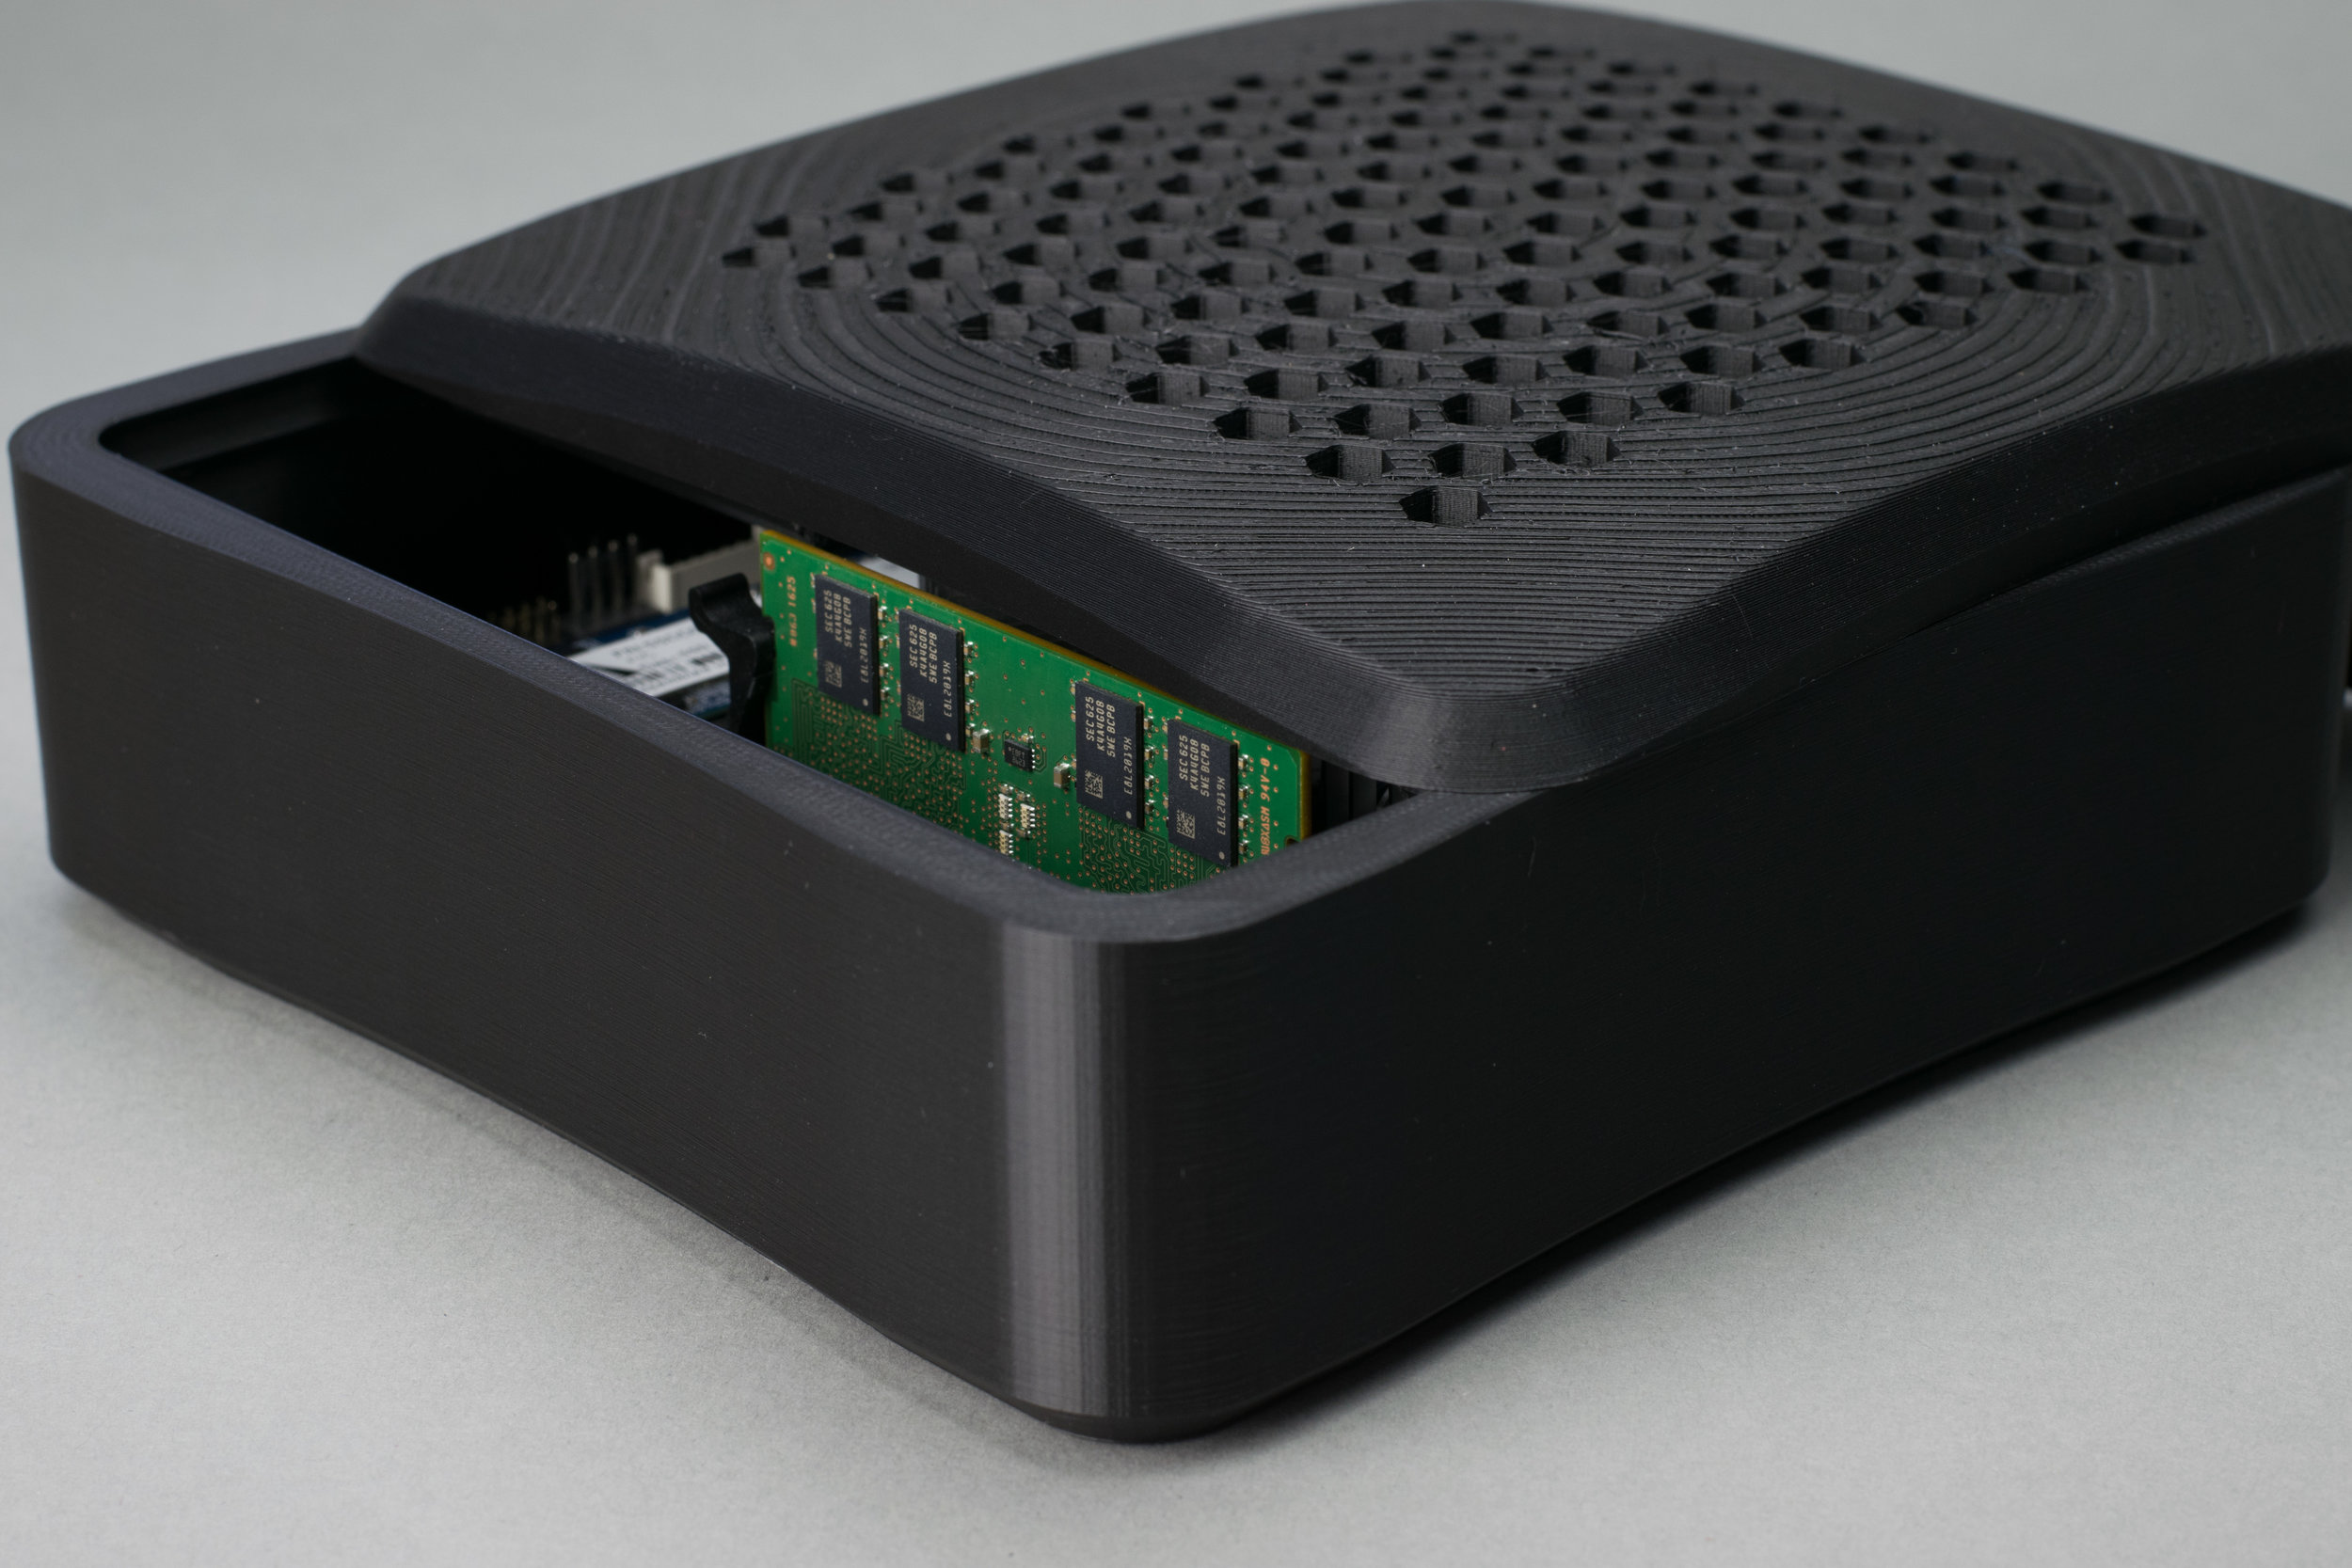
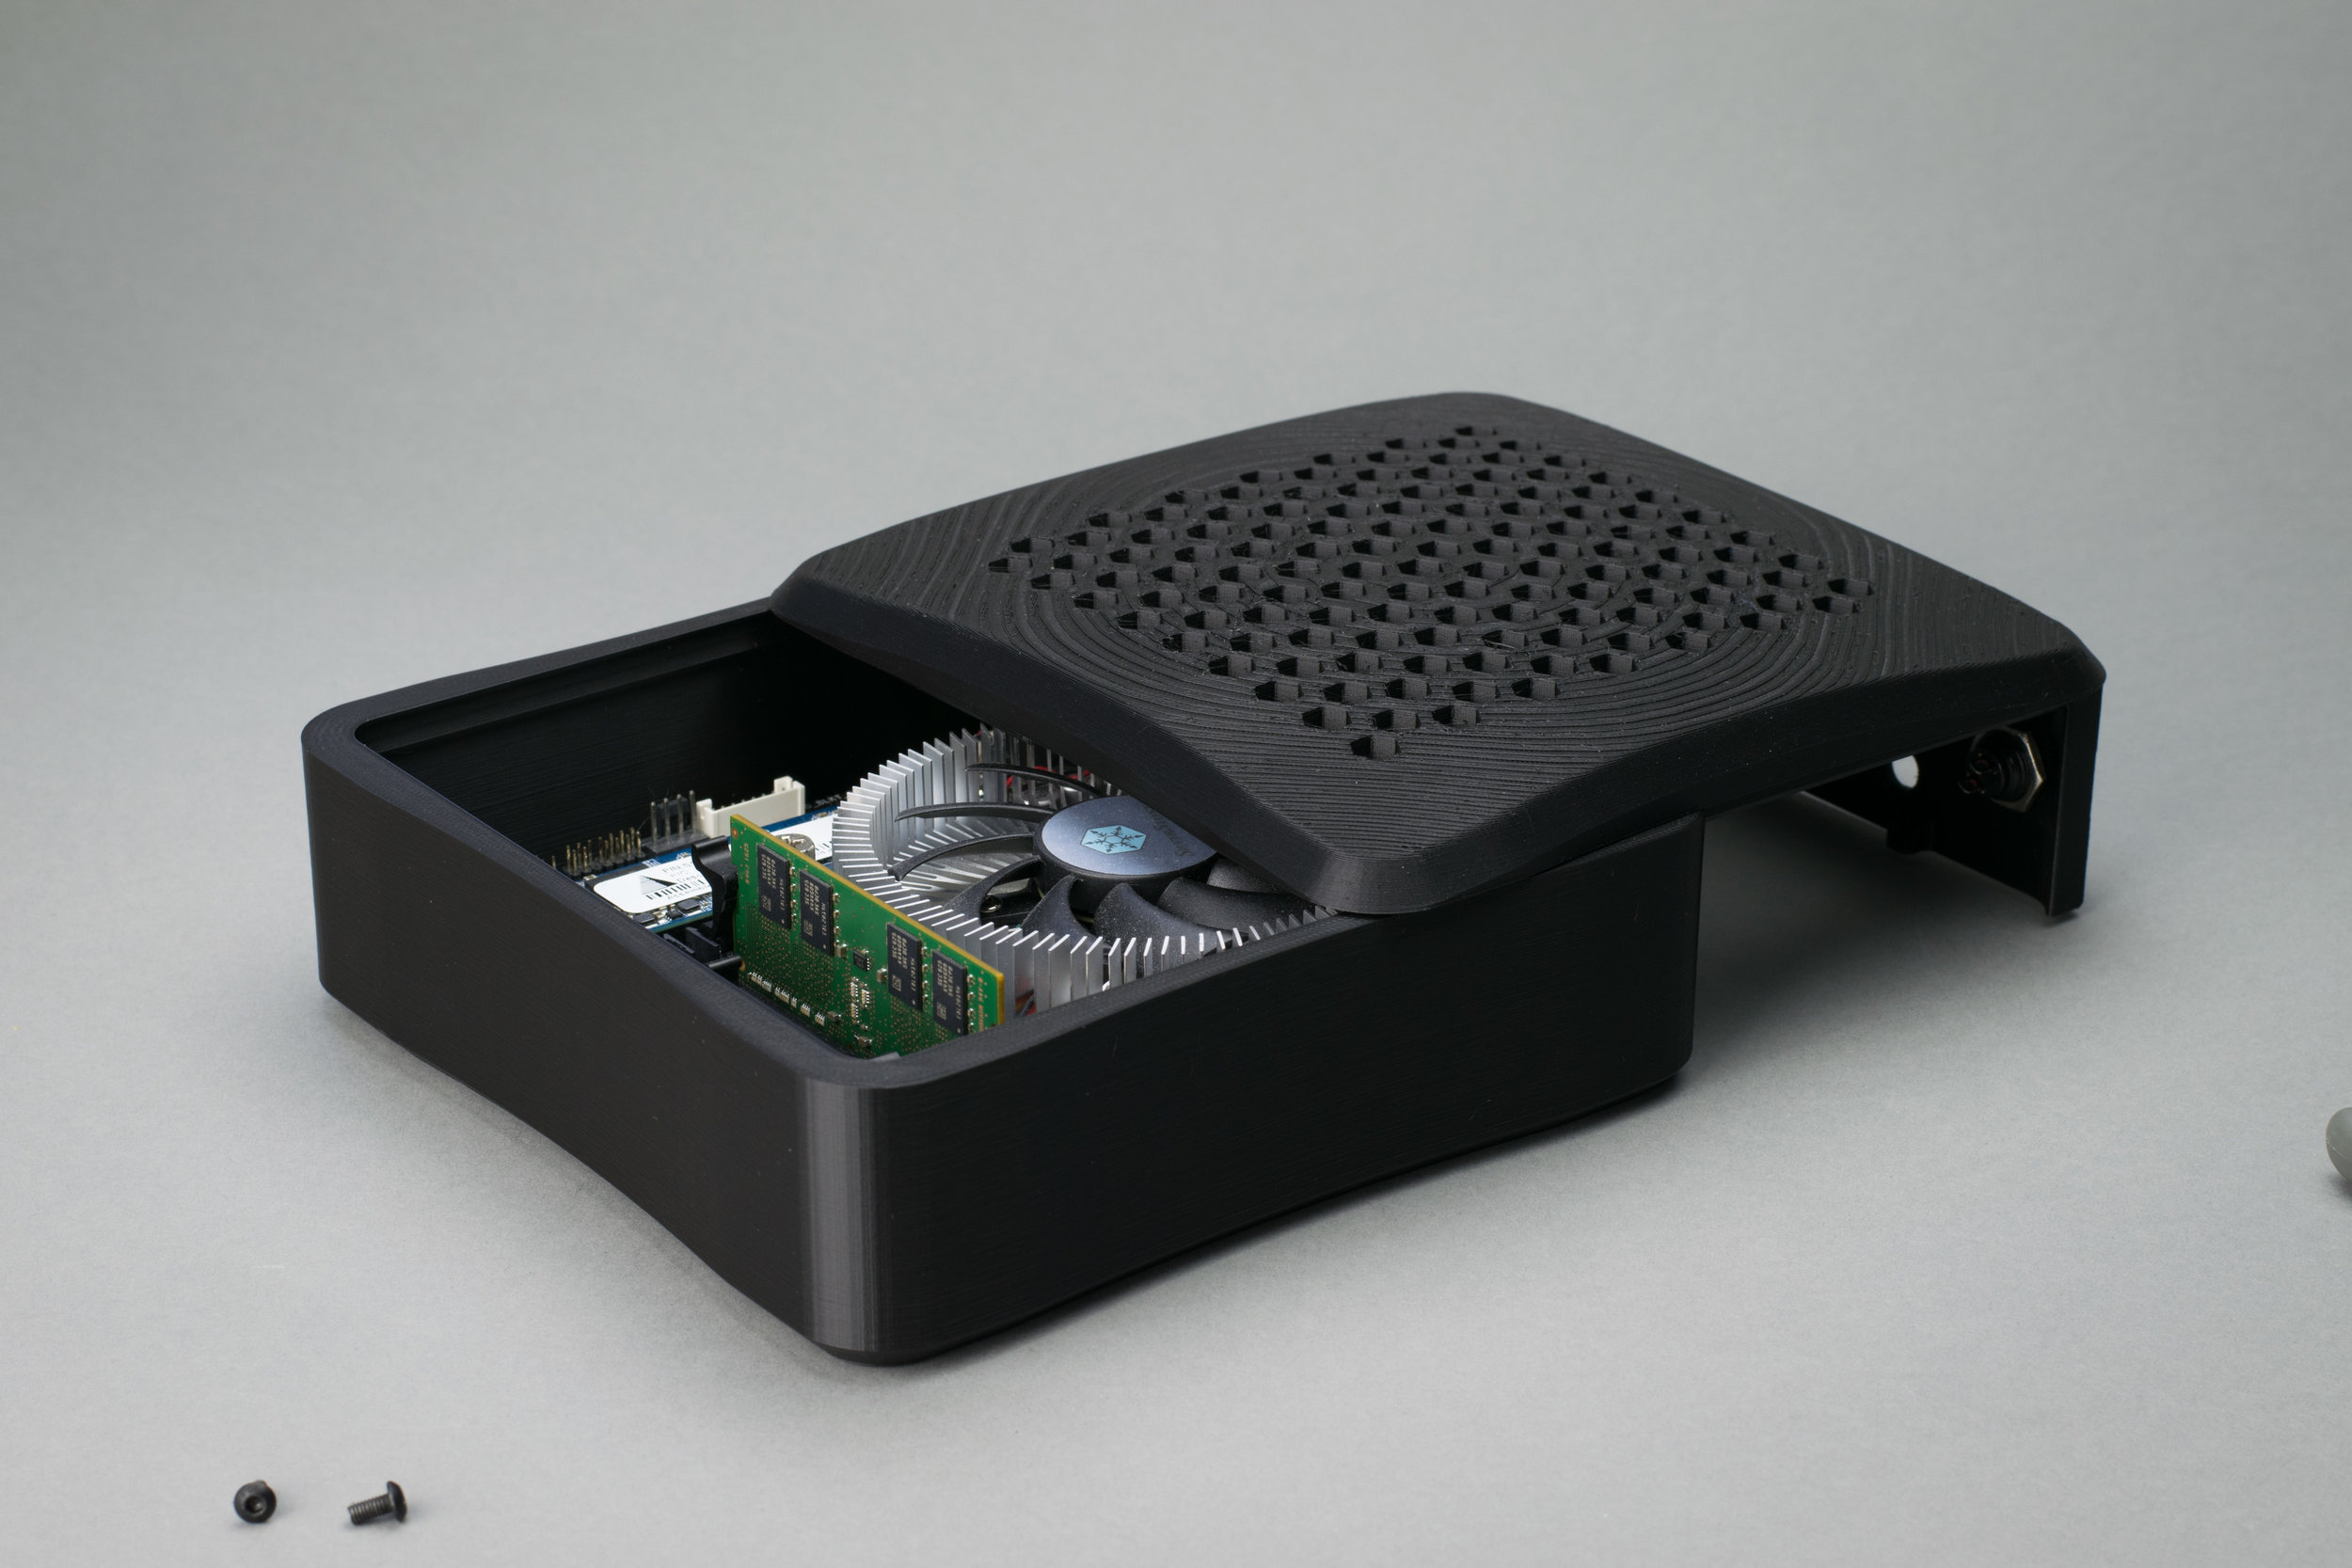
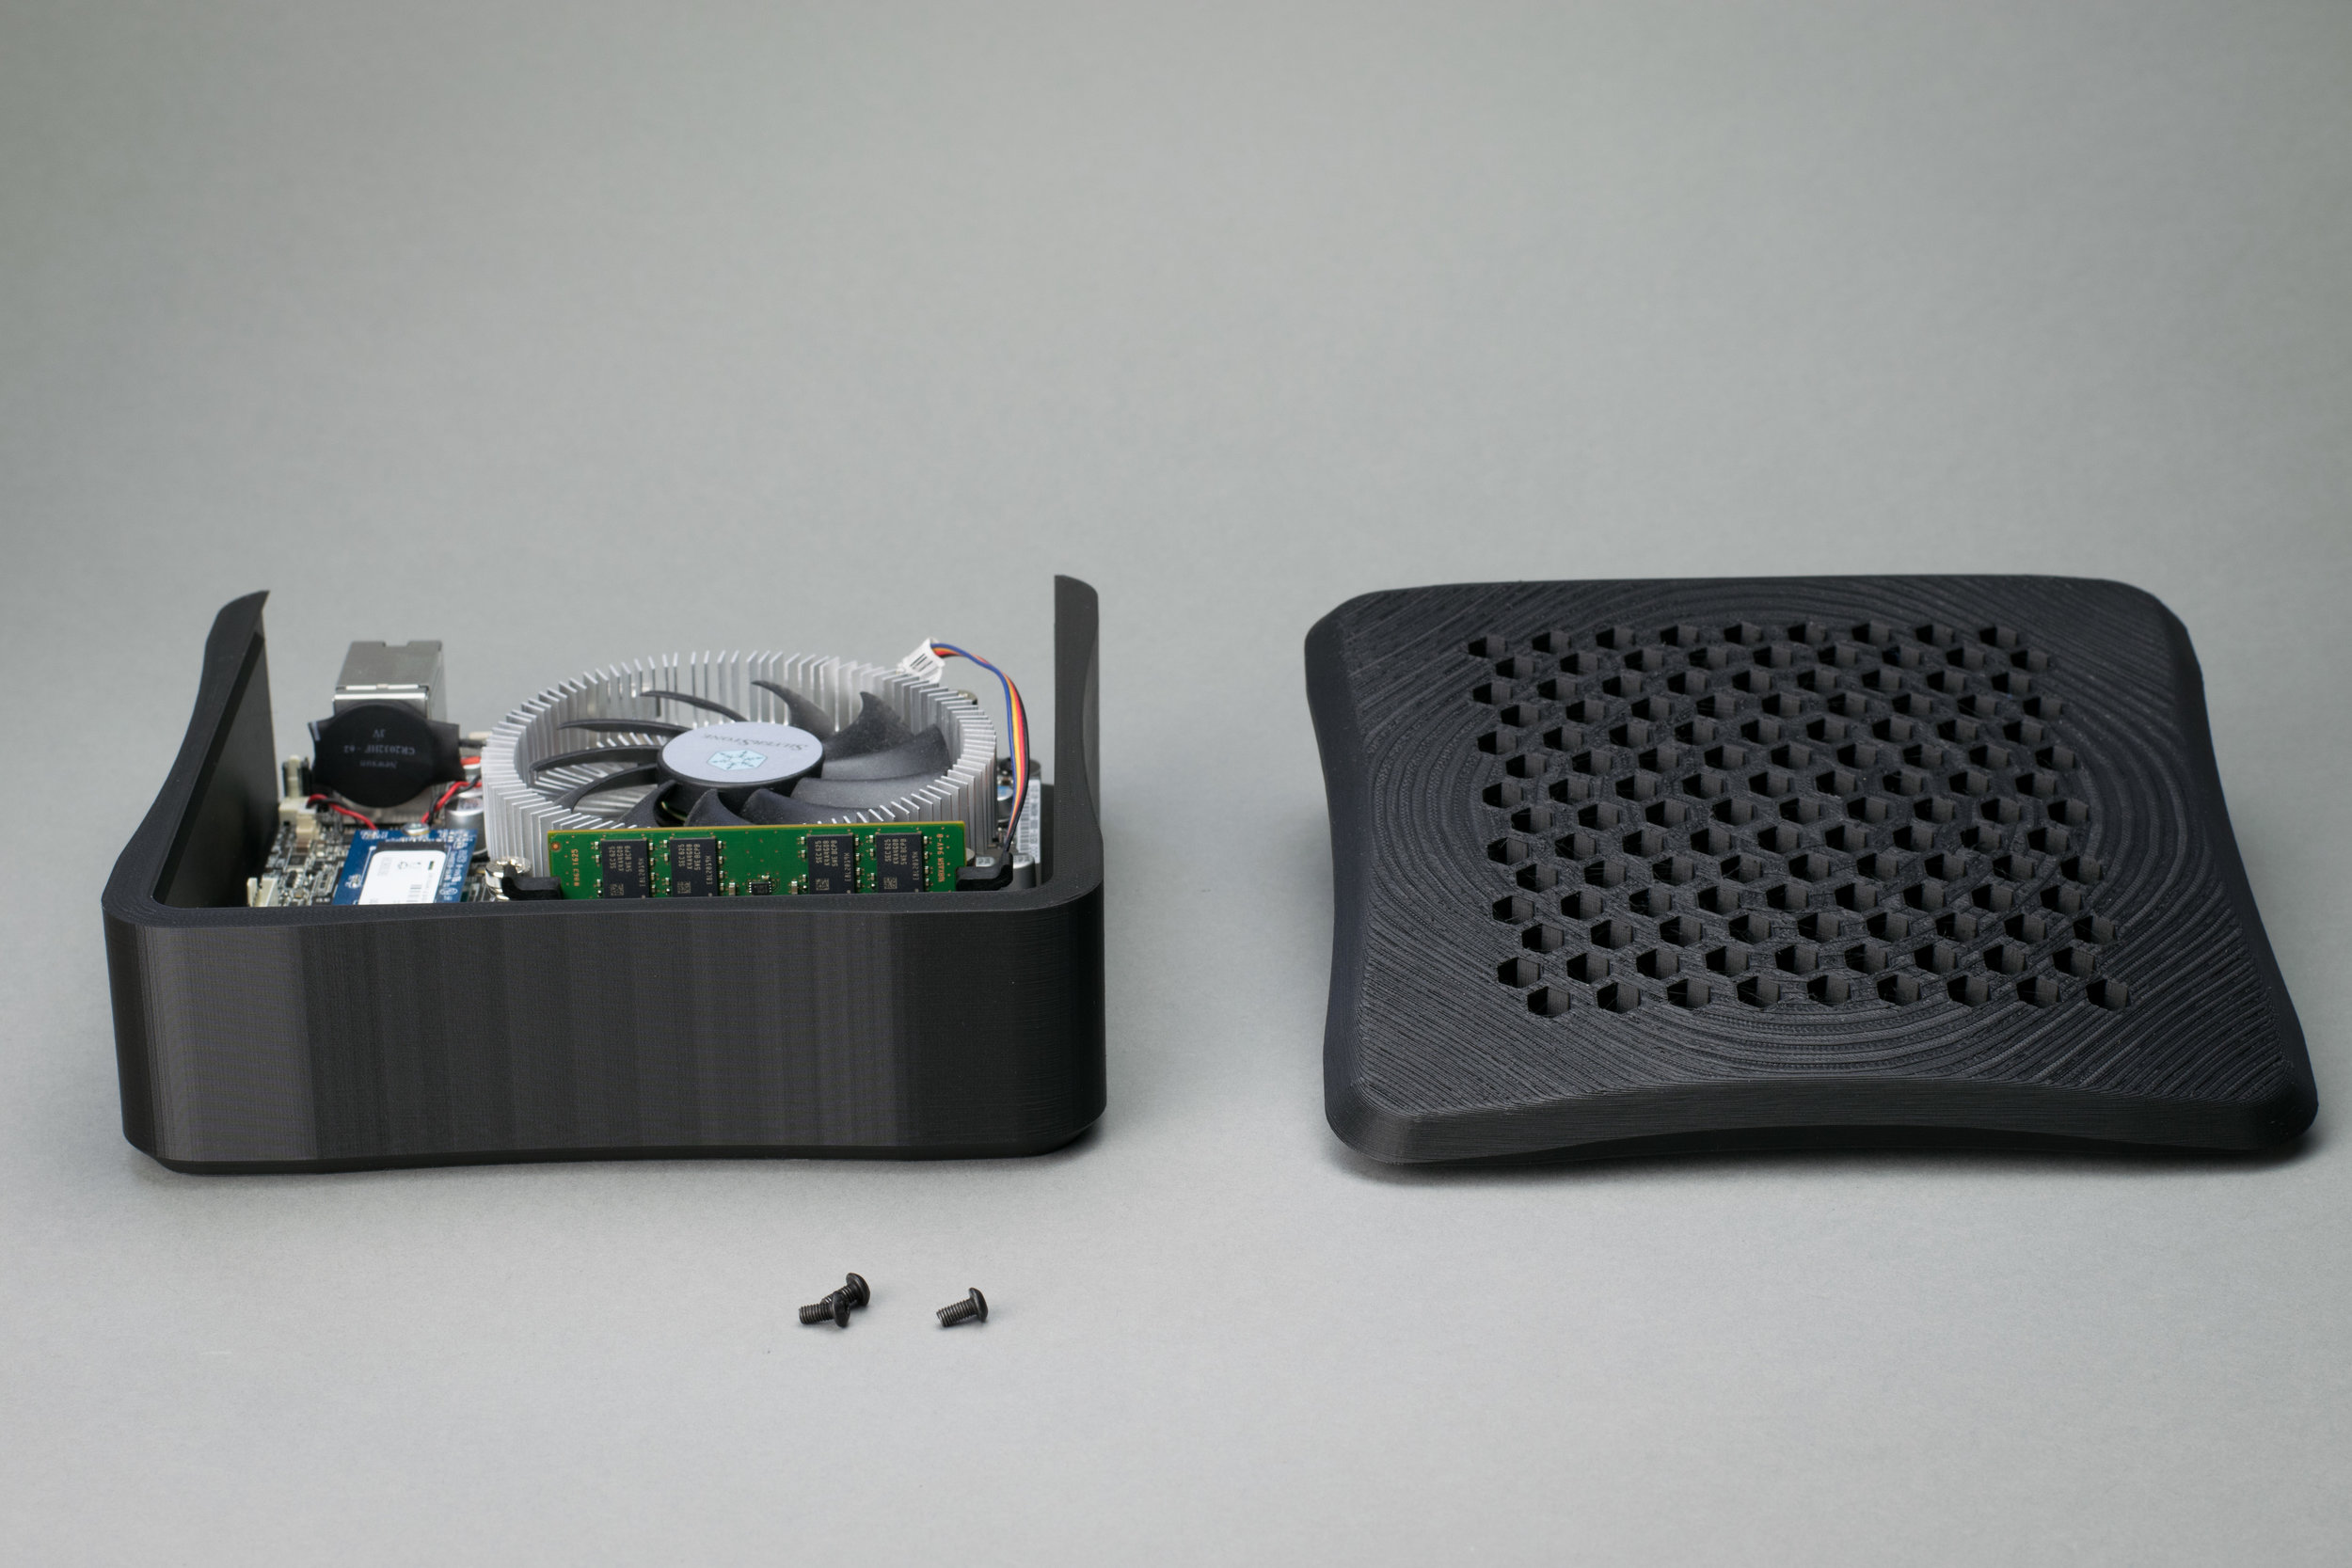

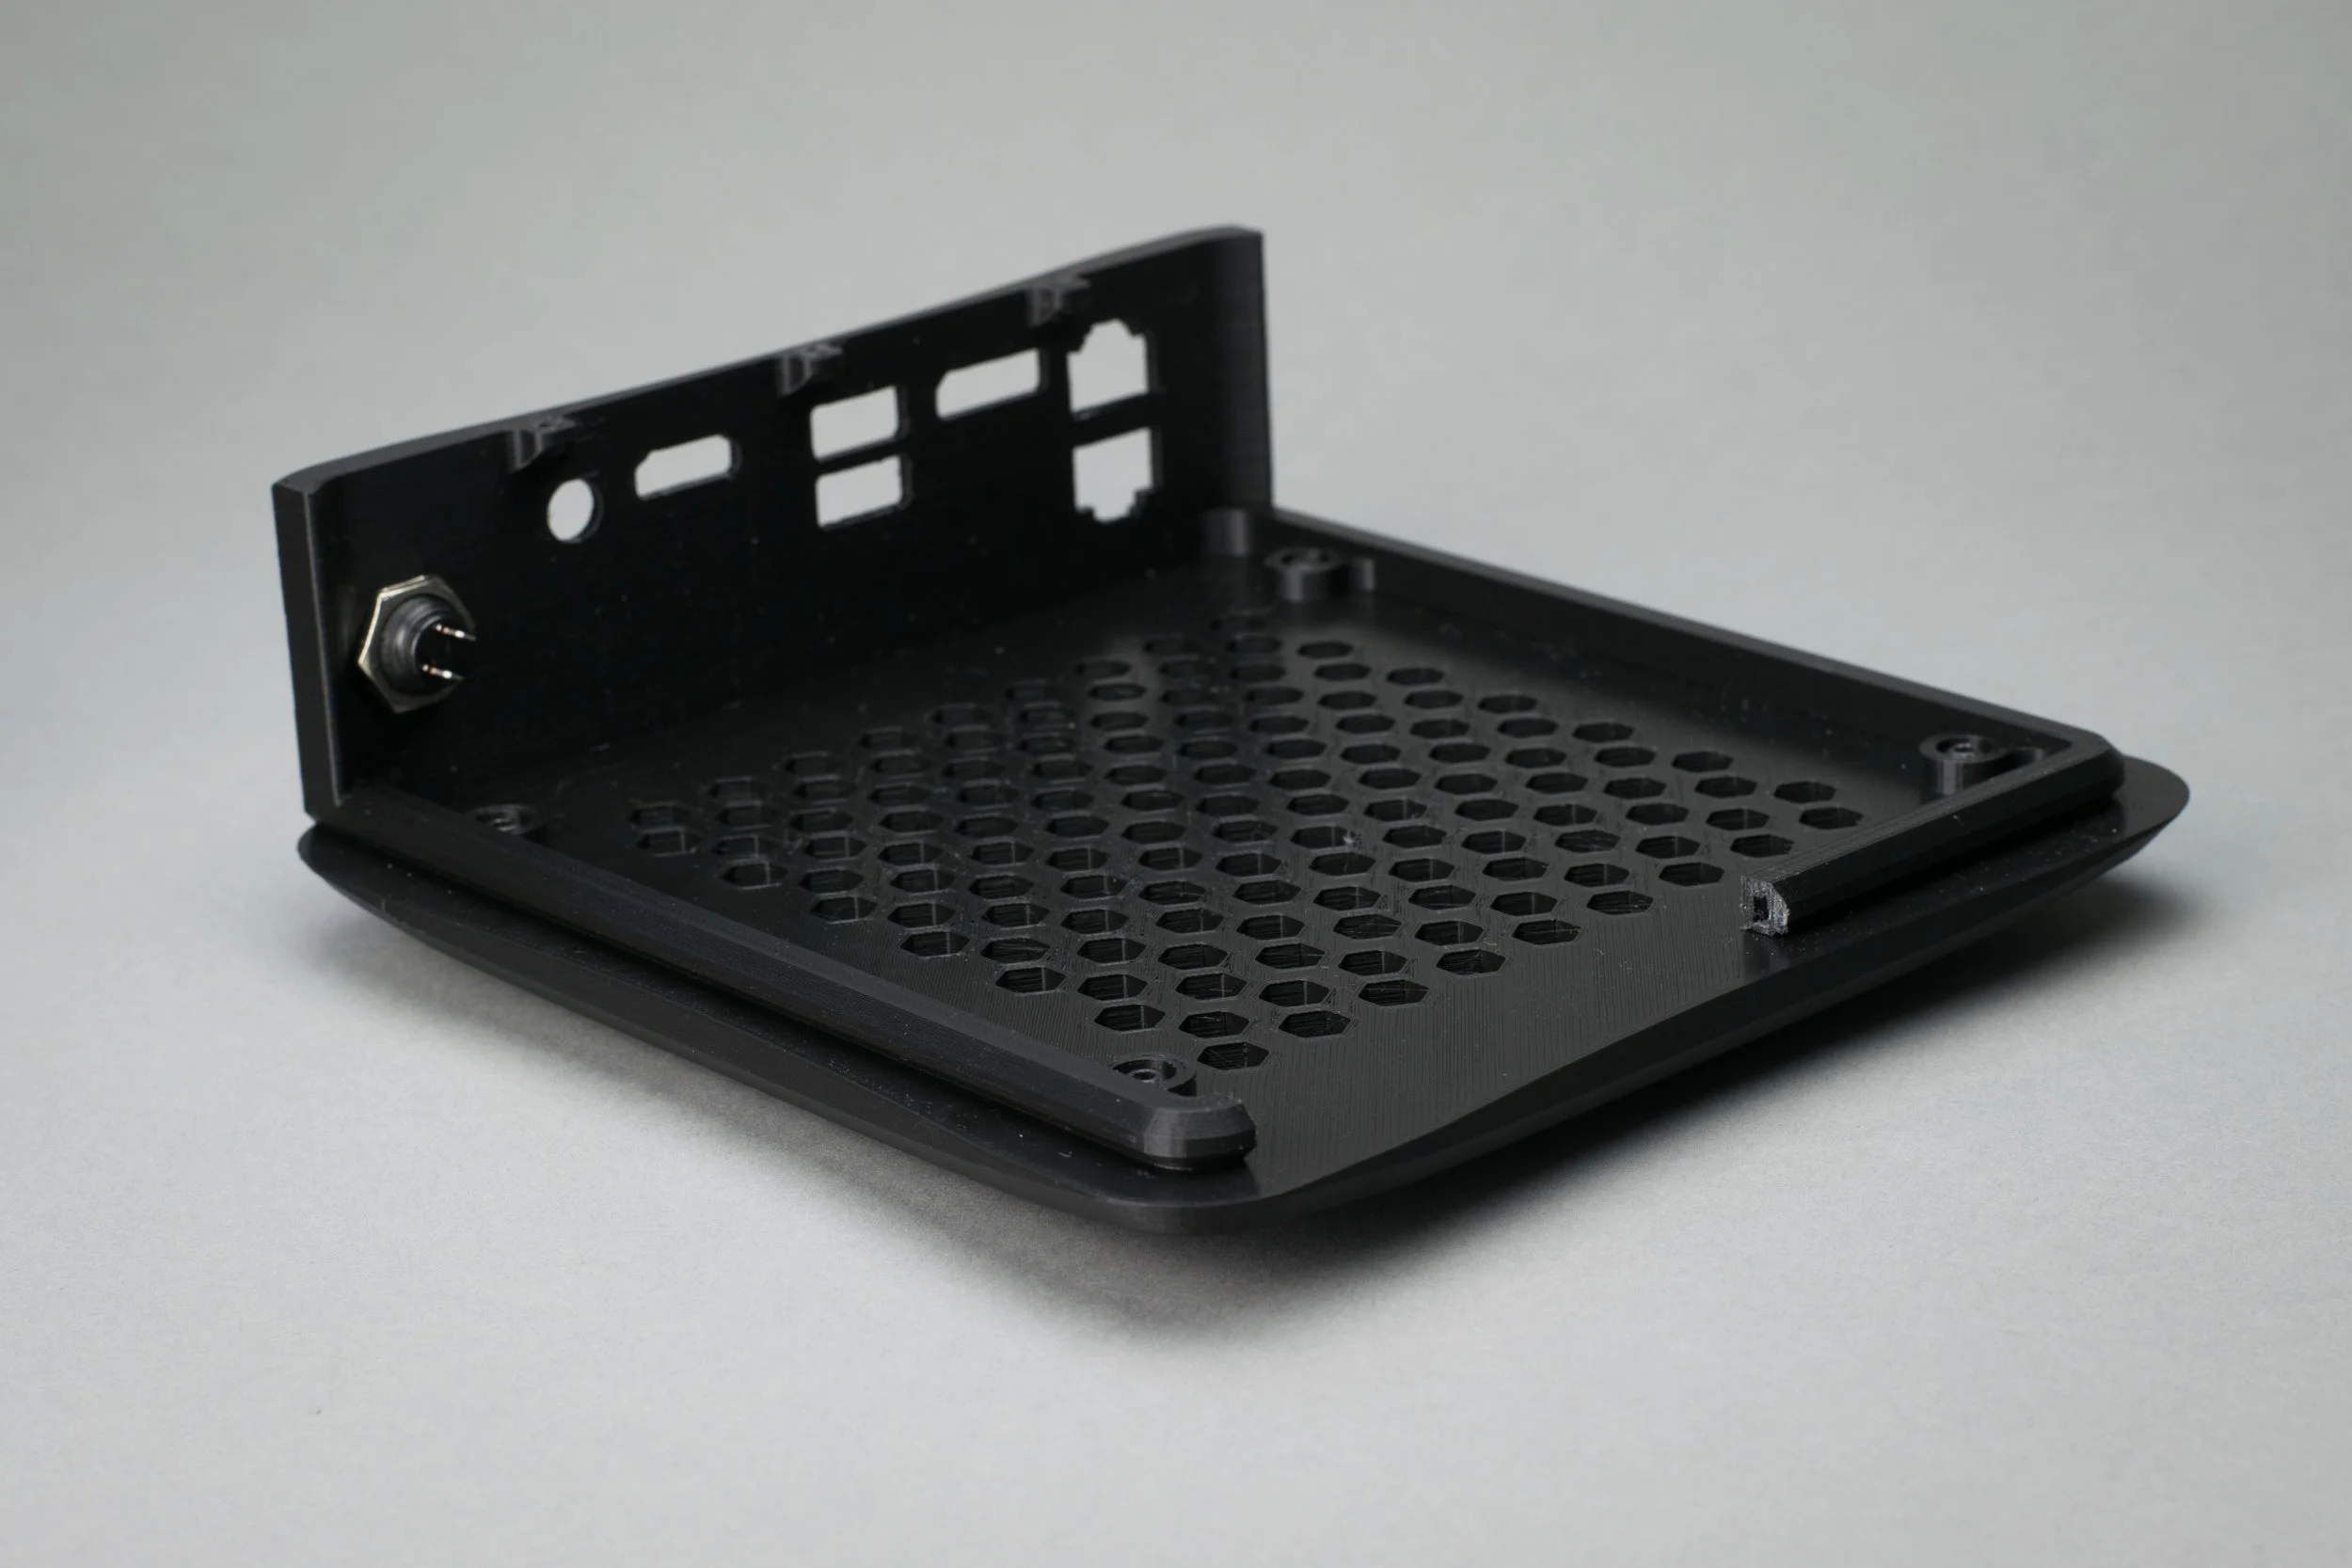
Organic 3d Printed PC Case
Inspiration: For many years, computer cases on the market follow the same tried and true formula: a plain steel box. While functional, it's not particularly adventurous in style. I love the look of Mini-Pc's with rounded edges, and took it a step forward by integrating organic lines throughout, minimizing flat (uninteresting) surfaces.
Use: Despite taking up a mere 1.3L in volume, the computer punches far above its belt. It uses a industry standard STX motherboard, with a fully fledged Intel desktop CPU. Special consideration was taken in making the case easy to print and assemble. The whole top/back section slides together with the main body and is fastened by 3 integrated screws on the bottom of the case.
Results: Despite the inherent drawbacks of FDM 3d printing, I thought the final result was interesting even if it didn't meet my original vision. The topographic-esque top of the case is a culprit of the 3d printer's layer by layer approach, something unintentional yet very unique.
Cost: Parts for the case were printed over the course of several days, reflecting one of the biggest drawbacks of 3d printing for production - time. However material cost was minimal, with the case only costing a few dollars in raw plastic.
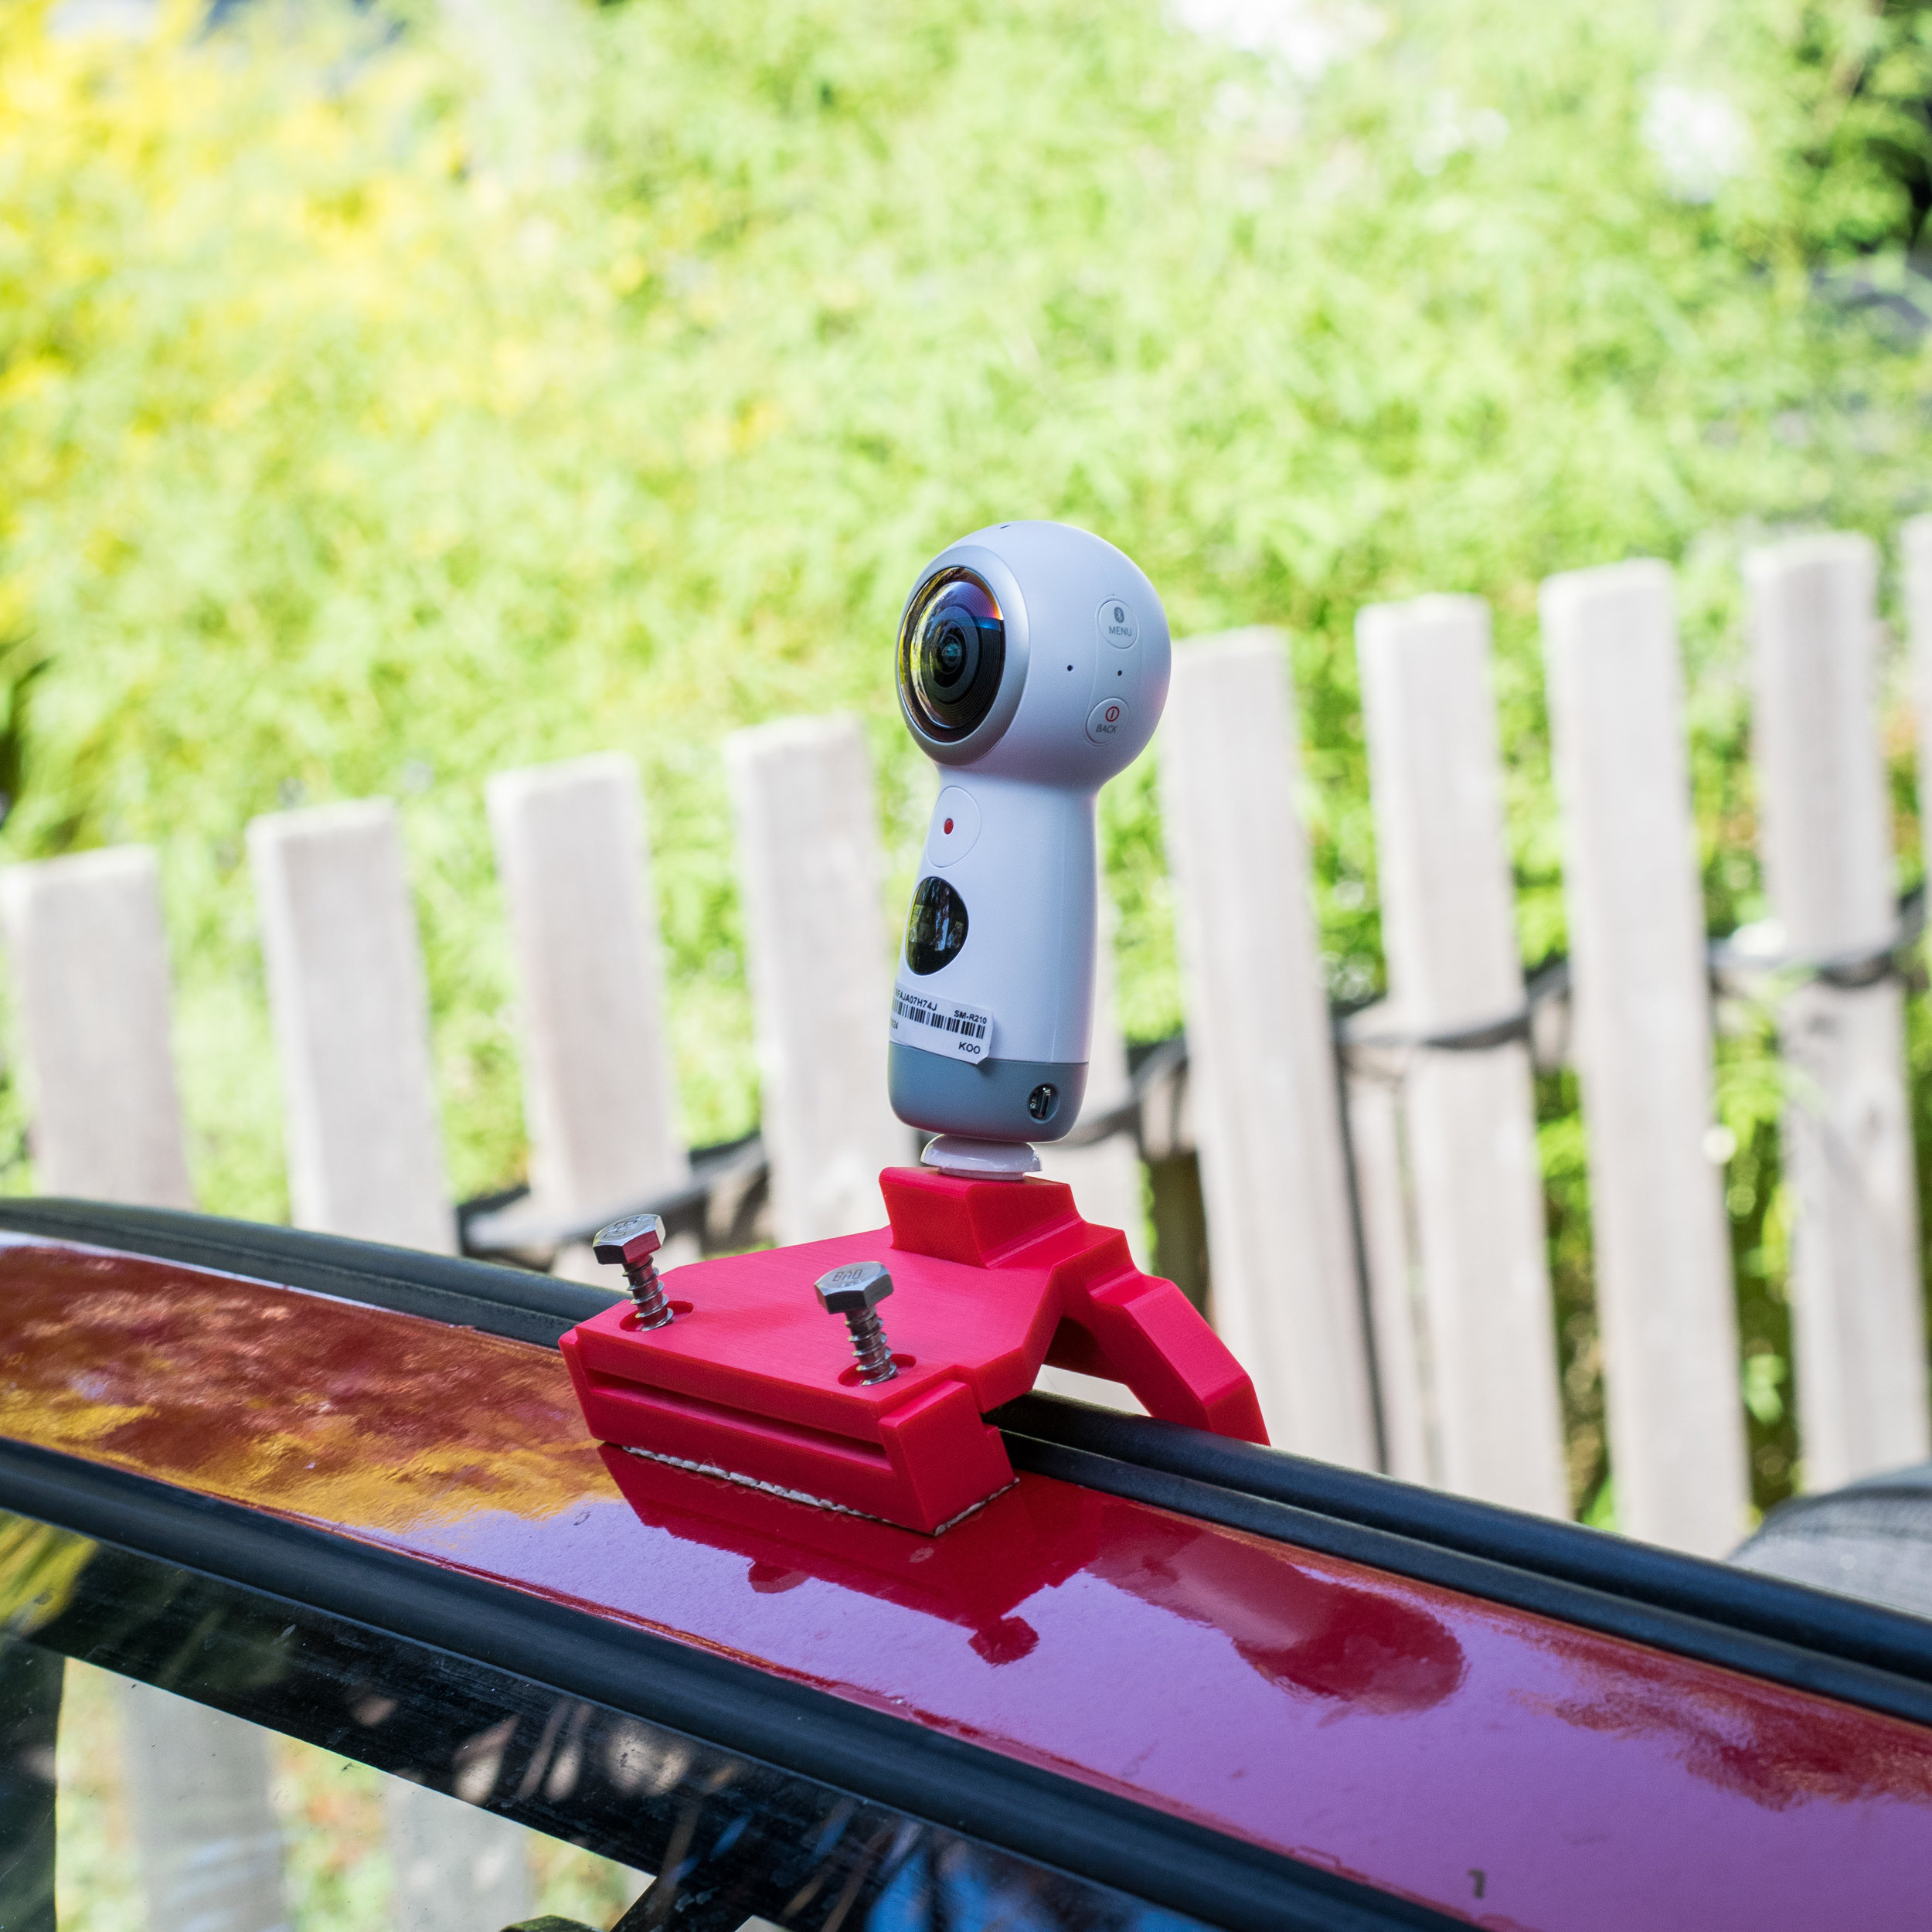
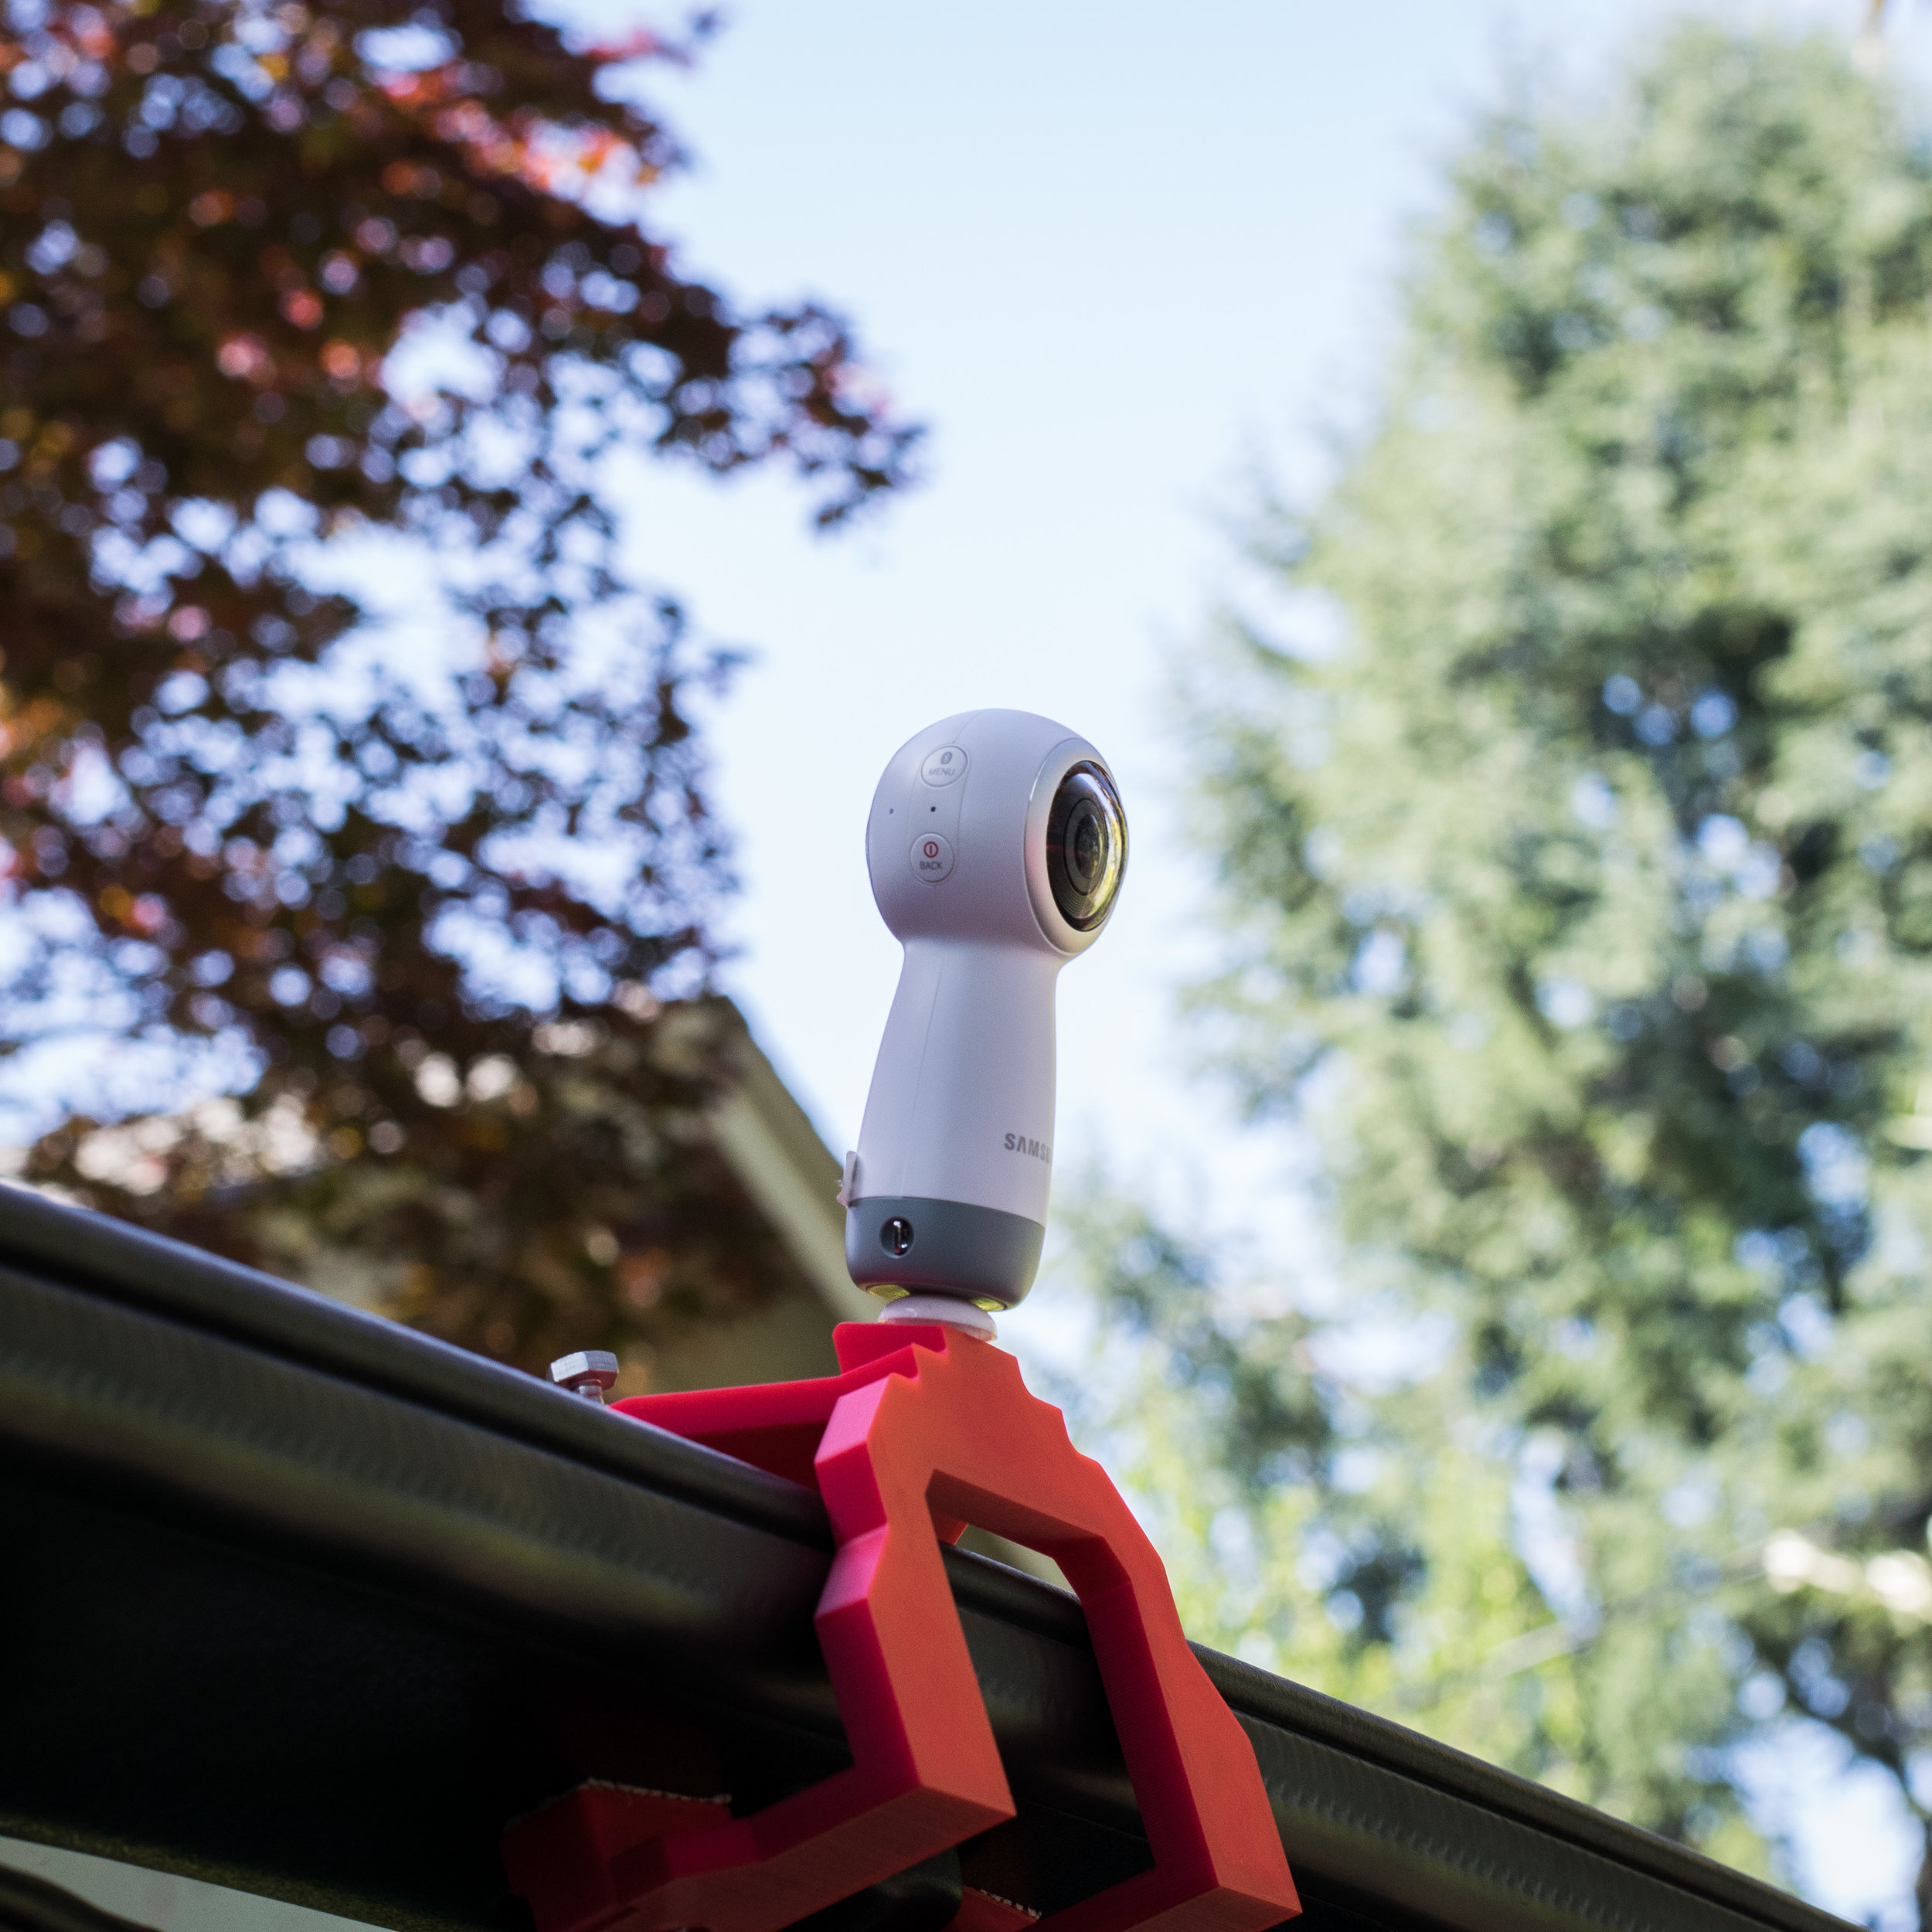
360 degree Camera mount
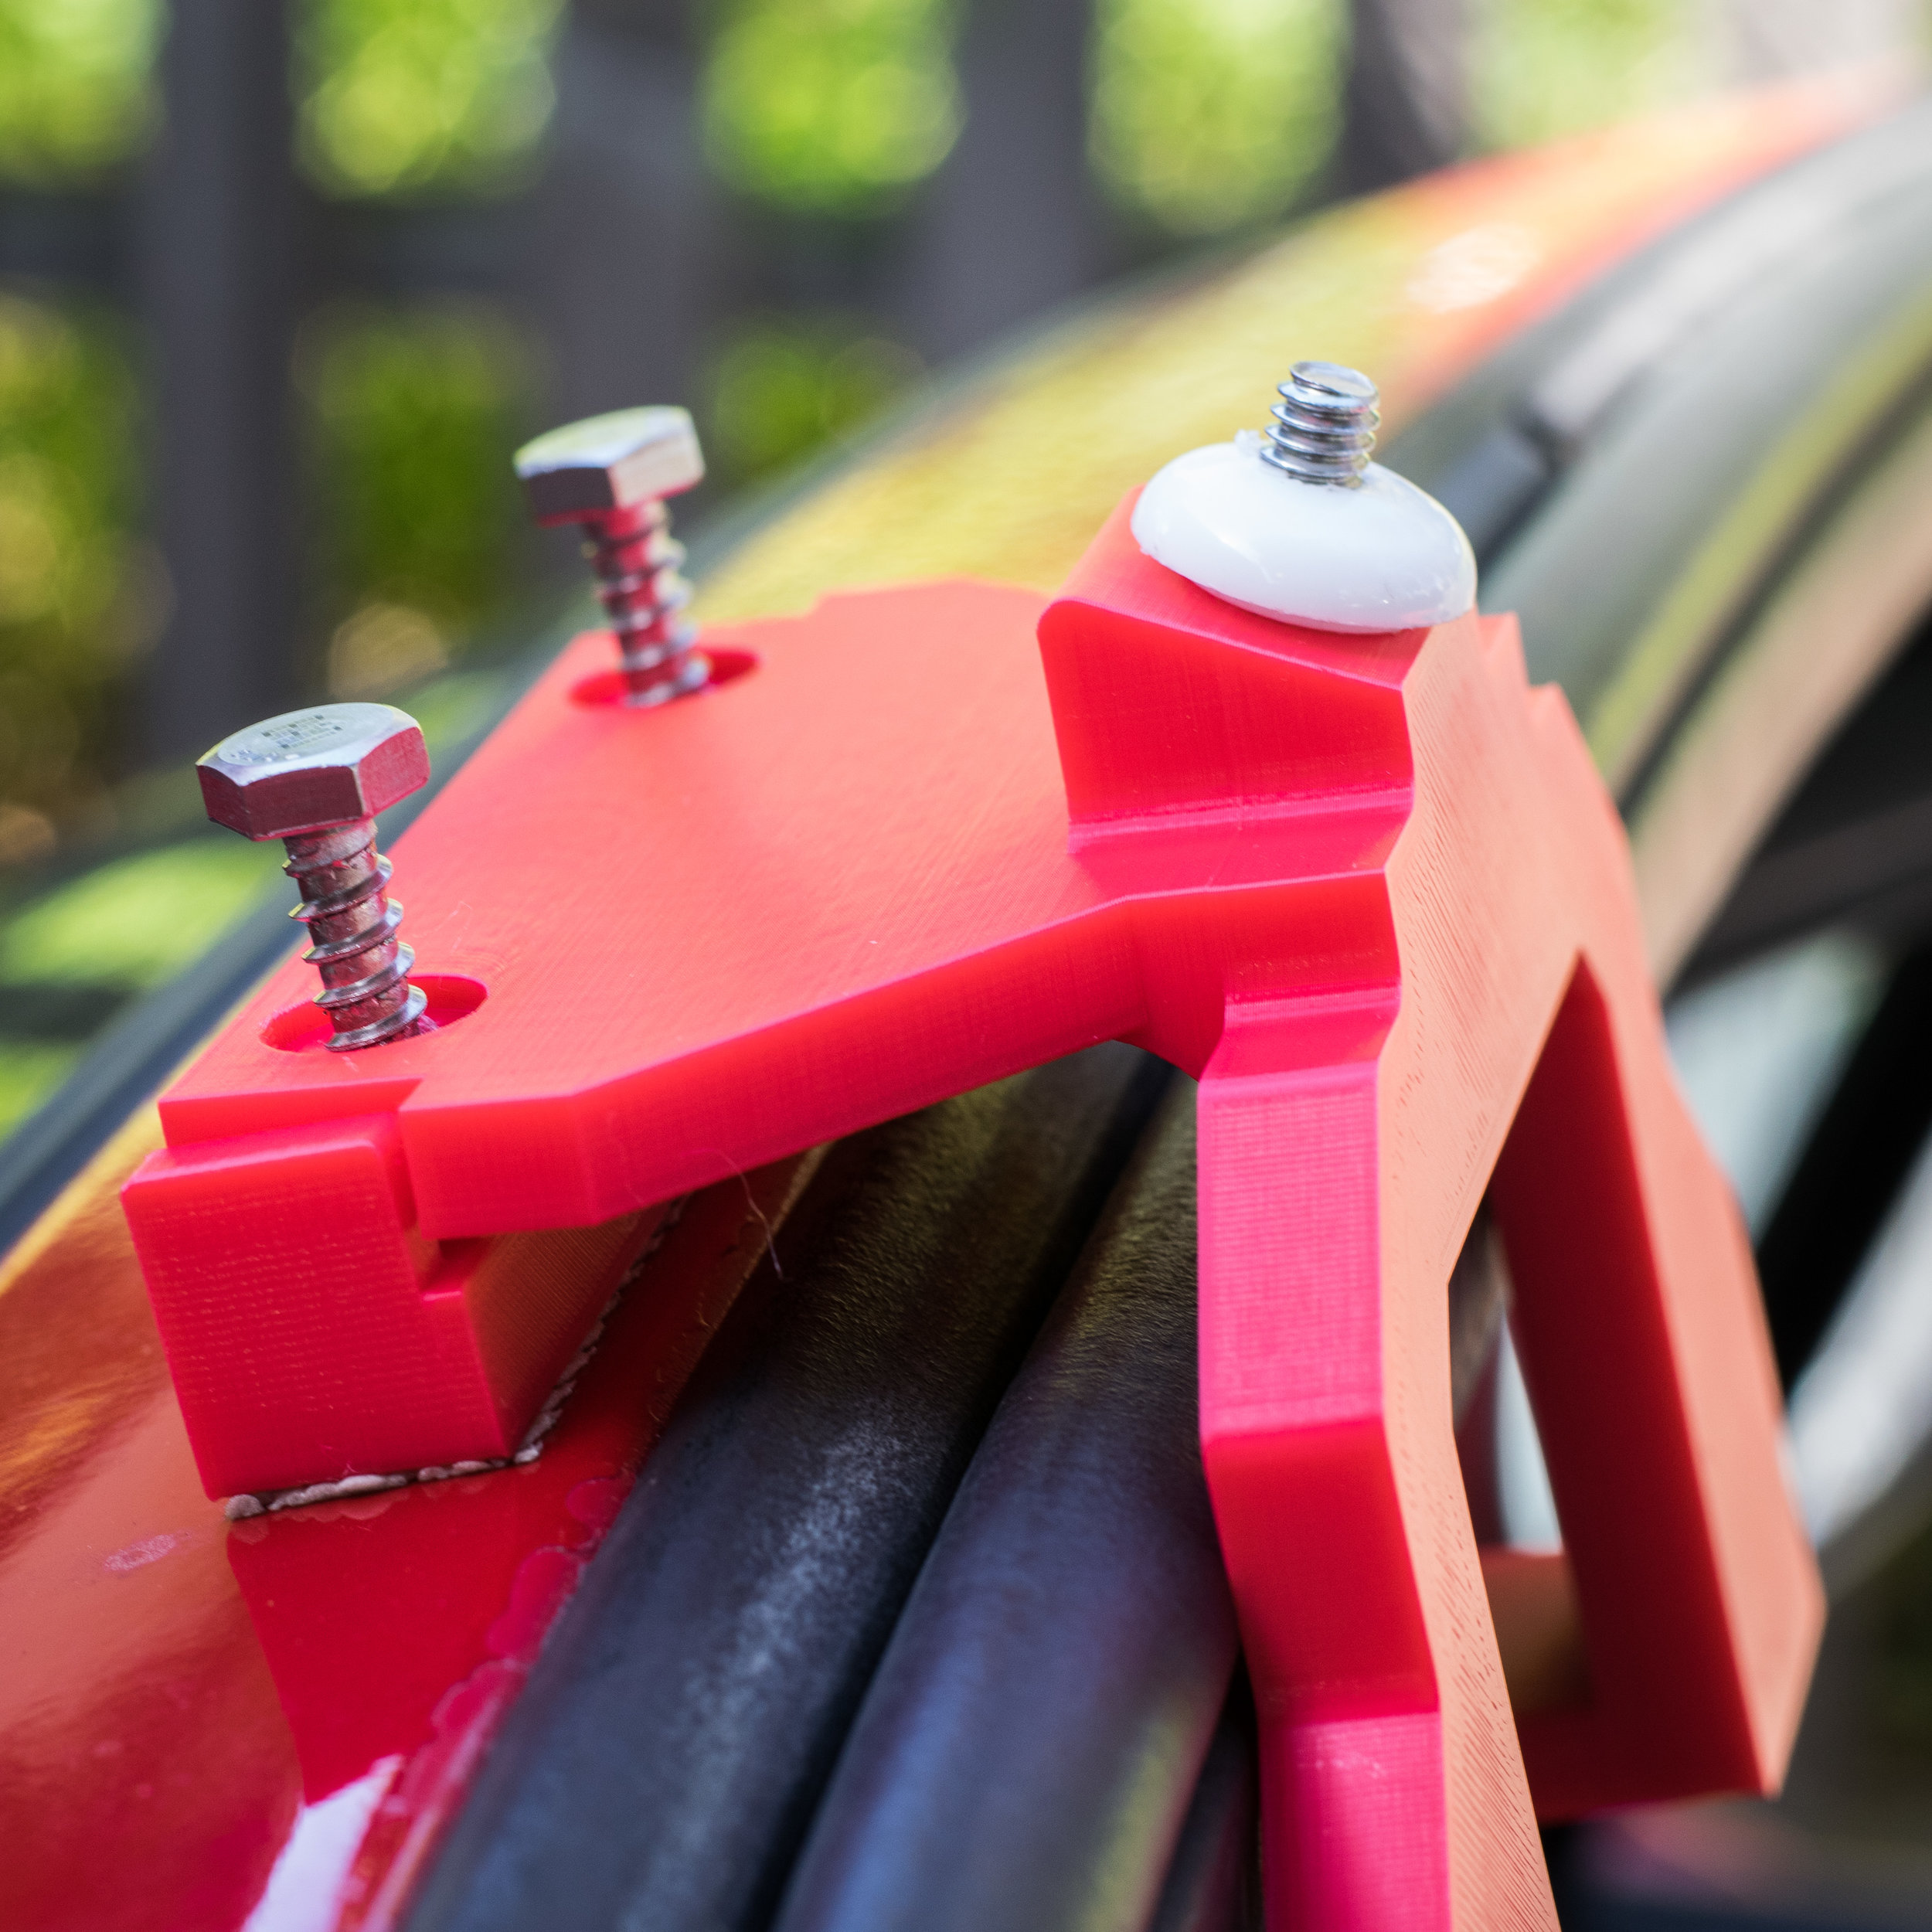
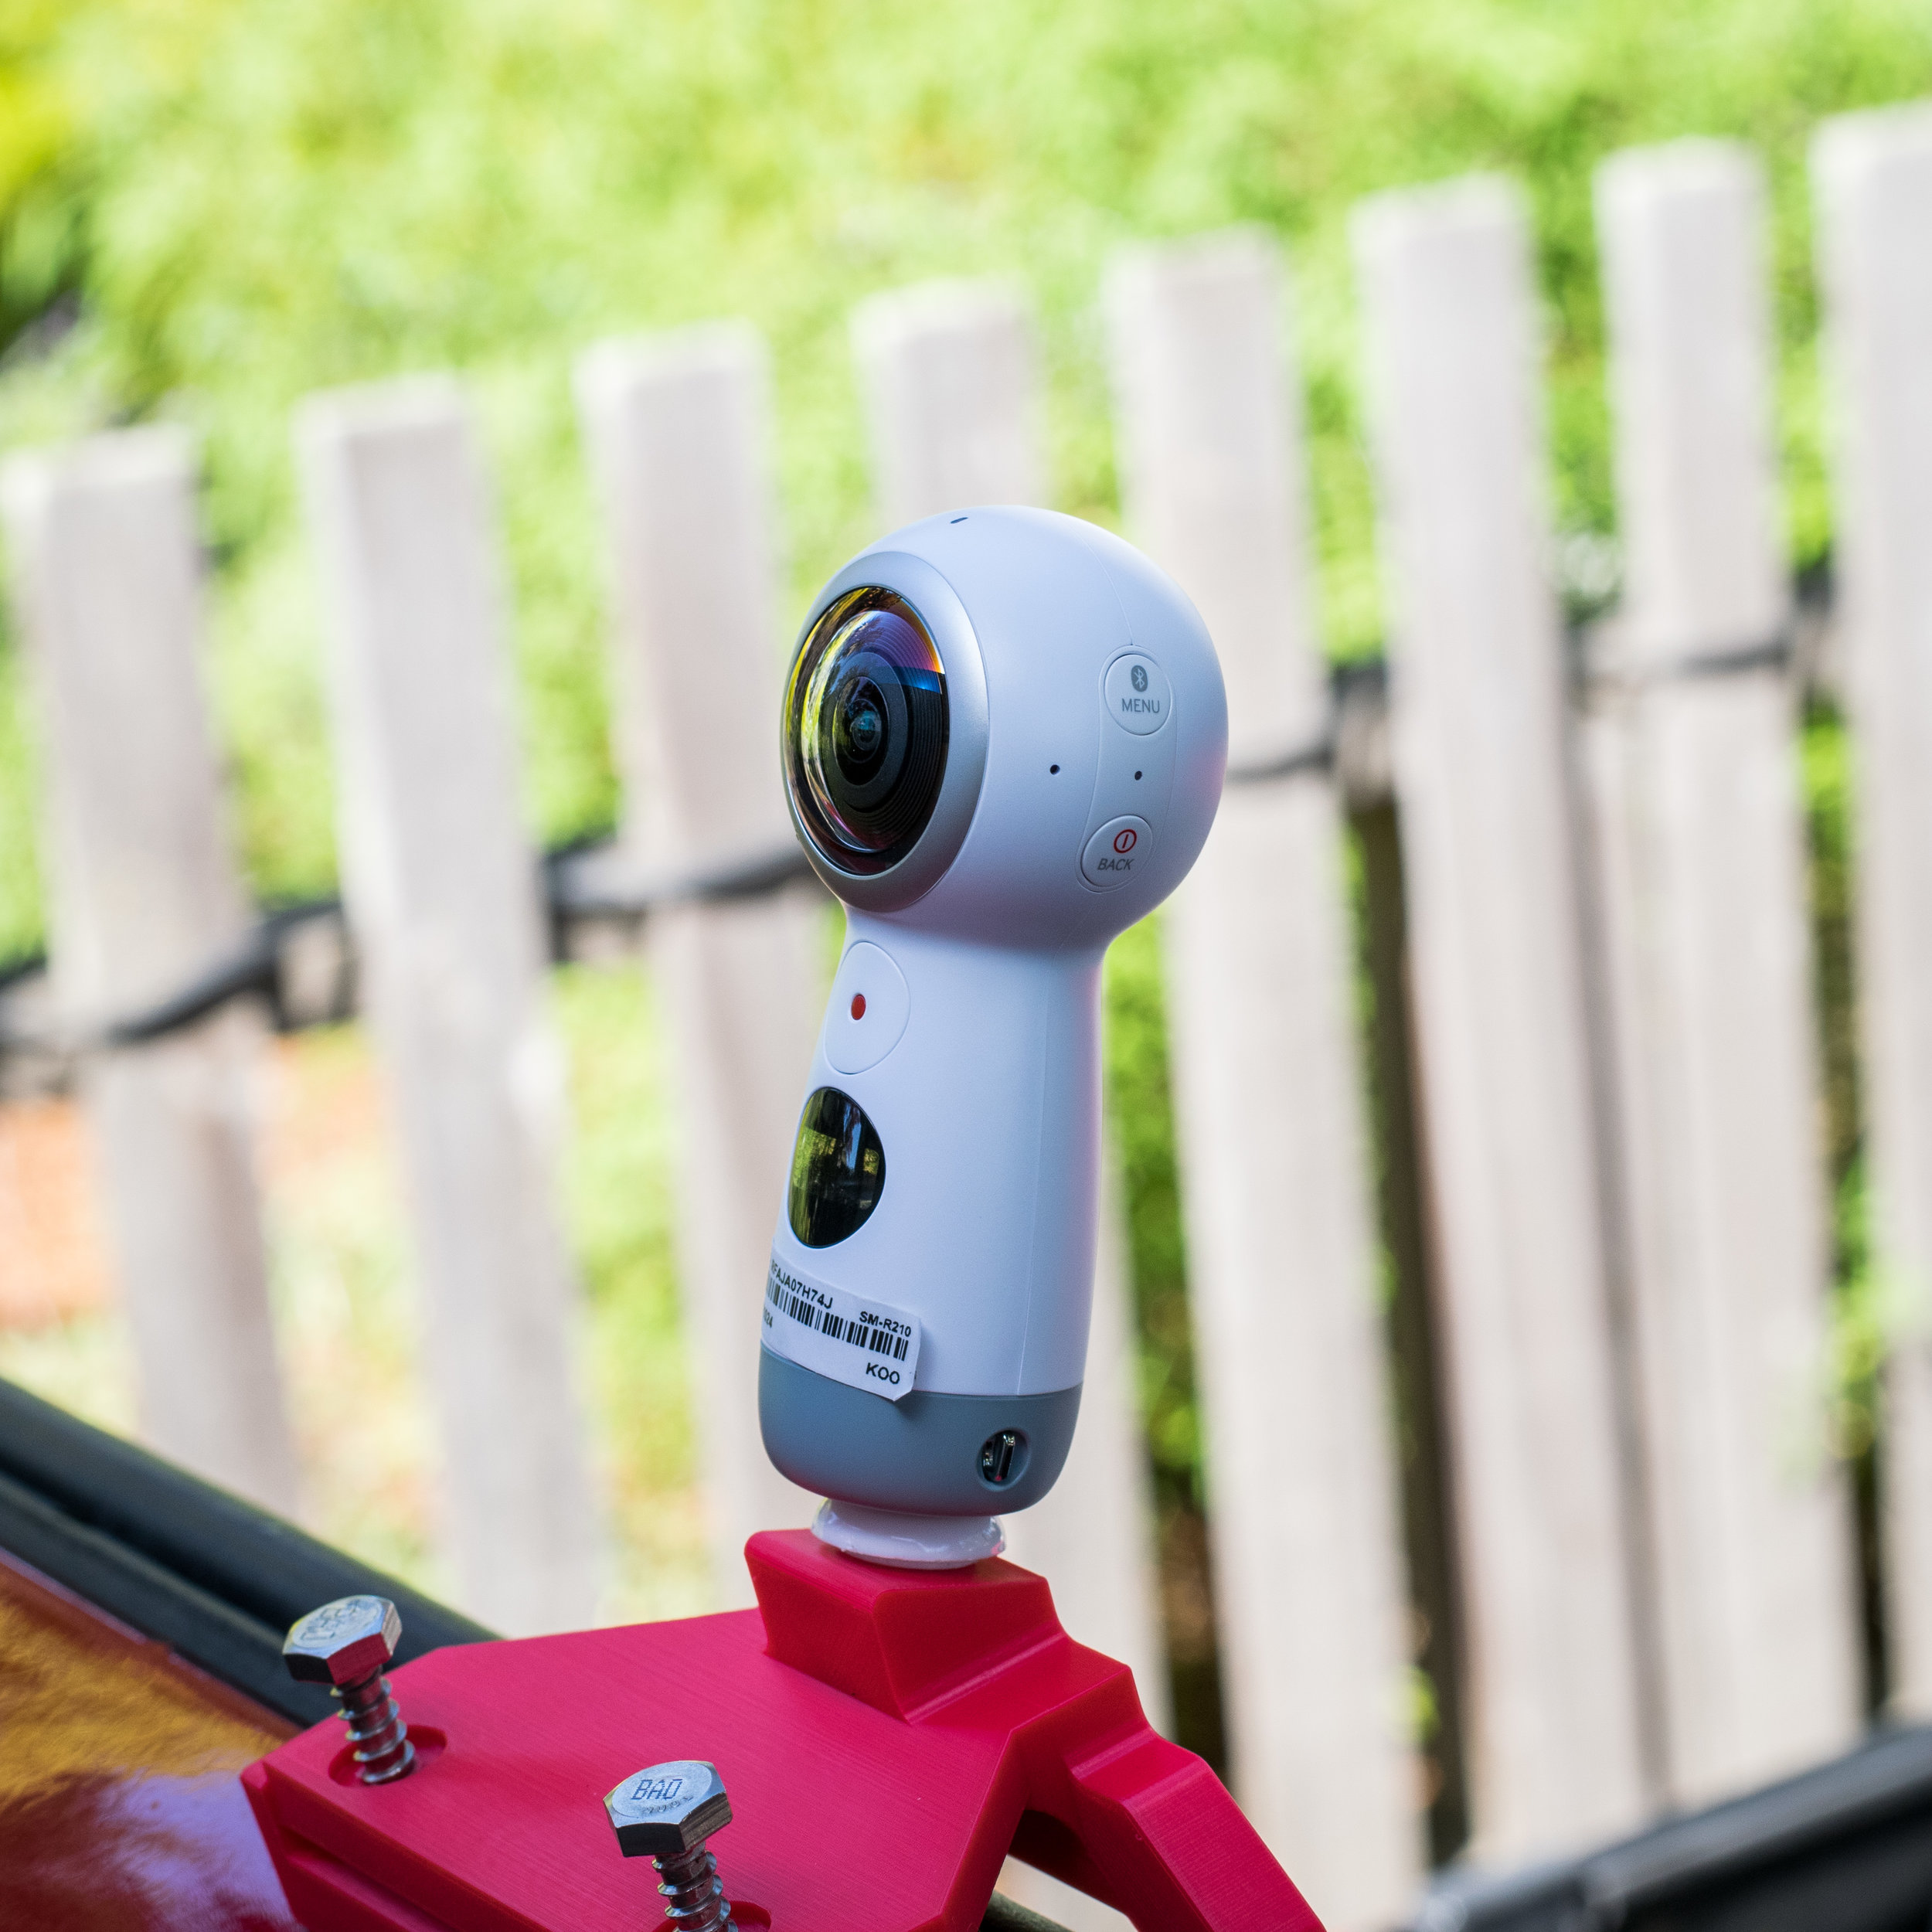
Inspiration: I was fortunate enough to obtain a 360 degree video camera and after brainstorming creative applications of its technology, decided to mount it to my car, creating an experience akin to Google street-view. Existing mounts on the market were either incompatible with my camera, or would partially or fully obscure its view, or my view of the road. I wanted to create something that would specifically fit my car (91 Miata) without hurting the paint or interior.
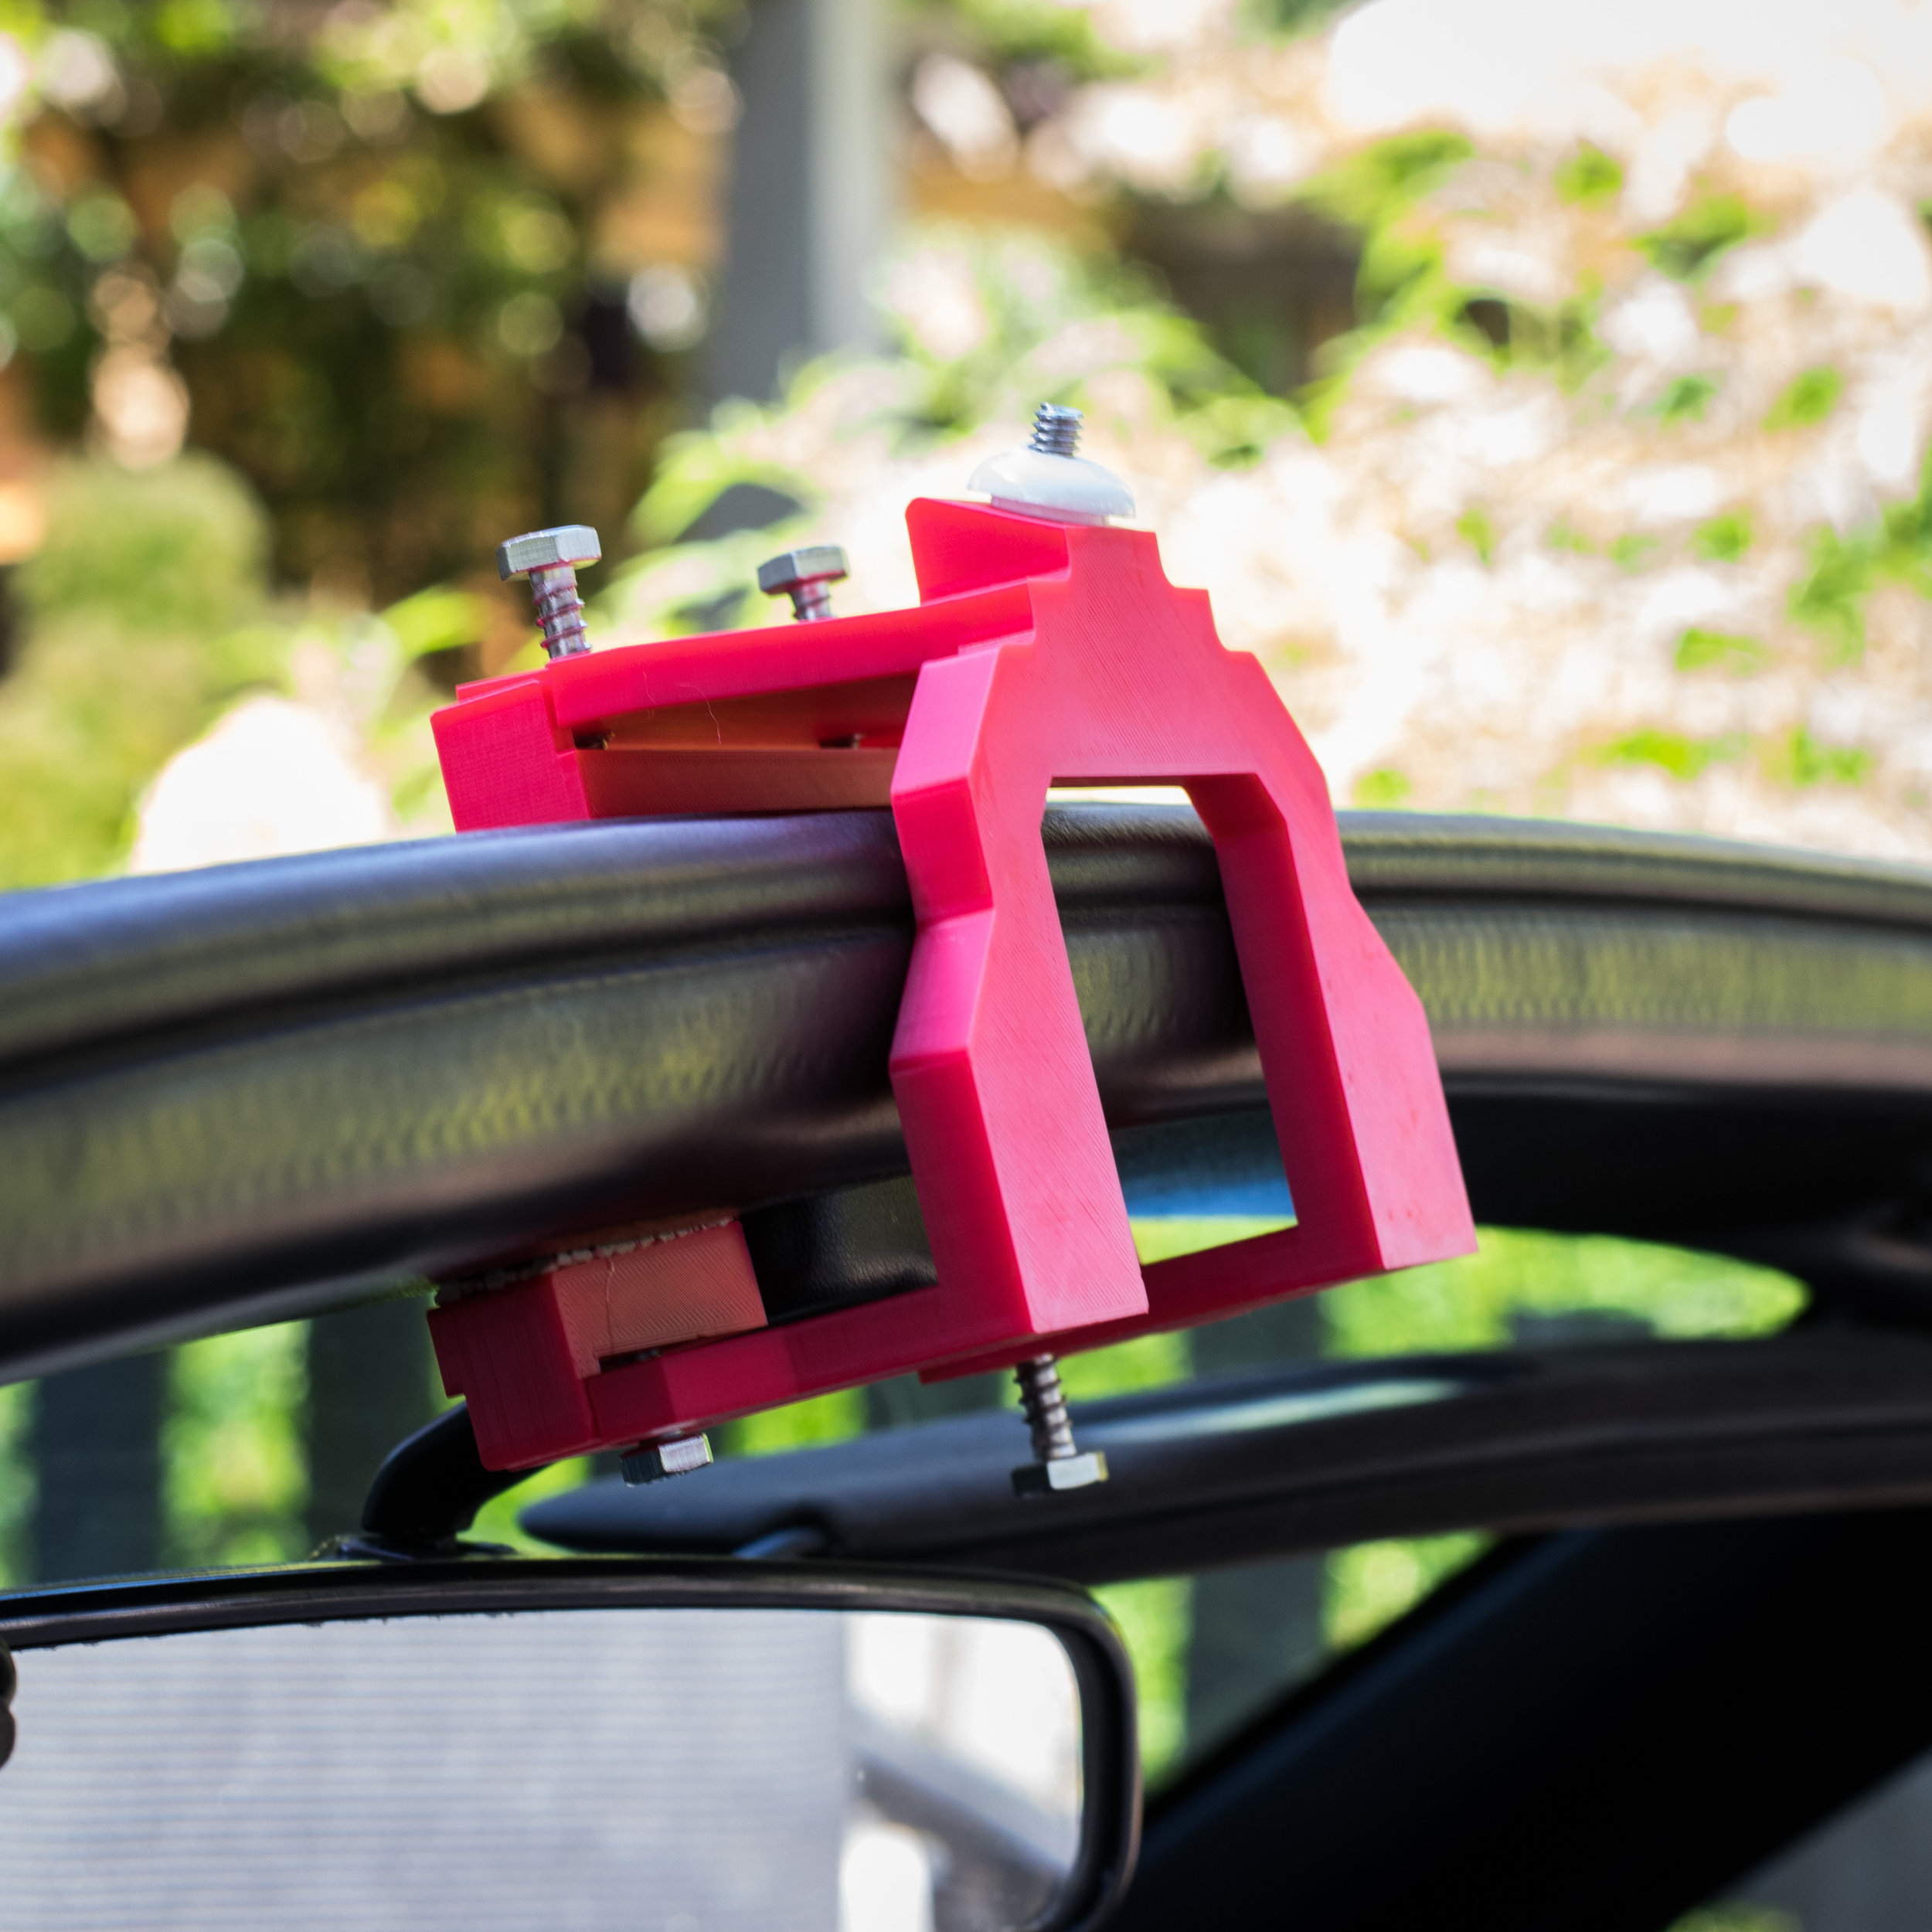
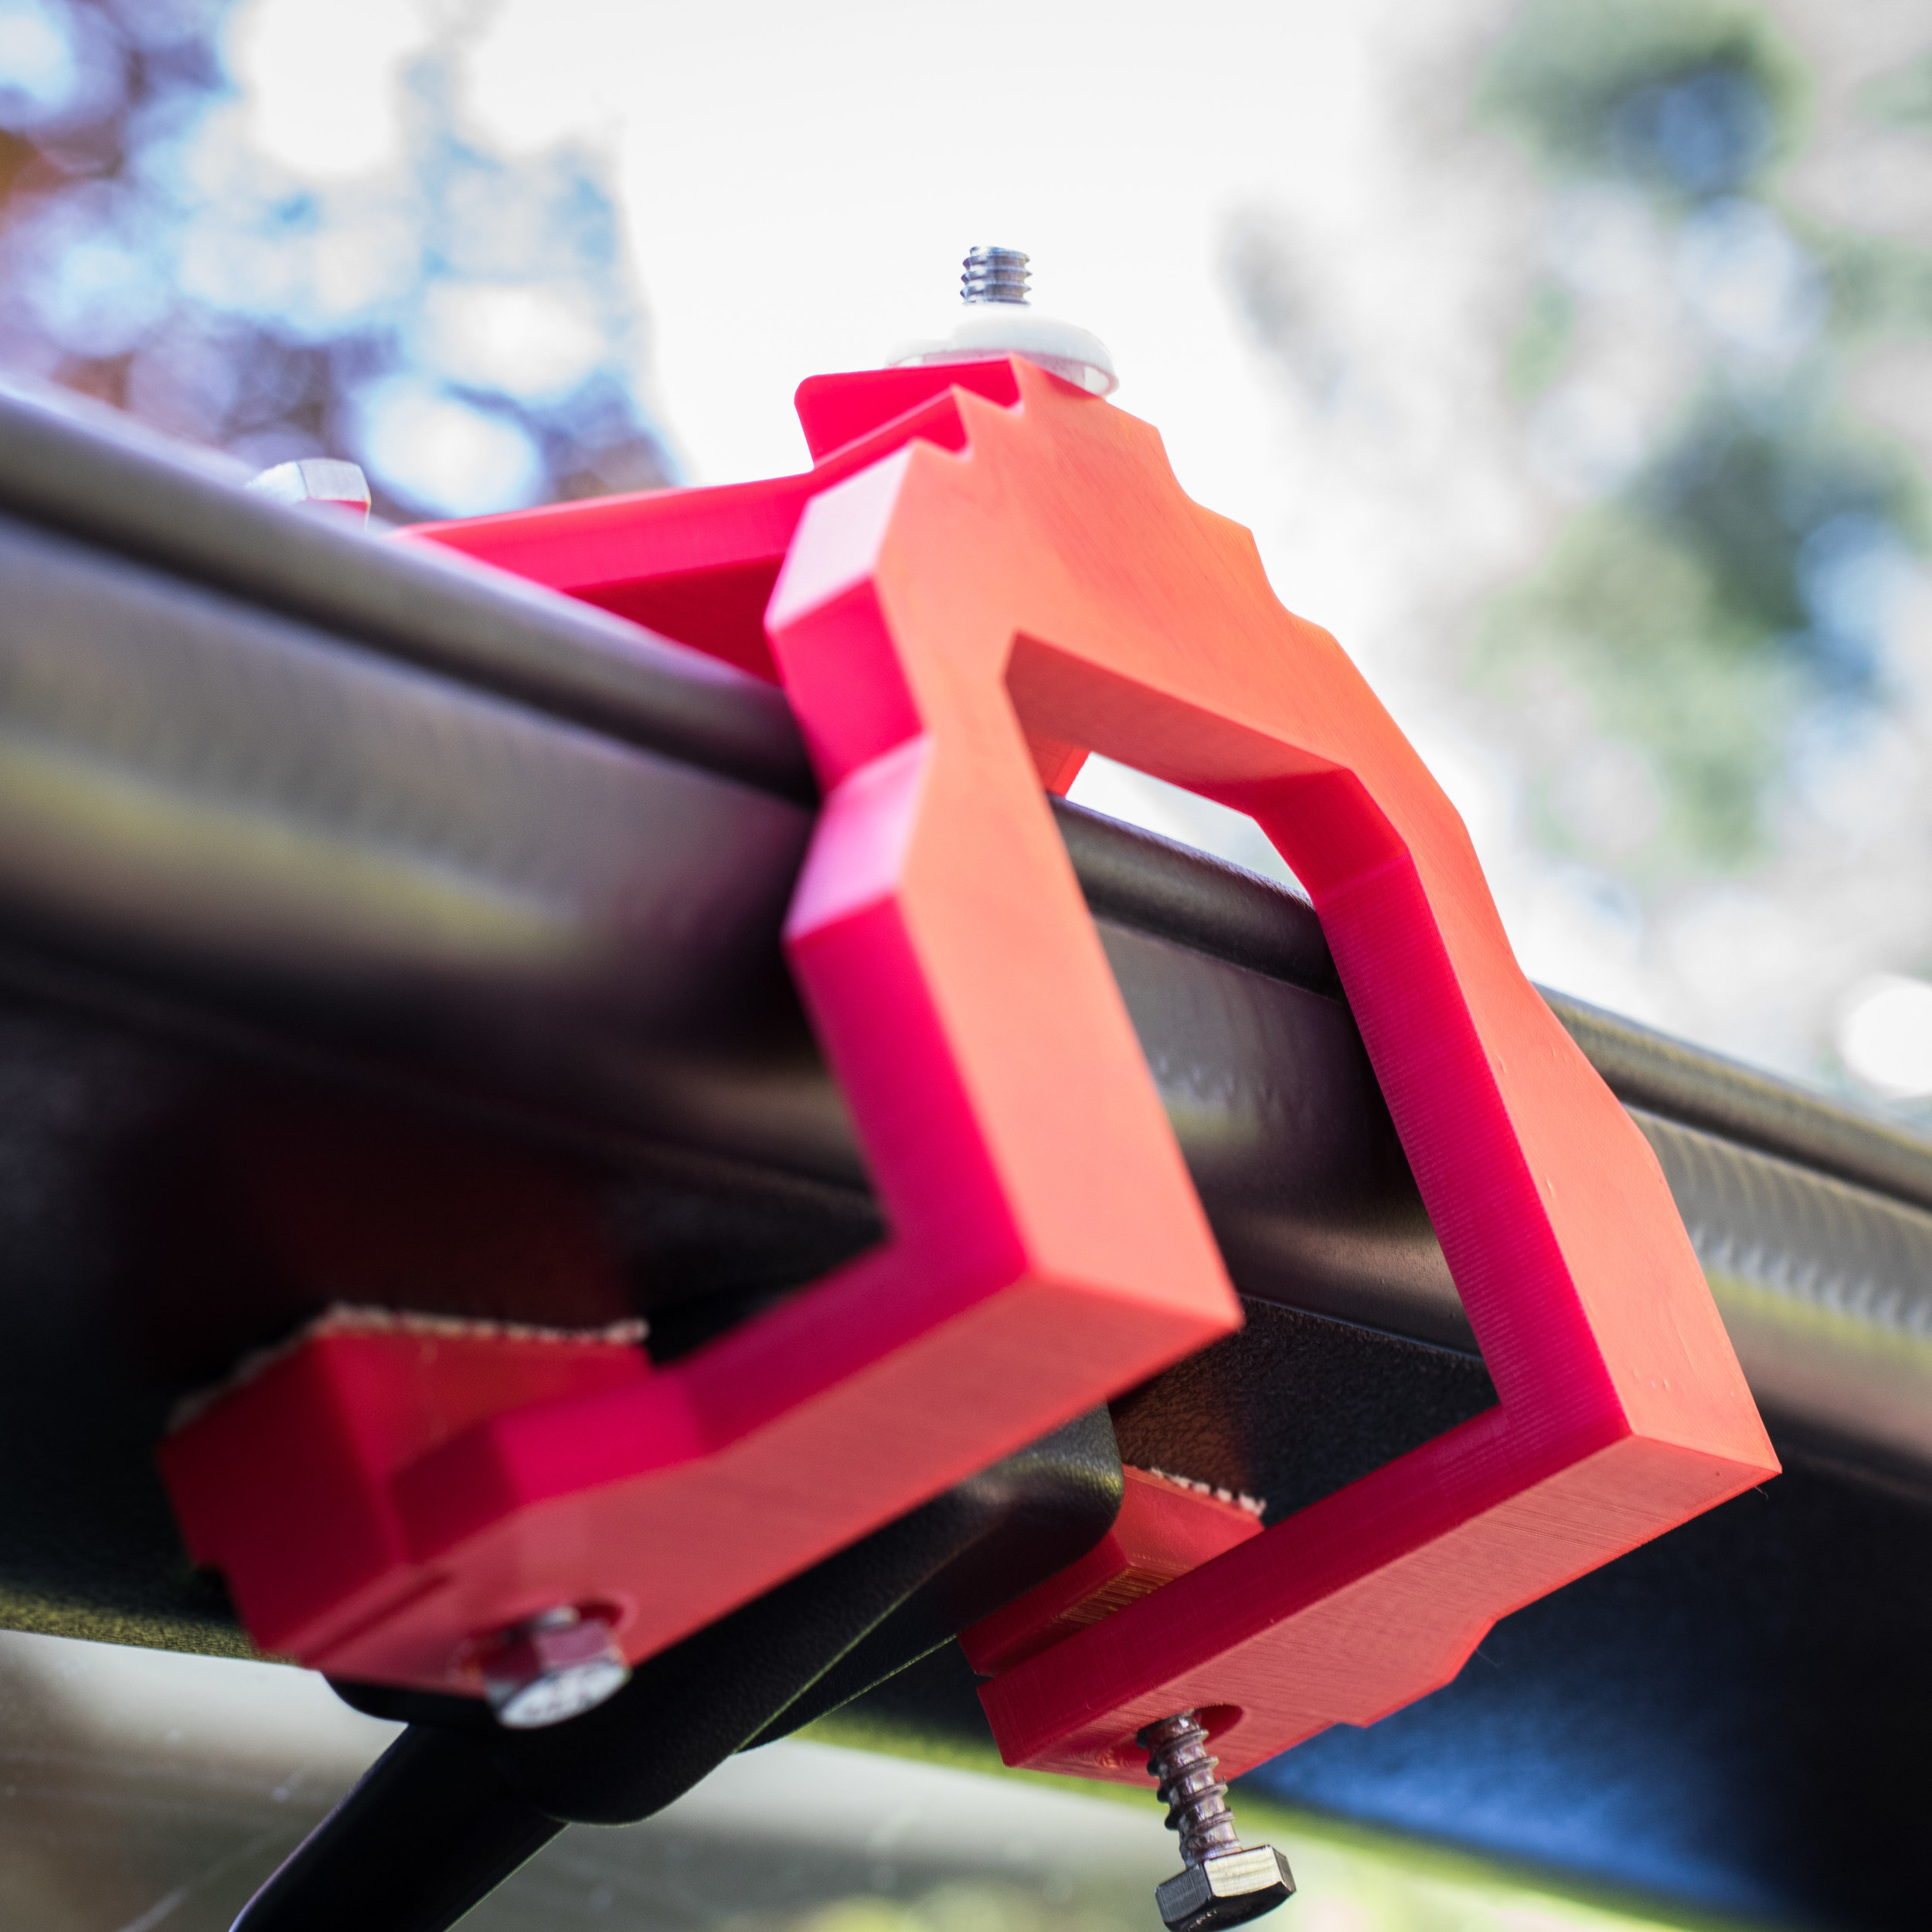
Use: Utilizing my 3d printer, I created a C-clamp style clasp that attaches to the top of the windshield. It has two feet on the bottom (split to avoid the rearview mirror) and one foot on top, all of which are tightened by lag-screws. Each foot uses cabinet liner, which prevents slippage and protects the car from becoming scratched by the clamping surfaces. I angled the camera mount and curved each foot to follow the windshield's natural profile.
Results: The finished mount is incredibly rigid and low profile, and can be attached or detached in a matter of seconds. In the future, I'd like to incorporate custom 3d printed knobs to make the whole installation tool-less. The camera experiences very little vibration and has a full view of the road, something that other 3rd party mounts would struggle with.
Cost: The lag screws were purchased from a big-box hardware store for under a dollar, and the 3d printed parts cost only a few more. In all, I was left with an extremely rigid and durable camera mount, specifically tailored to my use case, for under $4.